
user manual
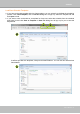

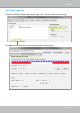
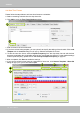
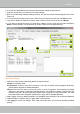
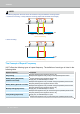
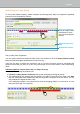
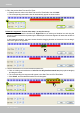
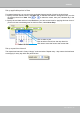
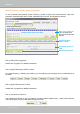
Table Of Contents
- Revision History
- Chapter One Hardware Installation and Initial Configuration
- Chapter Two NVR LiveClient Configuration
- VAST Server
- LiveClient Configuration
- Opening the LiveClient Interface and Logging in
- LiveClient User Interface
- Pan/Tilt/Zoom (PTZ) Control Panel
- Two Way Audio Control Panel
- How to Manage Devices (Cameras)
- Dual / Multiple Streams
- Fisheye Display Modes
- Refresh
- Streaming Server
- Get Public IP
- Camera Settings
- How to Change the VAST LiveClient Layout
- Switch Video Channels
- Configure Layout Mode
- Rotating Video Pages
- Edit Layout
- How to Manage Stations
- How to Manage User Accounts
- Add a New User Account
- How to Set up Association Management
- How to Set up Event Management
- How to Configure the Station General Settings
- How to Configure Station Network Settings
- How to Edit Recording Stoage
- Default Storage Group Settings
- Add New Storage Group(s)
- How to Edit Recording Schedules
- Add Schedules
- Rename Schedules
- Delete Schedules
- Load/Save Schedule Templates
- Add New Time Frames
- Recording Settings
- Repeat Frequency: Daily Setting
- Repeat Frequency: Weekly Setting (Day-based)
- Repeat Frequency: Monthly Setting (Day-based)
- Repeat Frequency: Yearly Setting (Day-based)
- How to Manually Begin /Stop Recording
- How to Edit Scheduled Backup Settings
- How to Configure Station Server Settings
- How to Use the Talk Panel
- How to Configure E-map Settings
- Quick Access Bar
- Status Panel
- Open Live View Dialog
- Send to Single View
- How to Configure Client Settings
- Taking a Snapshot
- Type 1: Record to EXE
- Type 2: Record to 3GP
- Type 3: Record to AVI
- Built-in Media Player--EXE
- Display Location
- Date and Time Format
- Video Display Mode
- Font Settings
- System Settings
- Event Settings
- Rotation Settings
- Display Settings
- Enable Joystick
- How to Use PiP (Picture-in-Picture)
- Global View
- ROI (Region of Interest)
- Digital Zoom In
- Snapshot Zoomed In Image
- PiP Settings
- How to Configure Video Enhancement
- Apply a Preset Defog Profile
- Create a New Defog Profile
- How to Search for a Device on the Hierarchical Device Tree
- How to Lock LiveClient for Security Concerns
- How to Log out from the VAST Server
- How to Exit VAST LiveClient
- Lauch Playback
- Second View
- Chapter Three NVR Playback Configuration
- Activating VAST Playback and Logging in to a Server
- VAST Playback User Interface
- How to Playback Recorded Video
- How to Change the Playback Layout
- Switch Video Channels
- Layout Mode
- How to Backup Recorded Video
- How to Search for a Video Clip Taken at a Specific Time
- How to Add a Bookmark
- How to Search for Events
- Event Category- All Events
- Event Category- All Motion Events
- Event Category- All IVA events
- Event Category- All DI Events
- Event Category- Named DI Events
- How to Search for a Bookmark
- How to Search Logs
- Search All Local Logs
- Search Login History
- Search Login Activities
- How to Configure Client Settings
- System Settings
- Display Settings
- How to Configure Video Enhancement
- How to Search for a Device on the Hierarchical Management Tree
- How to Lock VAST Playback for Security Concerns
- How to Log out from the VAST Server
- How to Exit VAST Playback
- Chapter Four Auxiliary Utilities
- Appendix Rebuilding a RAID Volume
- Appendix B ONVIF Support
VIVOTEK
User's Manual - 91
Load/Save Schedule Templates
g. If you have a schedule template with time frame settings, you can upload it to facilitate the scheduling
process. Click Load Template, and a Load File dialog box will pop up. Select the template le and
click Open to load.
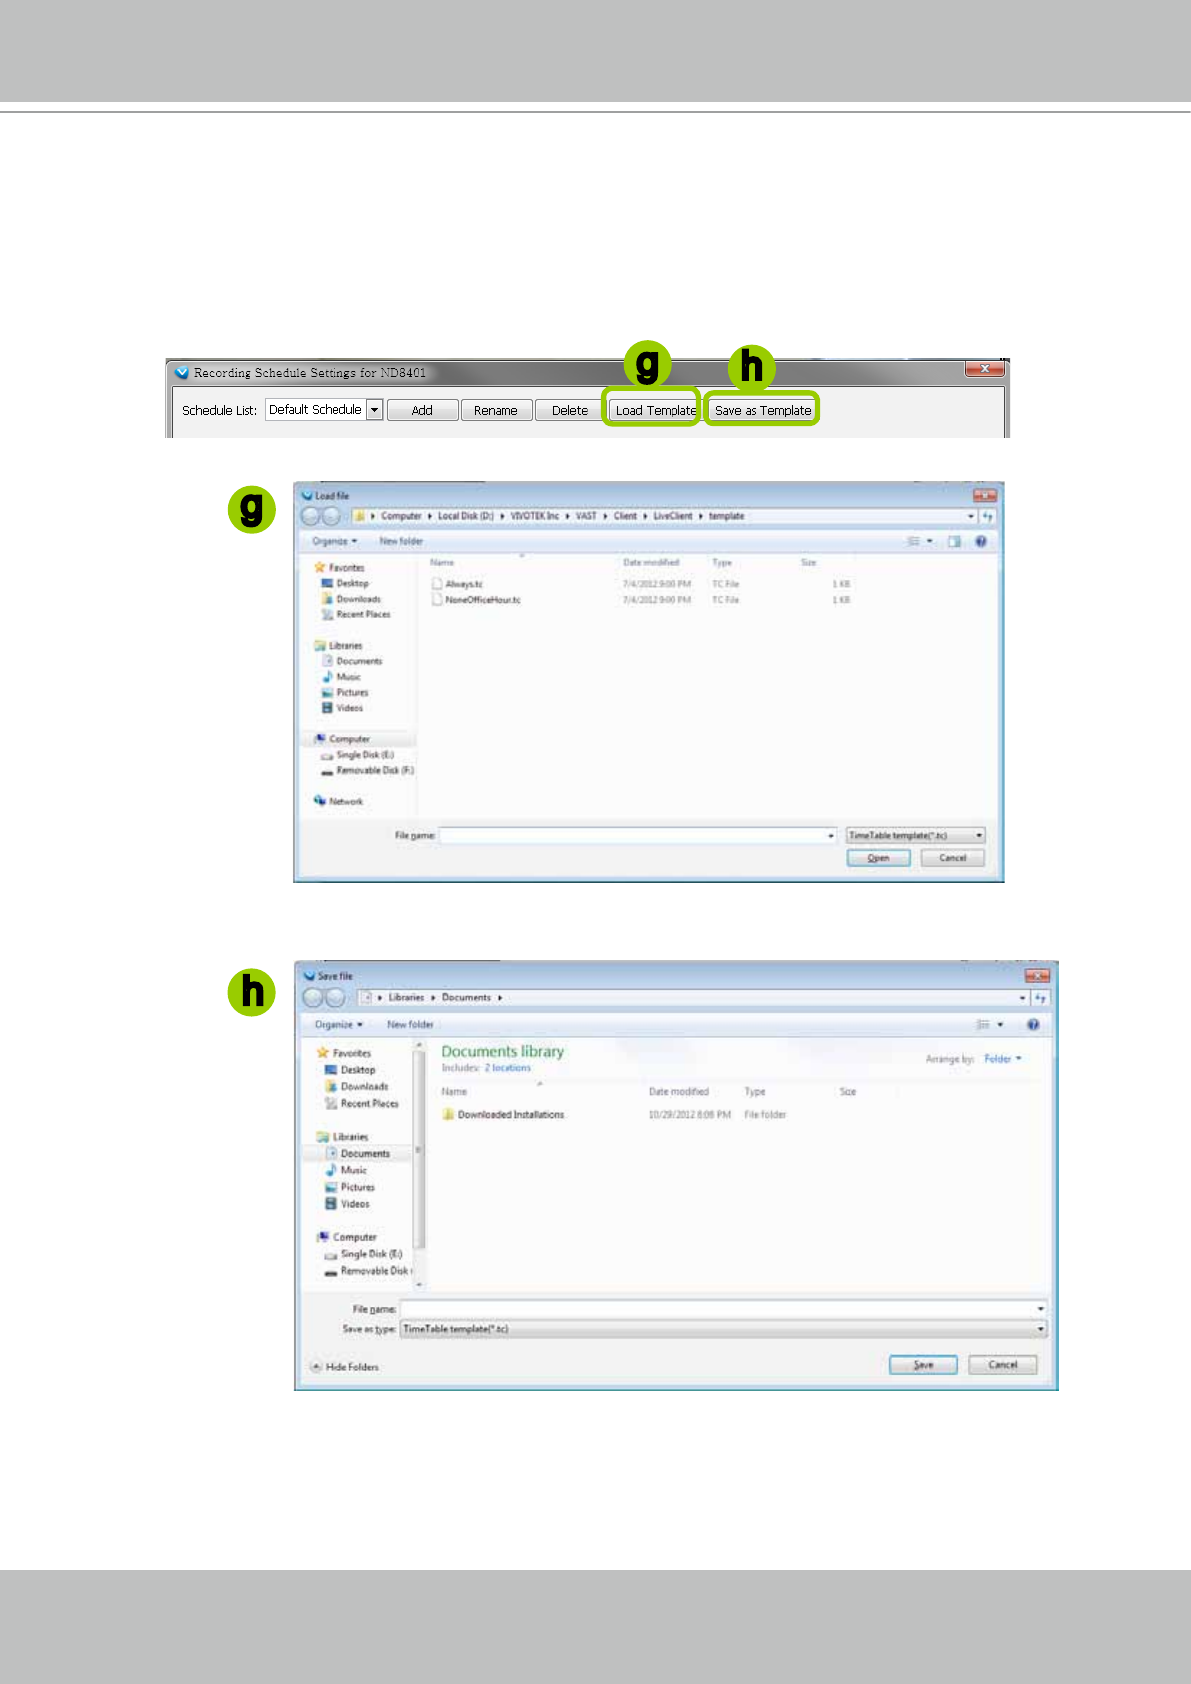
h. If you want to save a schedule as a template for future use, select the schedule from the schedule
drop-down list and click Save as Template. A Save File dialog box will pop up for you to save the
template le.
g
h
h
g
LiveClient provides two templates, Always and NoneOfceHour. You can load and edit the time
frame details.