
User Manual

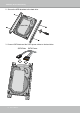


Table Of Contents
- Chapter One Hardware Installation and Initial Configuration
- Section One
- Management over a
- Local Console
- Chapter Two
- Introduction to the Local Console Interface
- Chapter Three
- Configuation Using the Local Console
- The Main Control Portal
- 3-2-1. Time Search
- 3-2-2. Alarm Search
- 3-2-3. POS Search
- 3-2-4. Storyboard
- 3-4-1. Settings - Overview
- 3-4-2. Settings - Camera - Management
- 3-4-3. Settings - Camera - Recording
- 3-4-4. Settings - Camera - Media
- 3-4-5. Settings - Camera - Image
- 3-4-6. Settings - Camera - Motion Detection
- 3-4-7. Settings - Camera - PTZ settings
- 3-4-8. Settings - Alarm - Alarm
- 3-4-9. Settings - Alarm - Email
- 3-4-10. Settings - System - Information
- 3-4-11. Settings - System - Maintenance
- 3-4-12. Settings - System - Display
- 3-4-13. Settings - System - UPS
- 3-4-14. Settings - System - Log
- 3-4-15. Settings - System - VIVOCloud service
- 3-4-16. Settings - User
- 3-4-17. Settings - Storage
- 3-4-18. Settings - Storage - Scheduled backup
- 3-4-19. Settings - Network
- Settings - Network - Connection mode
- Settings - Network - IP
- Settings - DDNS
- Settings - Service
- Section Two
- Management over a Web Console
- Chapter Four Login and Getting Started
- 4-1. Login
- 4-2. Graphical Layout and Screen Elements - Liveview
- 4-2-4. Logo & Menu
- 4-2-5. View Cell panel
- 4-2-6. PTZ panel
- Adding Cameras to View Cells
- 4-2-7. Alarm panel
- 4-3. Graphical Layout and Screen Elements - Search recording clips
- 4-3-4. View Cells in Search Recording Clips
- 4-3-6. Calendar Panel
- 4-3-5. Alarm Panel
- Search Recording Clips Control Panel
- Chapter Five System Settings
- Chapter Six Operation
- Technical Specifications
- Safety and Compatibility

VIVOTEK - Built with Reliability
User's Manual - 15
1. Connect to a monitor using an HDMI cable.
2. Connect CAT5e or better-quality Ethernet cable to the network.
3. Connect USB devices such as mouse, keyboard, or USB thumb drive (formatted in FAT for-
mat), or UPS.
4. Connect the power adaptor to the power mains and the system.
The NVR works with both wired and wireless cameras.
3
Camera 01
Camera 02
Camera 03
Camera 04
Camera 06
Camera 05
Camera 07
Camera 08
Camera 09
AC100~240V
50/60Hz, 1.5A
LAN/WAN
USB 2.0
Interface Connections
The ND8312 comes without the wireless connectivity.
Pressing the Reset button for longer than 10 seconds will restore the factory detaults.