
User Manual
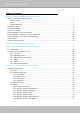


Table Of Contents
- Chapter One Hardware Installation and Initial Configuration
- Section One
- Management over a
- Local Console
- Chapter Two
- Introduction to the Local Console Interface
- Chapter Three
- Configuation Using the Local Console
- The Main Control Portal
- 3-2-1. Time Search
- 3-2-2. Alarm Search
- 3-2-3. POS Search
- 3-2-4. Storyboard
- 3-4-1. Settings - Overview
- 3-4-2. Settings - Camera - Management
- 3-4-3. Settings - Camera - Recording
- 3-4-4. Settings - Camera - Media
- 3-4-5. Settings - Camera - Image
- 3-4-6. Settings - Camera - Motion Detection
- 3-4-7. Settings - Camera - PTZ settings
- 3-4-8. Settings - Alarm - Alarm
- 3-4-9. Settings - Alarm - Email
- 3-4-10. Settings - System - Information
- 3-4-11. Settings - System - Maintenance
- 3-4-12. Settings - System - Display
- 3-4-13. Settings - System - UPS
- 3-4-14. Settings - System - Log
- 3-4-15. Settings - System - VIVOCloud service
- 3-4-16. Settings - User
- 3-4-17. Settings - Storage
- 3-4-18. Settings - Storage - Scheduled backup
- 3-4-19. Settings - Network
- Settings - Network - Connection mode
- Settings - Network - IP
- Settings - DDNS
- Settings - Service
- Section Two
- Management over a Web Console
- Chapter Four Login and Getting Started
- 4-1. Login
- 4-2. Graphical Layout and Screen Elements - Liveview
- 4-2-4. Logo & Menu
- 4-2-5. View Cell panel
- 4-2-6. PTZ panel
- Adding Cameras to View Cells
- 4-2-7. Alarm panel
- 4-3. Graphical Layout and Screen Elements - Search recording clips
- 4-3-4. View Cells in Search Recording Clips
- 4-3-6. Calendar Panel
- 4-3-5. Alarm Panel
- Search Recording Clips Control Panel
- Chapter Five System Settings
- Chapter Six Operation
- Technical Specifications
- Safety and Compatibility

VIVOTEK - Built with Reliability
User's Manual - 7
Chapter One Hardware Installation and
Initial Conguration
Introducing the Network Video Recorder
VIVOTEK ND8312 and ND8212W series is a compact Linux embedded 8-CH or 4-CH stand-
alone desktop NVR designed for any small-scale video surveillance installation. The series fea-
tures ease of installation, and facilitates “One Button Setup” with its plug & play and auto setup
functionality. With a wireless 2.4Ghz/5Ghz connectivity, wireless cameras can easily connect
and record to the ND8212W NVR.
The ND8312 is the wired version.
Supporting the HDMI local video output, users can control the GUI OSD interface via mouse &
keyboard, eliminating the need for a separate PC to search video or to playback from the NVR.
The new local display design - Auto Adaptive Stream will dynamically modify Stream 2 resolu-
tion of a camera to best fit the display resolution according to the layout type, resulting in an ef-
ficient display, while maintaining superb image quality.
Together with the VAST CMS software, users can set up an easy-to-use IP surveillance system
with ease. VIVOTEK also provides the mobile application, iViewer or VIVOCloud, for both iOS
and Android handheld devices, enabling users to monitor live video anytime, anywhere.
Special Features
● Runs on embedded Linux
● 1 x HDMI for local display up to 4K resolution
● 1 x HDD bay, for a max. capacity of 6TB
● 1 x Gigabit RJ45 uplink Ethernet port;
● 2 x USB Port (1 in Front / 1 in Back)
● Size: 198 mm (W) x 200 mm (D) x 47 mm (H)
● 8-CH (ND8312) or 4-CH (ND8212W) Live View & 4-CH Synchronous Playback [max. frame
rate: 3840x2160@30fps(1 CH), 1920x1080@120fpx (4 CH).
● H.264 / MJPEG
● PTZ and joystick support
● Snapshot / Export Media
● PiP Video Control
● Configuration Backup / Restore
● Compatible with VIVOTEK VAST Central Management Software*
● Integration with VIVOTEK Network Cameras
● VIVOTEK iViewer and VIVOCloud Support (iOS/Android)
* The VIVOTEK VAST Central Management Software is not included in the package.