Table of Contents Chapter 1 - Introduction ................................................................................................................................2 1.1 - Before Use ......................................................................................................................................... 2 1.2 - Specifications ..................................................................................................................................... 2 1.
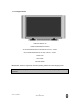
Chapter 1 - Introduction 1.1 - Before Use Congratulations on your VIZIO P42 42” Plasma Television purchase. Thank you for your support of V, Inc. and its Plasma Television product line. The P42 is a precise electronic product and you should read the following instructions carefully to maximize the performance of the product. It has passed the Class-B EMC test and the UL and CSA safety certifications and you can be assured of the highest quality display with the utmost reliability.
1.3 - Opening the Package • • • • • The VIZIO P42 is packaged in a carton together with other standard accessories. Any optional accessories are packed separately in another carton. The weight of the Plasma Display is approximately 85 lbs. Due to the size and weight of the product, it is recommended that it be handled by a minimum of 2 persons. The protective glass and the glass substrate are installed on the front of the product.
1.5 - Important Safety Guidelines This product is designed and manufactured to operate within defined design limits, and misuse may result in electric shock or fire. To prevent the product from being damaged, the following rules should be observed for the installation, use and maintenance of the product. Read the following safety instructions before operating the display. Keep these instructions in a safe place for future reference.
1.6 - Television Antenna Connection Protection External Television Antenna Grounding If an outside antenna or cable system is to be connected to the Plasma TV, make sure that the antenna or cable system is electrically grounded to provide some protection against voltage surges and static charges.
1.7 - Package Contents VIZIO P42 Plasma TV VIZIO Universal Remote Control 42 mm Stand-Off Screws for the Bottom of the TV – 2 QTY 55 mm Stand-Off Screws for the Top of the TV – 2 QTY Power Cord RCA Cable This User Guide IMPORTANT: Save the original box and all the packing material for future shipping needs. Note: Your product may also include various other accessories depending on region of purchase. Version - 2/21/2005 6 www.vizioce.
1.8 - Front Panel Controls Volume ◄/► - These buttons are used to increase or decrease the speaker volume. While the OSD is active, these buttons function as adjustment controls in the OSD menus. Channel d/c – These buttons are used to increase or decrease the selected channels. While the OSD is active, these buttons function as select controls in the OSD menus. Input - Repeated pressing of this button steps through the input sources in sequence.
1.9 - Rear Panel Connections 1 2 3 8 14 15 16 9 17 4 10 5 6 11 12 18 7 13 19 20 1. RF (TV Input) – Connect to the antenna, satellite or cable service 2. Component (YPbPr) Input - Connect the external video devices with component output, such as a DVD player or set-top box. 3. Audio In, Right and Left (R/L) – Connect the external audio from the component video source such as a DVD player or set-top box. 4.
1.10 - VIZIO Universal Remote Control The VIZIO Universal Remote Control is a comprehensive remote that can be used to control up to four different components. The remote control button functions are explained on the following pages. VIZIO Universal Remote Control Button Description 2 1 3 4 5 6 7 8 9 10 12 14 11 13 15 16 17 19 18 22 20 23 25 24 26 28 27 29 31 30 32 33 35 34 Version - 2/21/2005 36 9 www.vizioce.
1.10.1 - Key Remote Control Functions 1. 2. 3. 4. 5. 6. 7. 8. 9. 10. 11. 12. 13. 14. 15. 16. 17. 18. 19. SETUP - This button starts all programming sequences. Remote LED – Blinks when the remote is being programmed or is sending a signal to your Plasma Display. POWER - Press this key to turn the Plasma Display On from Standby mode. Press it again to return to the Standby mode. AUX – This button selects a programmed component.
20. 21. 22. 23. 24. 25. 26. 27. 28. 29. 30. 31. 32. 33. 34. 35. 36. Reverse/AV1 – This button rewinds the CD, DVD or VCR when the component is activated with the remote control. Additionally, this button will select the AV1 component in TV mode. Play/SVid1 – This button plays the CD, DVD or VCR when the component is activated with the remote control. Additionally, this button will select the SVid1 component in TV mode.
1.10.2 - Insertion of Batteries in the Remote Control Insert two AA batteries into the remote control. Make sure that you match the (+) and (-) symbols on the batteries with the (+) and (-) symbols inside the battery compartment. Re-attach the battery cover. Precautionary Tips for Inserting the Batteries: • Only use the specified AA batteries. • Do not mix new and old batteries. This may result in cracking or leakage that may pose a fire risk or lead to personal injury.
1.10.3 - Remote Control Range • Point the remote control at the remote control sensor to transmit the commands. • Do not place any obstacles between the remote control and the receiver window. • The effective range of the remote control is approximately 32 feet (10 meters) from the front of the receiver window, 30º to the left and right, 20º up and down. 1.10.4 - Precautions for the VIZIO Universal Remote Control • Remote control should be kept dry and away from heat sources. Avoid humidity.
Chapter 2 - Connecting Components 2.1 - Which Video Connection Should I Use? The VIZIO P42 Plasma TV has five different ways to connect your video equipment from a basic one to the most advanced for digital displays. Connection Quality Cable and Connector Description OK Coaxial RF. This is the only connection that has the audio and the video in one cable. If you have an antenna, this is the only way you can connect it to the Plasma TV.
2.2 - Connecting Your DVD Player You have several options for connecting your DVD player to your new P42 Plasma TV - DVI, Component, S-Video, and Composite inputs. Based on your home theater configuration, you can decide which option is the right one for you. 2.2.1 - Using Digital Video DVD players that have a digital interface compliant with the DVI (Digital Visual Interface) standard, such as the BRAVO D2 DVI Enabled DVD Player from V, Inc.
2.2.2 - Using Component Video Installation: 1. Turn off the power to the Plasma TV and DVD player. 2. Connect the Y (green color) connector on the rear of your DVD player to the corresponding Y (green color) connector in the Component Video/Audio In connections (green band) in the rear of your Plasma TV. 3.
2.2.3 - Using S-Video Installation: 1. Turn off the power to the Plasma TV and DVD player. 2. Connect the S-Video jack on the rear of your DVD player to the S-Video1 jack in the Video/Audio IN connections (yellow band) in the rear of your Plasma TV. 3. Connect the R (red color) and L (white color) audio connectors on the rear of your DVD player to the R (red color) and L (white color) audio input connectors in the Video/Audio IN connections (yellow band) in the rear of your Plasma TV. 4.
2.2.4 - Using Composite Video Installation: 1. Turn off the power to the Plasma TV and DVD player. 2. Connect the Video (yellow color) connector on the rear of your DVD player to the Video1 connector in the Video/Audio IN connections (yellow band) in the rear of your Plasma TV. 3.
2.3 - Connecting Your HDTV Set-Top Box You have several options for connecting your HDTV Set-Top Box to your new P42 Plasma TV: Component, DVI and RGB inputs. Based on your home theater configuration, you can decide which option is the right one for you. 2.3.1 - Using Digital Video HDTV Set-Top Boxes that have a digital interface compliant with the DVI (Digital Visual Interface) standard can be connected to the DVI input of the Plasma TV. Note: a) Use TMDS signals conforming to DVI standards.
2.3.2 - Using RGB Video Installation: 1. Turn off the power to the Plasma TV and HDTV Set-Top Box. 2. Connect a 15-pin D-Sub RGB cable to the RGB output of your HDTV Set-Top Box and the other end to the RGB IN input in the rear of your Plasma TV. 3. Connect the Audio Out on your HDTV Set-Top Box to the DVI HDTV/RGB PC Audio In on your Plasma TV. 4. Turn on the power to the Plasma TV and your HDTV Set-Top Box. 5. Select RGB using the INPUT button on the front of the Plasma TV.
2.5 - Connecting Coaxial (RF) There are several options for connecting your antenna or cable to your new P42 Plasma TV directly to the TV or through your VCR. Based on your home theater configuration, you can decide which option is the right one for you. 2.5.1 - Using Your Antenna or Cable TV Installation: 1. Turn off the power to the Plasma TV. 2. Connect the coaxial (RF) connector from your antenna or cable box to the RF connector on the rear of your Plasma TV. 3. Turn on the power to the Plasma TV 4.
2.6 - Connecting External Amplified Speakers Installation: 1. Turn off the power to the Plasma TV and external speakers. 2. Connect the R (red color) and L (white color) audio connectors on the rear of your speakers to the R (red color) and L (white color) audio output connectors in the AUDIO OUT connections in the rear of your Plasma TV. 3. Connect the subwoofer connector on the rear of your speaker to the SUBWOOFER connection in the rear of your Plasma TV. 4.
2.7 - Connecting an External Receiver or Amplifier You can connect an external receiver or amplifier to your Plasma TV. Your Plasma TV is equipped with an external speaker switch that can automatically send a remote turn-on/off signal to the connected external receiver or amplifier. Installation: 1. Turn off the power to the Plasma TV and receiver or amplifier. 2.
2.8 - Connecting a Computer Installation: 1. Turn off the power to the Plasma TV and Computer. 2. Connect a 15-pin D-sub RGB cable to the RGB output of your computer and the other end to the RGB input in the rear of your Plasma TV. 3. Connect the Audio Out on your computer to the DVI HDTV/RBG PC Audio In at the rear of your Plasma TV. 4. Turn on the power to the Plasma TV and your computer. 5. Select RGB using the INPUT button on the front of the Plasma TV.
Chapter 3 - Getting Started 3.1 - Turning your Plasma TV On and Off 1. Plug the power cord into an AC wall socket. 2. Press the AC switch button on the back of the Plasma TV. The POWER indicator on the front panel will light orange. 3. Press the POWER button on the front panel or the POWER button on the remote control to power on the Plasma TV. The POWER indicator on the front panel will light green. 4. Select input source for the Plasma TV, via either OSD menu or remote control. 5.
3.3 - Adjusting Basic Plasma TV Settings Volume To increase the volume, press and hold the VOL + button on the front panel or remote control until the desired level is reached. To decrease the volume, press and hold the - VOL button on the front panel or remote control until the desired level is reached. TV Channels To step up through the available TV channels, press the CH + button on the front panel or remote control once for the next channel or hold it depressed until the desired channel is reached.
3.4 - Using the On-Screen Display (OSD) The remote control or the bottom control keys on the front panel of the Plasma TV can control all the function settings. The on-screen display (OSD) allows you to adjust and save contrast, brightness and other settings. The Plasma TV will save changes made to the settings even if the Plasma TV is turned off. 3.4.
3.4.2 - OSD Menus and Options The OSD menus and options are used to adjust various settings on your Plasma TV. 3.4.2.1 - PICTURE Brightness – Adjusts the brightness of the picture. Users may need to readjust the brightness after the Plasma TV warms up. Contrast – Adjusts the contrast of the picture. Color – Adjusts the color saturation making colors more intense. Note: this option is not selectable when TV is in PC mode. Tint – Adjusts the color of flesh tones.
3.4.2.3 - SOURCE Main Screen – Selects main screen sources. TV1, TV2, AV1, AV2, SV1, SV2, YPbPr, YCbCr, RGB, DVI Sub Screen – Selects Sub Screen sources. Off, TV, AV1, AV2, SV1, SV2, YPbPr, YCbCr, RGB, DVI Audio From – Select Main or Sub Screen audio sources. Display Mode – Select Full, PIP or POP. Wide Mode – Changes the Sub Screen size. Choose between aspect, wide 1:1. Note: This is not available when POP is selected.
3.4.2.5 - TV Input – Select TV source type from one of the following: ANT, Cable, HRC and IRC. Caption Mode – Turn the close caption OFF or CC1, CC2, CC3, CC4, TT1, TT2, TT3, TT4. Auto Scan – Auto scan on TV channels. Add/Del Channels – Manually add and delete selected channels. Parental Controls – Adjust parental control settings. Password Edit – Change user password. TV Rating – Choose either B (Block) or U (Unblock).
3.4.2.6 - CLOCK Date – Display present date in MM/DD/YY format. Time – Display present time. Timer1 – Set the time and duration to automatically turn on. Timer2 – Set the time and duration to automatically turn on. Sleep Timer – Sets sleep timer either on or off. Users can select the number of minutes the Plasma TV waits before it automatically turns off in 5-minute increments. Maximum available time is 120 minutes. 3.4.2.7 - SETUP OSD H Posi.
3.4.3 - Using the Parental Controls The Parental Controls feature prevents viewers from watching programs that are not ageappropriate, such as programs containing violence or adult language. 1. Press the TV component button. 2. Press the MENU button on the remote control and the Main Menu will be displayed on the screen. 3. Press f until the TV menu is highlighted. Then press SELECT. 4. Press d until Parental Controls is highlighted. Press SELECT. 5. Enter your password.
3.4.4 - Setting a Password You control access to the Parental Control features with a password. The default password is “0000”. You can change the password to any four-digit number. To change the password: 1. Press the TV component button. 2. Press the MENU button on the remote control and the Main Menu will be displayed on the screen, as shown opposite. 3. Press f until the TV menu is highlighted. Then press SELECT. 4. Press d until the Password Edit is highlighted. 5.
3.5 - Remote Control Operation 3.5.1 - Programming the VIZIO Universal Remote Control You can program the remote control to work with up to four different components. Listed below are the steps for programming your TV, VCR, Cable Box and DVD Player. 3.5.1.1 - Programming for TV 1. Manually turn on the TV. 2. Press the TV button on the remote control. 3. Press and hold the SETUP button until the LED LIGHT flashes twice. 4.
3.5.1.3 - Programming for Cable Box 1. Manually turn on the Cable Box. 2. Press the CBL button on the remote control. 3. Press and hold the SETUP button until the LED LIGHT flashes twice. 4. Find the programming code for your Cable Box in the code list in the back of this book and enter it using the Number Buttons. If the code is accepted, the LED flashes twice after the last digit is entered.
3.5.2 - Searching for Component Codes If the user cannot find the manufacturer in the component list or the program code does not work, the user can use the remote control to search for the correct component code. To search for a component code: 1. Turn on the component. 2. Press the matching component button on the remote control. 3. Press and hold the SETUP button until the LED flashes twice. 4. Press 9 9 1. The LED flashes twice. 5.
Chapter 4 - Maintenance and Troubleshooting 4.1 - Maintenance Important 1. Make sure that the power cable is removed from the socket before cleaning the display. 2. Do not use volatile solvent (such as toluene, rosin and alcohol) to clean the display. Such chemicals may damage the housing, screen glass and remote control, and cause the paint to peel. Cleaning the Housing and the Remote Control 1. Use a soft cotton cloth for cleaning. 2.
Image color or quality deteriorates. Screen position and size are incorrect. Image or color is incorrect. The external speaker has no sound. The power indicator flashes. There is audio, but there is not any video signal. Power indicator is green, but there is not any video or audio. Check that all the video settings are adjusted appropriately, such as brightness, contrast, color, etc. For more information about video settings, refer to OSD Functions in Chapter 3.
4.4 - Compliance Caution: Always use a power cable that is properly grounded. Please use the AC cords listed below for each area. USA Canada Germany Britain Japan UL CSA VDE BASE/BS Electric Appliance Control Act 4.5 - FCC Class B Radio Frequency Interference Statement NOTE: This equipment has been tested and found to comply with the limits for a Class B digital device, pursuant to Part 15 of the FCC Rules.
Appendix A: Limited Product Warranty Please read this warranty information carefully, it is a "ONE-YEAR LIMITED WARRANTY" on parts and labor. VIZIO’s Responsibility VIZIO Displays purchased in the United States are warranted to be free from defects in materials or workmanship for a period of one (1) year from the date of their original retail purchase. If the unit fails to conform to this warranty, we will service the monitor using new or refurbished parts.
Appendix B: Component Program Codes SETUP CODES FOR CURRENT VIZIO PRODUCTS *Note: Please use these codes to program the VIZIO products to existing Universal remote controls for products such as cable and satellite boxes.
SETUP CODES FOR LASER DISK Denon Mitsubishi NAD Optimus Pioneer Sony 0059 0059 0059 0059 0059 0193, 0201 SETUP CODES FOR MISC.
SETUP CODES FOR TELEVISION AOC Admiral Aiko Akai Alaron America Action Ampro Anam Audiovox Baysonic Belcor Bell & Howell Bradford Brockwood Broksonic CXC Candle Carnivale Carver Celebrity Cineral Citizen Concerto Contec Craig Crosley Crown Curtis Mathes Daewoo Daytron Denon Dumont Dwin Electroband Emerson Envision Fisher Fujitsu Funai Futuretech GE0 Gibralter Gold Star Gradiente Grunpy Hallmark Harley Davidson Harman/Kardon Harvard Hitachi Infinity Inteq JBL JCB JVC KEC KTV Kenwood LG0 LXI Logik Luxman MGA
SETUP CODES FOR VCR Admiral Adventura Aiko Aiwa Akai America Action American High Asha Audiovox Beaumark Bell & Howell Broksonic CCE Calix Canon Carver Cineral Citizen Colt Craig Curtis Mathes Cybernex Daewoo Denon Dynatech Electrohome Electrophonic Emerex Emerson Fisher Fuji Funai GE Garrard GoVideo GoldStar Gradiente HI-Q Harley Davidson Harman/Kardon Harwood Headquarter Hitachi Hughes Network Systems JVC Jensen KEC KLH Kenwood Kodak LXI Lloyd's Logik MEI MGA MGN Technology MTC Magnasonic Magnavox Magnin