VIZIO E190MV/E220MV User Manual Dear VIZIO Customer, Congratulations on your new VIZIO E190MV or E220MV television purchase. To get the most out of your new VIZIO HDTV, read these instructions before making any adjustments, and retain them for future reference. We hope you will experience many years of enjoyment from your new VIZIO HDTV High Definition Television. For assistance, call 877-MYVIZIO (877-698-4946) or e-mail us at www.VIZIO.com.
VIZIO E190MV/E220MV User Manual Important Safety Instructions Your HDTV is designed and manufactured to operate within defined design limits. Misuse may result in electric shock or fire. To prevent your HDTV from being damaged, the following instructions should be observed for the installation, use, and maintenance of your HDTV. Read the following safety instructions before operating your HDTV. Keep these instructions in a safe place for future reference.
VIZIO E190MV/E220MV User Manual the literature accompanying your HDTV. Do not overload power strips and extension cords. Overloading can result in fire or electric shock. The wall socket should be installed near your HDTV and easily accessible. Only power of the marked voltage can be used for your HDTV. Any other voltage than the specified voltage may cause fire or electric shock Do not touch the power cord during lightning.
VIZIO E190MV/E220MV User Manual Television Antenna Connection Protection External Television Antenna Grounding If an outside antenna/satellite dish or cable system is to be connected to the TV, make sure that the antenna or cable system is electrically grounded to provide some protection against voltage surges and static charges.
VIZIO E190MV/E220MV User Manual Table of Contents Important Safety Instructions ........................................................................................................................ 2 Television Antenna Connection Protection ................................................................................................... 4 Advisory of the DTV Transition .....................................................................................................................
VIZIO E190MV/E220MV User Manual Wide ............................................................................................................................................................ 28 CC (Closed Caption) ................................................................................................................................... 29 Sleep Timer Menu.......................................................................................................................................
VIZIO E190MV/E220MV User Manual Opening the Package Your HDTV and its accompanying accessories are carefully packed in a cardboard carton that has been designed to protect it from transportation damage. After you have opened the carton, make sure that your HDTV is in good condition and that all of the contents are included. The screen can be easily scratched or broken, so handle your HDTV gently and never place your HDTV with the screen facing downwards on a surface without protective padding.
VIZIO E190MV/E220MV User Manual Chapter 1 Setting Up Your HDTV Read this user manual carefully before installing your HDTV. The power consumption of your HDTV is about 37W (E190MV); 41W (E220MV) average. Use the included power adapter. When an extension cord is required, use one with the correct power rating. The AC/DC power adapter must be grounded and the grounding feature must not be compromised. Install your HDTV on a flat surface to avoid tipping.
VIZIO E190MV/E220MV User Manual Wall Mounting Your HDTV Your HDTV can be mounted on the wall for viewing. If you choose to mount your HDTV on the wall, follow the instructions below. 1. Write down the serial number located on the back of your HDTV in the space provided on page 1 to have it handy if you need to call for support. 2. Remove the stand base and neck: a. Disconnect the cables from your HDTV. b. Place your HDTV face down on a soft, flat surface to prevent damage to the screen. c.
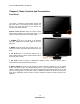
VIZIO E190MV/E220MV User Manual Chapter 2 Basic Controls and Connections Front Panel Your HDTV TV features touch-sensitive buttons that light when active. The proximity sensor detects you, and as your hand gets closer to the surface, the intensity of the LEDs increase. Remote Control Sensor—Point the remote control directly at this window on the lower right corner of your HDTV for the best response to the remote signal. )—Turn your HDTV on by pressing 1. POWER ( the button once.
VIZIO E190MV/E220MV User Manual Rear Panel Connections 1. DC IN—Connect the included AC/DC power supply here. Connect the other end to a wall outlet. 2. Kensington Security Slot—Insert a Kensington lock and attach your HDTV to a permanent object to prevent theft. 3. HDMI 1—Connect digital video devices such as a DVD player or Set-Top Box through these all digital connectors. 4.
VIZIO E190MV/E220MV User Manual Chapter 3 VIZIO Remote Control Installing the Batteries 1. Remove the battery cover. 2. Insert two AAA batteries into the remote control. Make sure that you match the (+) and (-) symbols on the batteries with the (+) and (-) symbols inside the battery compartment. 3. Replace the battery cover. Precautionary Tips for Inserting the Batteries: Only use Alkaline AAA batteries. Do not mix new and old batteries.
VIZIO E190MV/E220MV User Manual Remote Control Buttons INFO—Press to display program information. POWER ( )—Press to turn the TV on from the Standby mode. Press it again to return to the Standby mode. TV—Press to select the TV input. AV—Press to select the AV (either Composite or S-Video) input. COMP—Press to select the Component input. HDMI—Press to select the HDMI input. Press repeatedly to cycle between both HDMI inputs.
VIZIO E190MV/E220MV User Manual Chapter 4 Getting Started Your HDTV has a built-in setup App that runs when you turn on your TV for the first time. Follow the on-screen directions to easily setup your new HDTV. 1. Insert the batteries into the remote control. 2. Connect the AC/DC power adapter to the power connector on the back of your HDTV, and then plug into a wall outlet. 3. Connect your devices to your HDTV (see Chapter 2 for detailed steps). 4. Turn on your TV.
VIZIO E190MV/E220MV User Manual Chapter 5 Using your HDTV for the first time Select Input Source Select the input source for your HDTV by pressing the INPUT button on the remote control or the front of your TV. Pressing this button will cycle you through the following options: TV, AV, Comp, HDMI-1, HDMI-2, VGA, and Photos. Turn on your device and you will see a picture on your HDTV. If there is no picture, make sure you have selected the correct input on your HDTV.
VIZIO E190MV/E220MV User Manual Viewing Digital TV Program Information INFO Button When the channel is changed or when you press the INFO button, an information header is shown over the picture for a few seconds. Each press of the INFO button will display more information about the program: 16 www.VIZIO.
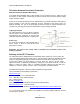
VIZIO E190MV/E220MV User Manual Chapter 6 Connecting Equipment Which Video Connection Should I Use ? You have six options for connecting your video equipment box to your HDTV from a basic connection to the most advanced for digital displays. Based on your Home Theater configuration, you can decide which option is the right one for you. Connection Quality (type) Connector Description Best (digital) HDMI delivers the best image quality of any of the cable types available and it’s all done over one cable.
VIZIO E190MV/E220MV User Manual Connecting Your Cable or Satellite Box Using HDMI (Best) Cable and Satellite Boxes that have a HDMI digital interface should be connected using HDMI for optimal results. To maintain image quality, use a VIZIO certified HDMI cable. This cable is available in 6, 15, and 30 foot lengths. See www.VIZIO.com or call 877-MYVIZIO (877-698-4946) for details. 1. Turn off your HDTV and Cable/Satellite Box. 2.
VIZIO E190MV/E220MV User Manual Using Component Video (Better) 1. 2. 3. 4. 5. Turn off your HDTV and Cable/Satellite Box. Connect the component cables (green, blue, and red) from your Cable/Satellite Box to the COMPONENT jacks on your HDTV. Connect the audio cables (white and red) from your Cable/Satellite Box to the COMPONENT L and R Audio jacks on your HDTV. Turn on your HDTV and Cable/Satellite Box.
VIZIO E190MV/E220MV User Manual Using Composite Video (Compatible) 1. Turn off your HDTV and Cable/Satellite Box. 2. Connect the video cable (yellow) from your Cable/Satellite Box to the AV jack (yellow) on your HDTV. 3. Connect the audio cables (white and red) from your Cable/Satellite Box to the corresponding L and R AUDIO jacks on your HDTV. 4. Turn on your HDTV and Cable/Satellite Box. 5.
VIZIO E190MV/E220MV User Manual Connecting Your DVD Player Using HDMI (Best) DVD players that have a HDMI digital interface should be connected using HDMI for optimal results. To maintain image quality, use a VIZIO certified HDMI cable. This cable is available in 6, 15, and 30 foot lengths. See www.VIZIO.com or call 877-MYVIZIO (877-698-4946) for details. 1. Turn off your HDTV and DVD player. 2.
VIZIO E190MV/E220MV User Manual Using Component Video (Better) 1. Turn off the power to your HDTV and DVD player. 2. Connect the component cable (green, blue, and red) from your DVD player to the COMPONENT jacks on your HDTV. 3. Connect the audio cables (white and red) from your DVD player to the COMPONENT L and R AUDIO jacks on your HDTV. 4. Turn on the power to your HDTV and DVD player. 5.
VIZIO E190MV/E220MV User Manual Using Composite (AV) Video (Compatible) 1. Turn off the power to your HDTV and DVD player. 2. Connect the video cable (yellow) from your DVD player to the AV/S-VIDEO jack on your HDTV. 3. Connect the audio cables (white and red) on your DVD player to the AV/S-VIDEO L and R AUDIO jacks on your HDTV. 4. Turn on the power to your HDTV and DVD Player. 5. Select AV using the INPUT button on the remote control, or directly by pressing the AV button on the remote control.
VIZIO E190MV/E220MV User Manual Connecting Your VCR or Video Camera Using S-VIDEO 1. Turn off the power to your HDTV and VCR or Video Camera. 2. Connect the S-VIDEO cable from your VCR or video camera to the S-VIDEO jack on your HDTV. 3. Connect the audio cables on your VCR or video camera to the corresponding L and R AUDIO jacks on your HDTV. 4. Turn on the power to your HDTV and VCR or video camera. 5.
VIZIO E190MV/E220MV User Manual Connecting a Home Theater System If your sound system has a SPDIF (optical) digital audio input you can connect it to the OPTICAL digital audio out on the back of your HDTV. This is active when receiving audio with the content being viewed no matter which input is being used. 1. Connect one end of the optical cable to the optical connection on the Home Theater and the other end to the OPTICAL jack on your HDTV. 2. Turn on the power to your HDTV and Home Theater.
VIZIO E190MV/E220MV User Manual Chapter 7 Viewing pictures Connect a USB flash drive to the USB port on your HDTV to view photos. USB drives that are USB 2.0 and FAT or FAT32 are supported. The USB Port does not support external hard drives or USB hubs. If your USB drive is oversized and does not physically fit in the USB port, use a USB extension cable. Connect one end of the cable to your USB drive and the other end to the USB port. Supported file extensions include .jpg and .jpeg.
VIZIO E190MV/E220MV User Manual Chapter 8 Adjusting Your HDTV Settings Using the HDTV Settings App The remote control or the buttons on the front of the TV can control all the function settings. The HDTV Settings App allows you to adjust contrast, brightness and other settings. The TV will save changes made to the settings, even if the TV is turned off. The HDTV Settings App consists of several menu options. The main menu options may vary depending on your selected input source.
VIZIO E190MV/E220MV User Manual Wide Select how the picture displays on the screen. As you select an option, you will see the screen adjusting to the different sizes. The options vary depending on the selected input and the TV program: Normal Mode The original 4:3 aspect ratio (1.33:1 source) is preserved, so black bars are added to the left and right of the display image. Standard TV broadcasts are displayed with a 4:3 Aspect Ratio.
VIZIO E190MV/E220MV User Manual CC (Closed Caption) To select the options in the CC sub-menu, press the OK button or the right navigation button. A new menu will be displayed showing the following CC settings: Analog Closed Caption The CC feature is available when watching regular analog (NTSC) TV. Select from CC1, CC2, CC3, CC4, or Off. Closed Caption for regular TV is usually CC1 or CC2. Digital Closed Caption The CC feature is available when watching digital TV.
VIZIO E190MV/E220MV User Manual TV Settings Menu When you first turned on your HDTV you set up your TV for DTV / TV channels using the Initial Setup screens. If you did not do this or if your setup has changed, you can do this from the TV menu. Input Source Select the Input Source for your HDTV. Choose from TV, AV, Comp, HDMI-1, HDMI-2, VGA, and Photos. Picture The Picture menu allows you to adjust the same settings as the Picture Settings menu option on the main menu.
VIZIO E190MV/E220MV User Manual Skip Channel After the TV has stored all of the available digital channels in memory you will find that some channels are too weak to watch comfortably or they may be channels you do not want to see. Press OK to select the channel to be skipped when using the CH▲ or CH▼ buttons. An X will appear in channels you have selected to skip. You will still be able to select this channel using the number buttons on the remote control.
VIZIO E190MV/E220MV User Manual To make your own custom label: 1. Select Input Source, and then press OK to show the list of inputs. 2. Press down navigation button to select the input label you want to change, and then press OK. 3. Press down navigation button to select Custom Label and then press OK. 4. Use the on-screen keyboard and begin typing in a new label name. 5. Press down navigation button to select OK when you have finished changing the names of the input labels.
VIZIO E190MV/E220MV User Manual USA-Movie Note: When Rating Enable is OFF, USA-Movie Rating adjustments are not available.
VIZIO E190MV/E220MV User Manual RESET LOCKS Return all Parental Control lock settings to factory default. A screen will come up to confirm your selection or to cancel it. Press Left or Right Navigation buttons to make the selection, and then press OK to accept it. Menu Languages Select to change the language of the menu. The default is English. You can also select French or Spanish.
VIZIO E190MV/E220MV User Manual Audio Settings Menu Audio Mode Choose from Flat, Rock, Pop, Classic or Jazz. Note: The Audio Mode adjustment will only be available when SRS TruSurround HD is set to Off. Balance Adjust the sound to the left or the right. TV Speakers Turn the internal speakers On or Off. You may want to turn the internal speakers off when listening to the audio through your Home Theater System.
VIZIO E190MV/E220MV User Manual Picture Settings Menu Picture Mode Choose from Standard, Movie, Game, Vivid, or Custom. Each input (i.e. HDMI, COMP, etc) remembers the custom setting you created. Select Custom to manually adjust Backlight, Brightness, Contrast, Color, Tint, Sharpness, and to access the More menu where further adjustments can be made.
VIZIO E190MV/E220MV User Manual Color Temperature Color Temperature is the “warmness” or “coolness” of the white areas of the picture. Choose from Custom, Cool, Normal, or PC. Normal is the setting for television broadcasting. Custom allows you to set a preset calibrated for a white point to suit individual preferences. Cool produces a blue-hued image. PC sets the white point at the established setting for a computer display (9300K). Each preset may also be adjusted for a customized setting.
VIZIO E190MV/E220MV User Manual Browse Photos Browse photos in a selected group or folder. Press Up or Down Navigation buttons to highlight an option and then press OK to select it. In some cases, a sub-menu will be displayed. Select a picture and then press OK. You can make the photo go full screen, rotate the photo, see information about the photo, or remove it from the slideshow. When a photo is removed from the slideshow the “No” symbol appears on the picture.
VIZIO E190MV/E220MV User Manual Chapter 9 Maintenance and Troubleshooting Cleaning the TV and Remote Control 1. Remove the power adapter cable from the TV. 2. Use a soft cloth moistened with diluted neutral cleaner to clean the TV and remote control. VIZIO recommends using an HDTV cleaning solution which can be purchased at any major retailer. 3. Wring liquid out of the cloth before cleaning to prevent water from penetrating into the housing. 4.
VIZIO E190MV/E220MV User Manual Troubleshooting Guide If the TV fails or the performance changes dramatically, check the display in accordance with the following instructions. Remember to check the peripherals to pinpoint the source of the failure. If the display still fails to perform as expected, contact the VIZIO for assistance by calling 1-877MYVIZIO (698-4946) or e-mail us at techsupport@VIZIO.com.
VIZIO E190MV/E220MV User Manual General TV Problems Solution quality issues. low. Make sure your antenna is connected securely to the TV and move the antenna around the room or close to a window. For best image quality, view HD wide-screen programs where possible. If HD content is not available view “Standard Definition” from a digital source.
VIZIO E190MV/E220MV User Manual General TV Problems Solution low. Make sure your antenna is connected securely to the TV and move the antenna around the room or close to a window. You switch to a different input and the volume changes. The TV remembers the volume level from the last time you adjusted it. If the sound level is higher or lower from another source, then the volume will change. You switch to a different input and the screen size changes.
VIZIO E190MV/E220MV User Manual Telephone & Technical Support Products are often returned due to a technical problem rather than a defective product that may result in unnecessary shipping charges billed to you. Our trained support personnel can often resolve the problem over the phone. For more information on warranty service or repair, after the warranty period, contact our Support Department at the number below.
VIZIO E190MV/E220MV User Manual Compliance Caution: Always use a AC/DC power adapter that is properly grounded. Use the AC cords listed below for each area. USA: UL Canada: CSA Germany: VDE UK: BASE/BS Japan: Electric Appliance Control Act FCC Class B Radio Interference Statement NOTE: This equipment has been tested and found to comply with the limits for a Class B digital device, pursuant to Part 15 of the FCC Rules.
VIZIO E190MV/E220MV User Manual Chapter 10 Specifications Product specifications may change without notice or obligation. (190MV Specifications Panel 19” (18.5” Diagonal), 16:9 Aspect Ratio Resolution 1366 x 768 pixels Pixel (Dot) Pitch 0.3mm(H) x 0.3mm(V) Display Compatibility HDTV (720p) Colors 16.
VIZIO E190MV/E220MV User Manual E220MV Specifications Panel 22” (21.5” Diagonal), 16:9 Aspect Ratio Resolution 1920 x 1080 pixels Pixel (Dot) Pitch 0.248mm(H) x 0.248mm(V) Display Compatibility FHDTV (1080p) Colors 16.
VIZIO E190MV/E220MV User Manual Preset PC Resolutions E190MV Preset PC Resolutions If connecting to a PC through the RGB PC input, set the TV timing mode to VESA 1366x768 at 60Hz for better picture quality (refer to the graphic card’s user guide for questions on how to set this timing mode). See the table below for the factory preset resolutions. Preset Pixel Format Horz Freq (kHz) Horz Polarity Vert Freq (Hz) Vert Polarity Pixel Clk (MHz) 1 640 x 480@60Hz 31.47 - 59.94 - 25.
VIZIO E190MV/E220MV User Manual E220MV Preset PC Resolutions If connecting to a PC through the RGB PC input, set the TV timing mode to VESA 1920x1080 at 60Hz for better picture quality (refer to the graphic card’s user guide for questions on how to set this timing mode). See the table below for the factory preset resolutions. Preset Pixel Format Horz Freq (kHz) Horz Polarity Vert Freq (Hz) Vert Polarity Pixel Clk (MHz) 1 640 x 480@60Hz 31.47 - 59.94 - 25.175 2 640 x 480@75Hz 37.50 - 75.
VIZIO E190MV/E220MV User Manual ONE-YEAR LIMITED WARRANTY ON PARTS AND LABOR Covers units purchased as new in United States and Puerto Rico Only VIZIO provides a warranty to the original purchaser of its products against defects in materials and workmanship for a period of one year of non-commercial usage and ninety (90) days of commercial use. If a VIZIO product is defective within the warranty period, VIZIO will either repair or replace the unit at its sole option and discretion.
VIZIO E190MV/E220MV User Manual Index 16:9 ..........................................................................28 4:3 ............................................................................28 Accessories................................................................7 Adjustments Volume.................................................................10 Advanced Adjustments ............................................27 Antenna....................................................................
VIZIO E190MV/E220MV User Manual Specifications ...........................................................45 S-Video ....................................................................17 Technical Support ....................................................43 Time Zone setting ....................................................34 Tint ...........................................................................36 Troubleshooting .......................................................