VIZIO QUICK START GUIDE Model: M801d-A3
IMPORTANT SAFETY INSTRUCTIONS Your TV is designed and manufactured to operate within defined design limits. Misuse may result in electric shock or fire. To prevent your TV from being damaged, the following instructions should be observed for the installation, use, and maintenance of your TV. Read the following safety instructions before operating your TV. Keep these instructions in a safe place for future reference.
You may experience discomfort while watching 3D content. You may feel symptoms of eye strain, vision fatigue, color or depth distortion, motion sickness, nausea, dizziness, disorientation, or other discomforts. If you experience any of these symptoms, stop watching and take a break for at least thirty minutes before resuming. If the symptoms are severe or continue even after you have stopped watching 3D content, consult a doctor. Take care to monitor children’s watching of 3D content.
DO YOU HAVE QUESTIONS? LET US HELP! YOUR PRODUCT INCLUDES FREE LIFETIME TECH SUPPORT The VIZIO support team is highly trained and is based in the United States. We can help with: • New Product Setup • Connecting Your Devices • Technical Problems • And More Phone: (877) 878-4946 (TOLL-FREE) Email: techsupport@VIZIO.com Web: http://store.VIZIO.
PACKAGE CONTENTS INPUT LIST MENU EXIT INFO BACK GUIDE VOL CH 3D VIZIO LED HDTV with Stand 1 2 3 4 5 6 7 8 9 ENTER 0 Remote Control and Batteries Power Cord 4 x M5 20mm Phillips Screws This Quick Start Guide Theater 3D Glasses Glasses may vary slightly from those shown.
INSTALLING THE BASE 1 It is recommended that two people take part in the base installation. Place the TV screen-down on a clean, flat surface. To prevent scratches or damage to the screen, place the TV on a soft surface, such as a blanket.
2 Align the neck piece with the back of the TV. Insert and tighten the four (4) included M5 20mm Phillips screws into the back of the TV as shown. Align the base with the neck. Insert and tighten the five (5) included M6 28mm Phillips screws into the bottom of the base as shown. When you are finished, place the TV on a stable, level surface.
CONNECTING YOUR DEVICES Connect all of your devices first. Choose ONE connection type for each device. Red Red White White Red Match colored connectors to colored ports.
AV CABLE* GOOD • ANALOG • VIDEO (480i)** • STEREO AUDIO Red White Commonly-Connected Devices: Yellow COMPONENT CABLE* BETTER • ANALOG • HD VIDEO (1080i)** • STEREO AUDIO Red Cable or Satellite Boxes White Red Blue Green COAXIAL CABLE* • ANALOG • HD VIDEO (1080i)** • STEREO AUDIO HDMI CABLE* • DIGITAL • HD VIDEO (1080p)** • HD AUDIO BETTER BEST Blu-ray™ or DVD Players Game Consoles *Cables are not included ** Maximum Resolution
USING THE REMOTE DEVICE POWER Turn devices on or off. INPUT Change the currently-displayed input. APP LAUNCHER Quickly launch the pictured App. POWER Turn TV on or off. INPUT A/V CONTROLS Control the USB media player and devices. LIST Display the channel guide when using a set-top box. MENU Display the on-screen menu. LIST MENU EXIT INFO OK Select the highlighted option. EXIT Close the on-screen menu. BACK Go to the previous on-screen menu. VOLUME UP/DOWN Increase or decrease loudness of the audio.
FIRST-TIME SETUP 1 2 Back of TV Ethernet Cable Connect the power cord to the back of the TV. Plug the power cord into an electrical outlet. If you have a high-speed Internet connection, connect an Ethernet cable from your modem/ router to the back of the TV as shown. For the best Smart TV experience, VIZIO recommends using an Ethernet cable. However, your TV also has built-in Wi-Fi. See the Connecting to the Internet with Wi-Fi section for more information.
3 4 Choose your mode. Select Store Demo for in-store display. Select Home Use for in-home use. Choisissez "Home Use" pour Mode Domicile ou "Store Demo" pour Démonstration en Magasin. Seleccione "Home Use" por Modo de Casa o "Store Demo" por Demostración de Tienda. Store Demo Remove the battery cover by pressing gently on the back cover and sliding away from the remote in the direction of the arrow. Insert the included batteries. Gently slide the battery cover back into place.
5 Use the Arrow buttons on the remote to select your preferred language and country and press OK. 6 Press and Hold the Red Record button and Green Hotkey button for 5 seconds to pair the Wi-Fi Direct remote. Follow the on-screen instructions to complete the First-time setup.
CONNECTING TO THE INTERNET WITH Wi-Fi 1 2 VIZIO VIZIO If you have already set up a wireless connection during the first-time setup, you can skip this section.
3 Highlight the name of your wireless network (this is the network’s SSID) and press OK. If you do not see your SSID, you will need to enter it manually by selecting Hidden Network. For more information, see the TV’s User Manual. Using the on-screen keyboard, enter your network’s password, then highlight Connect and press OK. If you are having trouble connecting to your network, check your router placement.
VIEWING THE ON-SCREEN USER MANUAL 1 2 INPUT VIZIO LIST MENU EXIT INFO MENU Button TV SETTINGS Picture Wide Zoom Normal Exit 2D 3D Audio Timers Network Tuner BACK GUIDE CC Closed Captions Devices ABC System VOL CH Guided Setup User Manual User Manual Input Wide CC Sleep Timer Picture Audio Network Settings Help 3D 1 2 3 4 5 6 7 8 9 ENTER 0 Press the MENU Button on the Remote Control to display the TV Settings menu. Highlight User Manual and press OK.
USER MANUAL HDTV WITH VIZIO INTERNET APPS® USE YOUR REMOTE PAGE NUMBER 1 OF 53 To skip to page, use Number Pad, Open TV Menu then press OK.
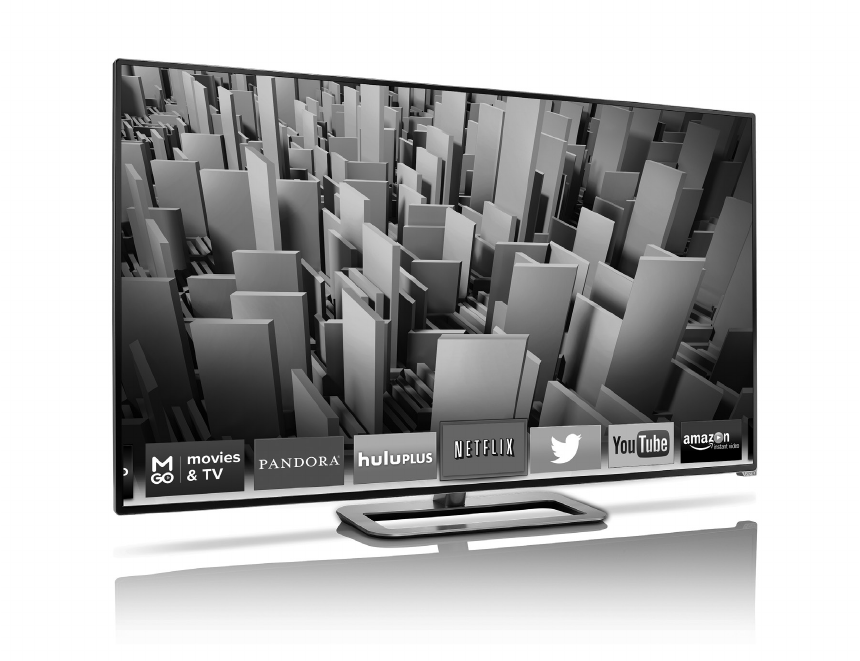
GETTING STARTED WITH VIZIO INTERNET APPS PLUS® VIZIO Internet Apps Plus® (V.I.A. Plus) delivers popular online content to your TV. V.I.A. Plus features a selection of Apps that allow you to watch movies and TV shows, listen to music, get weather and news information, and more–all on demand. A high-speed Internet connection is required to receive product updates and to access online content.
The fullscreen V.I.A. Apps window allows you to add and store apps. The Apps on the first page are displayed in the Dock and Apps on additional pages can be moved to the Dock. Press the V Button twice to launch the fullscreen V.I.A. Apps window. My Apps Features the apps installed on your TV. App Tabs Browse through apps on these tabs and add them to your My Apps tab. Installed Apps The Apps displayed here are also available in the V.I.A. Plus App Dock.
HOW TO VIEW 3D A. B. You will need: VIZIO Theater 3D Glasses C. 3D-ready Player + Media* 3D-ready HDMI cable* (Blu-ray™, Game Console, etc.) For the best 3D experience, try to view the TV straight-on, as shown here. Do not view the TV at an extreme angle, as some of the 3D effect will be lost. Sit at least 8 feet from the TV. t ee 8F A. C. B.
HELP TOPICS • How do I return to the Setup App? There is a picture, but there is no sound. The TV displays “No Signal.” • The on-screen menu has guided setup. Press MENU, then select Guided Setup. Select the type of setup you need and press OK. The Setup App will begin. To reset the TV to factory defaults, press MENU > System > Reset & Admin > Reset TV to Factory Defaults. If you have changed the default Parental Control Passcode, enter it now. Select Reset.
LEGAL / COMPLIANCE FCC Class B Radio Interference Statement NOTE: This equipment has been tested and found to comply with the limits for a Class B digital device, pursuant to Part 15 of the FCC Rules. These limits are designed to provide reasonable protection against harmful interference in a residential installation.
LIMITED WARRANTY ON PARTS AND LABOR Covers units purchased as new in United States and Puerto Rico Only. VIZIO provides a warranty to the original purchaser of a new Product against defects in materials and workmanship for a period of one (1) year of non-commercial usage and ninety (90) days of commercial use. If a Product covered by this warranty is determined to be defective within the warranty period, VIZIO will either repair or replace the Product at its sole option and discretion.
© 2013 VIZIO INC. ALL RIGHTS RESERVED.