
Instruction Manual
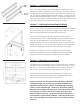

Please verify that your mounting surface will safely support the
combined weight of the enclosure, mounting hardware and
equipment installed in the cabinet. Conrm that the mounting
surface is safe to drill through. Please note that only mounting
hardware for mounting to wooden studs is provided with the unit.
If mounting to a surface other than wooden studs, then other
hardware will be required. This product should be installed by
professionals or professionally installed.
*Video Mount Products will not be held liable for the improper use
or installation of their products.*
Enjoy Your Cabinet!
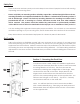
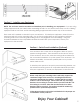
Section 6 - Patch Panel Installation (Optional)
Your enclosure also comes with an integrated, slide-out patch
panel mounting bracket. These brackets are located at the top
of the enclosure, above the vertical mounting rails and allows for
the convenient installation of a patch panel to the enclosure. For
added accessibility, the brackets partially slide out to provide
easier cable access.
To install a patch panel on the patch panel mounting bracket, use
the included mounting screws or compatible hardware provided
with your equipment, to secure your equipment to the rack rail.
4
5
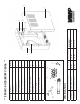
Section 5 - Installing your Equipment
NOTE: The enclosure must be mounted and stabilized prior to installing your equipment. If you are using
sliding equipment rails, be careful when extending the rails. Do not extend more than one set of sliding
equipment rails at one time. Avoid extending sliding equipment rails near the top of the enclosure.
Each rack unit is marked on the rail for your convenience. To install your equipment, lower it into the
enclosure and set it on the mounting rails. Line up the mounting holes on the equipment with the
mounting holes on the mounting rails making sure to stay aligned in the rail markings. Using the
included hardware or the compatible hardware included with your component, secure your
equipment to the rack rails.