VMware ® ThinApp™ REVIEWER’S GUIDE
VMware ThinApp Reviewer’s Guide Table of Contents Technology Overview . . . . . . . . . . . . . . . . . . . . . . . . . . . . . . . . . . . . . . . . . . . . . . . . . . . . . . . . 4 Common Use Cases To Leverage VMware ThinApp . . . . . . . . . . . . . . . . . . . . . . . . . . . . 4 Review of Key Features . . . . . . . . . . . . . . . . . . . . . . . . . . . . . . . . . . . . . . . .
VMware ThinApp Reviewer’s Guide Table of Contents Continued Procedures to Deploy and Manage ThinApp Packages in Horizon ApplicationManager. . . . . . . . . . . . . . . . . . . . . . . . . . . . . . . . . . . . . . . . . . . . . . . 35 Enabling a ThinApp Package for Horizon. . . . . . . . . . . . . . . . . . . . . . . . . . . . . . . . . .
VMware ThinApp Reviewer’s Guide Technology Overview VMware® ThinApp™ is an agentless application virtualization solution that decouples applications from their underlying operating systems to eliminate application conflict and streamline application delivery and management. ThinApp simplifies application virtualization and enables IT administrators to quickly deploy, efficiently manage, and upgrade applications without risk.
VMware ThinApp Reviewer’s Guide Review of Key Features Agentless Application Virtualization • Agentless architecture—Designed for fast deployment and ease of management, ThinApp requires no agent code on target devices. • Complete application isolation—Package entire applications and their settings into a single executable that runs independently on any endpoint, allowing multiple versions or multiple applications to run on the same device without any conflict.
VMware ThinApp Reviewer’s Guide Getting Started with VMware ThinApp What you need to get started: • VMware ThinApp software and product key • Clean installation of a Windows operating system on a dedicated physical or virtual capture machine • Application installer file for application you want to virtualize • (Optional) VMware View environment To obtain the evaluation software and product key for 50 clients, go to http://www.vmware.
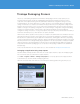
VMware ThinApp Reviewer’s Guide ThinApp Packaging Process The process of virtualizing an application with VMware ThinApp begins with the Setup Capture process and ends with the build into a read-only redistributable package that encapsulates all of the necessary components of the application along with the administrator-determined configuration settings necessary for implementation. The Setup Capture process creates a project to store the application and configuration settings.
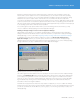
VMware ThinApp Reviewer’s Guide VMware recommends that customers install only the basic components of the operating system for the machine that is used for capture. It is also recommended that you use the oldest version of the operating system that your users may be on to ensure that the application installation includes all required files during installation.
VMware ThinApp Reviewer’s Guide | Figure 3: Skipped Groups Window in Setup Capture If You Enable for Horizon When you advance through Setup Capture after enabling a ThinApp package for Horizon, you will also notice that the MSI package creation is automatically enabled for you. This is for possible future use in Horizon. The MSI package is created in the bin folder of the ThinApp project, along with the EXE and DAT files.
VMware ThinApp Reviewer’s Guide If you are already familiar with the Package.ini configuration file for a ThinApp package, you will notice three new parameters for the Horizon enablement. Figure 5: New Package.ini Parameters for Horizon Enablement • The AppID=genid entry in Package.ini causes ThinApp to assign a random GUID to the ThinApp package. The GUID is used by Horizon to identify the package in the Horizon ThinApp Repository and to check entitlement.
VMware ThinApp Reviewer’s Guide 1. When the Groups window appears during Setup Capture, select Only the following Active Directory groups and click the Add button. Figure 6: Groups Window of ThinApp Setup Capture The Select Groups window opens. Figure 7: Select Groups Window in ThinApp Setup Capture 2. Select the Active Directory groups that you want to authorize for access to the application. • To specify objects, click Object Types. • To specify a location in the forest, click Locations.
VMware ThinApp Reviewer’s Guide The following example shows that an administrator has selected ‘RoadWarriors’ as the only Active Directory group able to launch this application. Figure 8: Groups Window of ThinApp Setup Capture, with Entry Modifying Settings in the Package.ini File The last step of the Setup Capture wizard prompts the administrator for advanced configuration before commencing the build of the package. The Package.
VMware ThinApp Reviewer’s Guide 1. Click Edit Package.ini. 2. Modify a parameter by removing the semicolon at the beginning of the line or by editing existing parameters. 3. For example, activate the RemoveSandboxOnExit parameter by deleting the semicolon at the beginning of the line so that RemoveSandboxOnExit=1 is enabled in Package.ini. 4. Modify any additional parameters and save the file. 5. Return to the Setup Capture wizard and click Build to complete the process and generate the ThinApp package.
VMware ThinApp Reviewer’s Guide 1. Important: To utilize the harvest method of capturing Internet Explorer 6, you must run Setup Capture on a Windows XP capture machine. Run Setup Capture and click the Internet Explorer button within the Install Application window to harvest IE6. Figure 10: Internet Explorer Button in Install Application Window of ThinApp Setup Capture 2. Select Include an entry point for a fully virtualized Internet Explorer, then click OK.
VMware ThinApp Reviewer’s Guide 3. Add any browser plug-ins or modifications, then click Postscan. During the postscan, ThinApp harvests IE6 from the Windows XP capture machine. 4. Advance through the Entry Points, Groups, Isolation, Sandbox, and Quality Assurance windows. At this point you will be presented with a dialog box that will automatically redirect users going to specified hosts or URLs into the virtualized IE6 instance. These entries populate the ThinDirect.
VMware ThinApp Reviewer’s Guide To utilize ThinApp Converter, you must specify the parameters used in the automation in the ThinAppConverter. ini file and then reference the appropriate file shares. The following diagram represents the components and process used for the automated packaging operation.
VMware ThinApp Reviewer’s Guide Deploying ThinApp Packages The process for deploying ThinApp application packages is very simple, as there is no actual installation of the application, and interoperation with the local operating system is minimal. Deployment involves making a decision for a centralized or de-centralized model for application delivery and then integrating the virtualized applications into the desktop for end-user accessibility.
VMware ThinApp Reviewer’s Guide The path through the network between the client device and the central network location must be robust. A virtualized application utilizes standard SMB protocol. The amount of network traffic will vary based on the application and the functions used by the end user. Benefits Centralized management is the primary benefit of the streaming mode of execution.
VMware ThinApp Reviewer’s Guide Application Registration Application registration integrates the virtualized application packages with the desktop operating system. Registration of virtualized applications creates: • Shortcuts on the desktop and in the Start menu • File-type, protocol, and object-type associations so that applications launch automatically • Entries in the Add/Remove Programs applet of the Control Panel The thinreg.exe tool in ThinApp handles application registration.
VMware ThinApp Reviewer’s Guide Deployment of Virtualized Applications with Electronic Software Distribution (ESD) Tools and Active Directory An organization with an established mechanism for deploying MSI files, such as Active Directory, can deploy ThinApp MSI packages in the same manner that they would deploy native applications. Registering applications to the desktop makes use of the thinreg utility whether the package is deployed as an EXE-based package or as an MSI package.
VMware ThinApp Reviewer’s Guide Using ThinApp Assignments with VMware View The VMware View Administrator assigns ThinApp packages to individual desktops or pools of desktops to allow for streamlined application deployment. The requirements to utilize this method are: • MSI-based ThinApp packages • A file share • VMware View 4.5 or later This video reviews the setup and operation of ThinApp assignments in VMware View: ThinApp Assignments in VMware View 4.
VMware ThinApp Reviewer’s Guide Practice Creating the View ThinApp Repository and Populate It with ThinApp Packages 1. Add the ThinApp Repository, specify the appropriate path, and optionally provide a description. Figure 15: ThinApp Configuration in View Administrator 2. Navigate to the ThinApp configuration section and choose to ‘Scan’ for new applications, selecting the ThinApp Repository specified previously.
VMware ThinApp Reviewer’s Guide 3. Select the MSI packages to add them to VMware View Administrator. Figure 17: Selecting MSI Packages in View Administrator Practice Creating ThinApp Assignments in View Administrator 1. (Optional) Create ThinApp templates, which are groups of ThinApp packages. This allows you to make one assignment to a desktop or pool and deliver a group of applications instead of making multiple assignments.
VMware ThinApp Reviewer’s Guide 3. Select single or multiple desktops or pools and then choose the Installation type. Figure 19: Add Pool Assignment Window in VMware View 4. Verify the Assignment and monitor progress by using the Events applet. Figure 20: Events Applet in VMware View The process illustrated above reviews how to set up a View ThinApp Repository and make ThinApp assignments within View Administrator.
VMware ThinApp Reviewer’s Guide Practice Utilizing Script-Based Application Registration in View For deployment to non-View managed desktops, the use of script-based application registration can be automated to provide role-based access to ThinApp packages.
VMware ThinApp Reviewer’s Guide Utilizing AppLink to Combine ThinApp Packages Application Link is a feature that connects dependent application packages at runtime. This allows the administrator to build relationships between packages without using Setup Capture to package all needed components into a single package. Component packages are often more efficiently packaged, deployed, and updated separately. Create links between packages for the following scenarios: • Link runtime components, such as .
VMware ThinApp Reviewer’s Guide Integrating ThinApp Packages with Horizon Application Manager Horizon Application Manager is a unified application catalog and broker in the cloud that presents end users with applications they can log into with a single sign-on.
VMware ThinApp Reviewer’s Guide Horizon Application Manager includes the following components: • Horizon Connector: A lightweight virtual appliance that you install on premise for Active Directory synchronization and secure authentication of users to ThinApp packages. The connector is in OVA format, and you need a compatible hypervisor, such as VMware vSphere, to run the virtual appliance.
VMware ThinApp Reviewer’s Guide Every organization has its own URL on the multi-tenant, cloud-based Horizon Service. User Portal Horizon Service AD Windows Application Management Administration Portal Figure 23: Horizon Service • Horizon Agent: The Horizon Agent service is installed on each user desktop. Whenever a user tries to launch a Horizon-enabled ThinApp package, the ThinApp runtime checks if the Agent is installed on the desktop.
VMware ThinApp Reviewer’s Guide • ThinApp Repository (Windows Application Share): Windows applications that have been converted to ThinApp packages are stored in a Windows application share (network file share) on premises. This is also called the ThinApp Repository. • Active Directory: Your Active Directory is a necessary component for Horizon Application Management.
VMware ThinApp Reviewer’s Guide The user logs in with user name and activation code. Horizon Connector matches user login information to the Active Directory. The administrator may require the user to choose security settings, such as a personalized welcome message, a confidence image, or security questions. Figure 27: Horizon User Portal Home Page The user portal home page displays available SaaS and federated web applications and ThinApp virtualized Windows applications.
VMware ThinApp Reviewer’s Guide The Application Catalog on the user portal lists the applications that the user is entitled to. If an application was set to User-Activated by the administrator, the user determines if the application is downloaded to their desktop. Other applications will already have been automatically activated and downloaded to the user desktop if the administrator set them to Automatic.
VMware ThinApp Reviewer’s Guide • Right-click the system tray icon and select Preferences to set the schedule for the Agent to poll the Horizon Service for changes in entitlements and to download new packages. (The user must have administrative rights to change the polling interval.) Figure 31: Horizon Preferences from the System Tray Icon Activation of Applications Users can activate any application they see in their Application Catalog.
VMware ThinApp Reviewer’s Guide Thus, the Horizon Service user portal is only one way for users to launch their Horizon-enabled ThinApp applications. The administrator can set up push for all applications so that users do not need to use the Horizon user portal. However the administrator may require user activation (and download) of some applications, and the user does this from the user portal.
VMware ThinApp Reviewer’s Guide Downloaded ThinApp packages can also be used offline, when the user is disconnected from the network and the Horizon Service. Entitlement to the application may change while the user is offline, but they can continue to use the package until the Horizon Agent is able to check with the service for changed entitlement. The default length of time that a user can launch a ThinApp package and not reconnect to the network is thirty days.
VMware ThinApp Reviewer’s Guide Installing and Configuring the Horizon Connector The Horizon Connector is the interface between 1) the Active Directory and the ThinApp Repository (Windows Application Share) on premise, and 2) the Horizon Service in the cloud. Installing and configuring the connector enables it to communicate with the service, the Active Directory, and the ThinApp Repository (Windows Application Share).
VMware ThinApp Reviewer’s Guide Next, you use the connector setup wizard for essential configuration of the connector. In the setup wizard, you configure the connection and communication between the connector, the Horizon Service, the Active Directory, and the Windows application share where the ThinApp packages reside. If you ever need to reconfigure the connector, you use the setup wizard again.
VMware ThinApp Reviewer’s Guide The setup wizard takes you through the following steps: 1. Horizon Application Manager: You enter the Activation Code for your Horizon account so that the connector can communicate with the service. You received this activation code from VMware. Figure 34: Horizon Application Manager Window of the Connector Setup Wizard 2. Directory: You point to the Active Directory server.
VMware ThinApp Reviewer’s Guide 3. (Optional) Join Domain: Required if you want to 1) provide users with access to Windows applications virtualized with ThinApp, or 2) configure single sign-on with NTLMv2. You describe the Active Directory user account that has the right to join machines to the Active Directory domain. Figure 36: Join Domain Window of the Connector Setup Wizard 4.
VMware ThinApp Reviewer’s Guide 5. (Optional) NTLMv2: You enable or disable the NTLMv2 protocol. Enable NTLMv2 if you are configuring the connector in Connector Authentication mode, and you want to provide NTLMv2 security instead of or in addition to that provided by Kerberos. Also available in the Advanced tab of the connector UI after you complete the setup wizard. Figure 38: NTLMv2 Window of the Connector Setup Wizard 6.
VMware ThinApp Reviewer’s Guide 7. External Access: You must configure the hostname or IP address that is accessible from the public Internet, and enter SSL certificate information. Figure 40: External Access Window of the Connector Setup Wizard 8. (Optional) Windows Apps: Required if you want users to be able to access virtualized Windows applications from ThinApp.
VMware ThinApp Reviewer’s Guide Figure 41: Completed Windows Apps Window of the Connector Setup Wizard 9. Map User Attributes: You configure user attributes according to Active Directory settings.
VMware ThinApp Reviewer’s Guide 10. Select Users: You specify which Active Directory users to synchronize between the connector and the service. Use the Filter Users tab. The View Results tab lets you see your selections. The View Errors tab provides a list of user entries that will not be synchronized because of errors. Figure 43: Select Users Window of the Connector Setup Wizard 11. Select Administrators: Configure this page to specify the users who have administrator access to the service.
VMware ThinApp Reviewer’s Guide 12. Select Groups: You configure the Active Directory group information to be synchronized between the connector and the service. Figure 45: Select Groups Window of the Connector Setup Wizard 13. Configure Scheduling: You configure the frequency of synchronization between the connector and service for Active Directory information.
VMware ThinApp Reviewer’s Guide 14. Push to Horizon: This shows you the Active Directory information to be sent to the Horizon Service, and then you can push that information to the service immediately. Save and Continue synchronizes the Active Directory information. Figure 47: Push to Horizon Window of the Connector Setup Wizard After you click Save and Continue, you are given a choice: • Log in to Horizon: Proceed to the Horizon Service for configurations and setting up entitlements.
VMware ThinApp Reviewer’s Guide Directory Sync: The Directory Sync window of the Advanced tab combines the Directory, Select Users, Select Groups, Configure Scheduling, and Push to Horizon windows from the connector setup wizard. In this sequence of windows, you can change the Active Directory users and groups to synchronize to the Horizon Service, reschedule the import of Active Directory information into the Horizon Service, and push the Active Directory users and groups to the service.
VMware ThinApp Reviewer’s Guide Windows Apps: You can edit the location of the ThinApp Repository (Windows Application Share) and reschedule synchronization between the connector and that file share. Figure 50: Windows Applications Window in Connector Web Interface Advanced Tab If you do not see all of your ThinApp packages listed in the Windows Applications window, synchronization between the connector and the ThinApp Repository (Windows Application Share) has not succeeded.
VMware ThinApp Reviewer’s Guide When you click Edit, the Windows Applications Share Setup window appears. Figure 51: Windows Applications Share Setup in Connector Web Interface Sync Safeguards: For information on the Sync Safeguards choice in the connector web interface, see the Installing and Configuring Horizon Connector guide. Change Password: If you lose or need to change the connector web interface password, you use the connector command-line interface to initiate the change-password process.
VMware ThinApp Reviewer’s Guide Enabling IdP Discovery in the Horizon Service For users to access ThinApp packages on the Windows application share, you must first enable Identity Provider (IdP) Discovery through the Horizon Service Settings tab > Connector Management. Figure 52: Connector Management in the Horizon Service Administration Portal Select your connector name, and in the next window, set an IP address range or ranges that the connector will accept incoming requests from.
VMware ThinApp Reviewer’s Guide If a user logs in to the Horizon Service user portal from an IP address that is within the range you specify, the connector allows single sign-on through correct setup of Kerberos. If the IP address is out of all your connector’s specified address ranges, the user will be required to enter a username and password to log in. Single sign-on through Kerberos has not been correctly configured. Now you are ready to set up entitlement in the Horizon Service.
VMware ThinApp Reviewer’s Guide First, let us look at how you add more applications to the organization’s portal through the Applications tab. Click the Add Application button to see a list of applications to choose from. Figure 55: Add Application Window of the Horizon Service Administration Portal For more information about adding applications to the portal, see the Horizon Administration Help.
VMware ThinApp Reviewer’s Guide The Edit Application window opens. Figure 57: Edit Application Window of the Horizon Service Administration Portal From this window, you can click EDIT for the application and change the location and description of the ThinApp package. In this version of Horizon, you must not change the name of the application.
VMware ThinApp Reviewer’s Guide You can add group or user entitlements, as well as edit or remove current entitlements. If you click EDIT for a group, you are able to change the type of Deployment (User-Activated or Automatic) and edit your comments for the group.
VMware ThinApp Reviewer’s Guide Figure 62: Choice of Groups to Entitle to an Application in Horizon Service Administration Portal Select a group or groups from the list of all groups in this organization, and choose a Deployment Type. You may add Comments. Click Save, and you have entitled that group to the selected application. This process used the Applications tab to entitle users or groups to an application.
VMware ThinApp Reviewer’s Guide To create a Horizon Group, click the Create Group button. Then enter a group name and description: Figure 64: Create Group Window in Horizon Service Administration Portal After you Add the group, the Edit Group window opens. Here you can add users to the group and view and change application entitlements for this group.
VMware ThinApp Reviewer’s Guide If you click EDIT for users, the Edit Group Rules window opens, and you can assign users to the group. Figure 66: Edit Group Rules Window of the Horizon Service Administration Portal You can also view application entitlements for the group from the Edit Group window, and you can click ADD to add a group entitlement to the application.
VMware ThinApp Reviewer’s Guide Figure 68: Adding an Application Entitlement in the Horizon Service Administration Portal Figure 69: An Added Application Entitlement for a Group in the Horizon Service Administration Portal For details on these steps, see the Installing and Configuring Horizon Connector guide. Important note: You configure entitlement to ThinApp packages in the Horizon Service. The Horizon Agent on the user’s desktop communicates with the Horizon Service to check entitlement.
VMware ThinApp Reviewer’s Guide Installation of the Horizon Agent on User Desktops The Horizon Agent is a Windows service that runs on users’ desktops. For a user to run a Horizon-enabled ThinApp package, the Horizon Agent must be installed on their desktop. The Horizon Agent: • Communicates with the Horizon Service to get ThinApp package entitlement information. By default, the Agent checks with the service every sixty minutes.
VMware ThinApp Reviewer’s Guide The error message when the user tries to launch from a desktop shortcut can occur if the Agent has been uninstalled. Before you deploy the Horizon Agent to user desktops: 1. Configure users’ browsers for Kerberos. Firefox, Chrome, Safari, and Internet Explorer are supported browsers with Horizon Application Manager.
VMware ThinApp Reviewer’s Guide Figure 73: Downloaded Horizon Agent Installer The Horizon Service prompts the user through the Agent installation. A user must have administrative rights to run the Agent installation. During the installation, Horizon tries to extract the organization’s Horizon Service URL from the user’s browser cookies (the user opened the user portal with this URL; most browsers discover the URL for existing SaaS users).
VMware ThinApp Reviewer’s Guide One of the Horizon Agent installer windows allows you to change the default name for the desktop folder containing the entitled downloaded applications: Figure 75: Horizon Agent Installation Dialog about Desktop Folder After the Horizon Agent is installed on the user desktop, it appears in the Add/Remove Programs facility of the Control Panel applet: Figure 76: Horizon Agent As a Program Installed on the User Desktop The Agent is a service that is set to run automaticall
VMware ThinApp Reviewer’s Guide The alternative method to Detect and Deploy for installing the Horizon Agent is the ESD method. Electronic Software Delivery (ESD) method: The administrator points the users to the Horizon Agent installer so they can run the installer themselves. In this case, the administrator can add a parameter to a silent installer command to specify the URL to be entered in the Service URL field.
VMware ThinApp Reviewer’s Guide Figure 79: Reports Tab of Horizon Administration Portal Security of Information That Is Communicated to the Horizon Cloud Service The on-premise Horizon Connector collects information about Active Directory users and groups and about ThinApp packages and transmits that information to the Horizon Service in the cloud. The ThinApp package information is metadata only: icon, application name and identifier, and path to the package in the ThinApp Repository.
VMware ThinApp Reviewer’s Guide Updating ThinApp Packages Application updates can be necessary either to provide additional application functionality for end users or to comply with administratively prescribed updates to software. When packaging applications, it is necessary to decide if the responsibility to package the application rests with the user or the administrator.
VMware ThinApp Reviewer’s Guide Package Replacement The package replacement method for updating application packages can be used for either streaming or deployed execution mode. If you have created an updated package and have a quiet window when no users will launch the application, then you can simply replace the original .exe-based package with the updated .exe. Make sure that the filename stays exactly the same: users depend on the shortcuts previously created to launch applications.
VMware ThinApp Reviewer’s Guide Practice in Using AppSync to Update ThinApp Packages The AppSync functionality provides an easy-to-administer method of updating packages inside or outside the corporate network. The Application Sync feature is a setting that initiates the pull of a differential update package from a central HTTP web server or UNC location. The interval for polling for updates and the location of the HTTP service or file share is configurable along with other settings in the Package.
VMware ThinApp Reviewer’s Guide You may wish to allow users to use both versions of a package for a while. If you do not replace the prior package, but simply add the updated package to the repository, Horizon retains the entitlements to the previous package, and users can continue to use both the previous package and the updated one. Entitlements pertain to a specific application ID; therefore, neither AppSync nor side-by-side updating of ThinApp packages is supported in Horizon for this release.