������� ��������������������������������������� ����� � � � � � � � ���� � �� ����� ��� ��� ���� � � ��� ��� ��� ��� � � ��� ��� � ����������� ����� ���������� ��� ����� �������������� � �� ��� � �� ���� ����� ��� ������� ����������������� ��� ������ ��� � � ��� � � ��� �� � �� ������ ����� � ������ ��� ���� ����� ��� ��� ��� � �� ����� ��� ��� ���� � � ��� ��� ��� ��� � � ��� ��� �� � �� ����� ����� ��� � � �� ����� ������ �� ���� ������ ���� � ��� �
Table of Contents FCC Information ...................................................... 3 Listening for a Lifetime ............................................. 4 Safety Instructions ................................................... 5 Welcome ............................................................... 6 Specifications ......................................................... 7 Getting Started ....................................................... 8 Getting Connected Connection Diagram ...............
FCC Information CAUTION: READ THIS BEFORE OPERATING YOUR UNIT 1. IMPORTANT NOTICE: DO NOT MODIFY THIS UNIT!: This product, when installed as indicated in the instructions contained in this manual, meets FCC requirements. Modifications not expressly approved by Vocopro may void your authority, granted by the FCC, to use this product. 1. To ensure the finest performance, please read this manual carefully. Keep it in a safe place for future reference. 2.
Listening for a Lifetime Selecting fine audio equipment such as the unit youʼve just purchased is only the start of your musical enjoyment. Now itʼs time to consider how you can maximize the fun and excitement your equipment offers. VocoPro and the Electronic Industries Associationʼs Consumer Electronics Group want you to get the most out of your equipment by playing it at a safe level.
Safety Instructions 8. Ventilation - The appliance should be situated so its location does not interfere with its proper ventilation. For example, the appliance should not be situated on a bed, sofa, rug, or similar surface that may block the ventilation slots. CAUTION RISK OF SHOCK CAUTION: To reduce the risk of electric shock, do not remove cover (or back). No user-serviceable parts inside. Only refer servicing to qualified service personnel. 9.
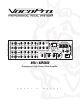
Welcome And thank you for purchasing the HV-1200 from VocoPro, your ultimate choice in Karaoke entertainment! With years of experience in the music entertainment business, VocoPro is a leading manufacturer of Karaoke equipment, and has been providing patrons of bars, churches, schools, clubs and individual consumers the opportunity to sound like a star with full-scale club models, in-home systems and mobile units.
Specifications INPUT Specifications INPUT Mic 1-4 CONNECTION XLR (BAL) LEVEL(RATED) IMPEDANCE -50dBu 1.3 Kohm RCA JACK 0dBu 10Kohm 1/4” (unbal) 0dBu 10Kohm 1/4” (unbal) 0dBu 10Kohm 1/4” (BAL/UNBAL) MUSIC (AV1-AV4) Mic LOOP RETURN(tip) Music LOOP L/R RETURN (TIP) OUTPUT Specifications OUTPUT CONNECTION LEVEL IMPEDANCE AMP OUTPUT BINDING POST 296Watt X 2 4 ohm (THD <0.
Getting Started Thank you for purchasing the HV-1200. Take a few moments to look through this manual. Before setting up, please make sure the following items are included.
Getting Connected Connection diagram �������� ���������������� �������� ������������������ �������� ���������������� �������� �������� ���������� � � �������� � ���� ��� ��� ������ � � � � ���� � ������ ��� ��� ��� ��� ������ ������ ������ �������� ��� ������ ������������������ � � ������������� ������������� ������������� ����������� ���������� �������������������� ������������������� �� � ��� ���������������������� ����������� ��������������������� ��������� � ���
Getting Connected cont. Connecting Power �������� � What you will need: • Surge Protector (recommended) or power outlet • Included power cable � ��� ��� ��� ��� ������ ������ ������������������ ������������� ������������� ������������� ������������ ��������������������� ����������� To connect Power to the HV-1200 1. Connect one end of the power cable to the rear panel of the HV-1200. 2. Connect the other end of the power cable to the power outlet or surge protector.
Getting Connected cont. Determining the proper way to connect the speaker cables: The speaker cable is a pair of insulated cables running side by side. One cable is colored or shaped differently, perhaps with a stripe, groove or ridges. 1. Connect one end of the striped (grooved, ridged, etc.) cable to the “+” (red) terminal on the rear panel of the HV-1200. 2. Connect the other end of the striped (grooved, ridged, etc.) cable to the “+” (red) terminal on the speaker. 3.
Getting Connected cont. Connecting a Powered Vocal Monitor ������������������ The HV-1200 has two types of connections for mic-only output. This is for compatibility with different types of powered vocal monitors. See your powered vocal monitor instruction manual to see if you need an XLR or ¼” cable.
Getting Connected cont. Connecting External Players to the HV-1200 There are four Audio/Video input channels on the rear panel of the HV-1200. This allows you to connect up to four external players such as DVD players and CD+G players to the HV-1200. You can switch between these input channels using the AV selector button on the front panel.
Getting Connected cont. Connecting Microphones The HV-1200 has four microphone input channels. Each channel has two types of microphone jack for compatibility with different types of microphone cables. What you will need: • Up to four Microphones • XLR or ¼” Mic Cables To connect Microphones to the HV-1200 1. Connect one end of the mic cable to the microphone. 2. Connect the other end to a mic channel’s ¼” jack or XLR jack depending on the type of mic cable.
Descriptions and Functions � ������� � ��������������������������������������� ����� ����� ����� � � � � ����� ���������� � � � ���� � �� ����� ��� ��� ���� � � ��� ��� ��� ��� � ��� ��� � � � � � ����������� ��� ������� �������������� � ��� �� ��� ������ � �� ���� ����� ����������������� ��� ��� � � ��� � � ��� �� � �� ������ ����� � ������ ��� ���� ��� ��� ��� � �� ����� ��� ��� ���� � � ��� ��� ��� ��� � ��� ��� � �� � �� ����� ����� ��� � � �� ���
Descriptions and Functions cont. � � ����� ����� ������� � � � � � � � � � � � ��������������������������������������� ��� � ���� � �� ����� ��� ��� ���� � � ��� ��� ��� ��� � ��� ��� � � �� ��� � ��� ���� Microphone Input Channels � to�� ��� ��� ��� a ¼” ���mic cable. ��� 1. ¼” Microphone Input Jack - Use this jack connect ��� a wired microphone with ����� ���� � ��� ��� � � � 2.
Descriptions and Functions cont. ������������������������ � � �������������� � ���� ��� ��� ��� ��� � ��� ��� � � �� ��� � � � ���� � � � ������ � �� ���� ����� � ����������� ����� ���������� ��� ������� ��� �� � �� ������ ����� � � ������ �� ��� ��� ��� ��� � ��� ��� � �� � �� ����� ����� ��� � � �� ����� ������ � �� ���� ������ ���� ���� ���� ���� ���� ��������� � Effect Control ������ ���� ��� ����� ���������� 1.
Descriptions and Functions cont.
Operations Customizing Source Music Output Using KEY CONTROL If a song’s natural musical key is either too high, or too low to be sung comfortably, use the KEY CONTROL feature to bring the musical key into range. • Press the UP button to raise the key a ½ step • Press the DOWN button to lower the key a ½ step • Press the NORMAL button to return the key to its natural position There is a maximum of 8 steps in either direction (UP/DOWN.) The current setting is displayed in the KEY DISPLAY (ex. -2, +3.
Operations cont. Customizing Microphone Output Using the HIGH/MID/LOW Controls To adjust the sound of each connected microphone individually, use the HIGH/MID/LOW controls. These controls work similar to the graphic equalizer, enabling to for the enhancement/suppression of particular frequencies within each microphone channel. • Adjust the HIGH control to increase/decrease sibilance. • Adjust the MID control to increase/decrease presence. • Adjust the LOW control to increase/decrease boom.
Troubleshooting The HV-1200 does not turn on • Make sure the HV-1200 is plugged in. • Make sure the power cord is undamaged. If it is damaged, do not attempt to repair it, contact VocoPro for a replacement cord. • If the HV-1200 is plugged in to a power strip, make sure the power strip is turned on. • Check the fuse. If the fuse is blown, replace only with the type marked on the back panel.
Notes
HV-1200 Owner’s Manual © VocoPro 2009 v1.0 www.vocopro.