Workshop manual Inlet, exhaust, cooling systems D 2(0) TAMD61A, TAMD62A, TAMD63L-A, TAMD63P-A TAMD71A, TAMD71B, TAMD72A, TAMD72P-A, TAMD72WJ-A
Group 25 Inlet and exhaust system Group 26 Cooling system Marine engines TAMD61A • TAMD62A • TAMD63L-A • TAMD63P-A TAMD71A • TAMD71B • TAMD72A • TAMD72P-A TAMD72WJ-A Contents General instructions ............................................ 2 Special tools ........................................................ 9 Other special equipment ..................................... 10 Group 25 Inlet and exhaust system Design and function General .................................................................
Information on Safety Introduction This Workshop Manual contains technical data, descriptions and repair instructions for Volvo Penta products or product versions contained in the contents list. Ensure that the correct workshop literature is being used. Read the safety information and the Workshop Manual “General Information” and “Repair Instructions” carefully before starting work. personal injury. Avoid burns.
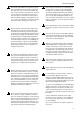
General instructions Avoid skin contact with oil. Long-term or repeated contact with oil can remove the natural oils from your skin. The result can be irritation, dry skin, eczema and other skin problems. Used oil is more dangerous to health than new oil. Use protective gloves and avoid oil soaked clothes and rags. Wash regularly, especially before meals. Use the correct barrier cream to prevent dry skin and to make cleaning your skin easier.
General instructions Never remove heavy components alone, even where secure lifting equipment such as secured blocks are being used. Even where lifting equipment is being used it is best to carry out the work with two people; one to operate the lifting equipment and the other to ensure that components are not trapped and damaged when being lifted. When working on-board ensure that there is sufficient space to remove components without danger of injury or damage.
General information About the Workshop Manual Certified engines This Workshop Manual contains technical data, descriptions and repair instructions for the standard version of engine units TAMD61A, TAMD62A, TAMD63P-A, TAMD63L-A, TAMD71A, TAMD71B, TAMD72A, TAMD72WJ-A, and TAMD72P-A. For engines which are certified for national and regional environmental legislation the manufacturer undertakes to ensure compliance with environmental regulations both for new engines and those in use.
Repair instructions The work methods described in the Workshop Manual are applicable for a workshop environment. The engine is therefore removed from the boat and mounted in an engine block. Renovation work which does not require removal of the engine is conducted in situ with the same work methods, unless otherwise stated.
General instructions Angular tightening torque For angular tightening torque the screw union is tightened with a given torque, thereafter further tightening with a predetermined angle. Example: at 90° angular tightening the union is tightened and an additional 1/4 turn is made in a work procedure after the given tightening torque has been reached. Lock nuts Dismantled lock nuts shall not be reused but replaced with new items, since the locking properties diminish or are lost with repeated use.
General instructions Safety instructions for fluorocarbon rubber ● Always wear gloves of chloroprene rubber (gloves for handling chemicals) and protective goggles. ● Handle the removed seal in the same way as corrosive acid. All residue, including ash, can be strongly corrosive. Never use compressed air to blow clean. ● Place the residue in a sealed plastic tin provided with a label. Gloves are washes under running water before taking them off.
Special tools 9992071 9992265 9992457 9992268 9992584 9992679 9994034 9994090 9996626 9996666 9996863 9996883 9996884 9996979 9998039 9998107 9998137 9998491 9996065 9996626-9 Hollow drift for installing shaft stub with bearing in coolant pump 9996666-5 Nipple with quick release connector for connection to 6065 9996863-8 Mandrel for replacing piston thermostat seal Hollow drift for coolant pump for removal of gear wheel from shaft stub and installation of circlip 9996883-6 Tool f
Other special equipment 884970 884985 885164 885151 884970-5 Flange kit complete for measuring exhaust back pressure on TAMD61, -62, -71, - 72 885151-1 Test instrument kit for measuring exhaust back pressure and exhaust temperature. 884985-3 Mandrel for pressing out coolant pump drive shaft 885164-4 Flange kit complete for measuring exhaust back pressure on TAMD 61, -62, -71 late model and TAMD63, -72.
Group 25 Inlet and exhaust system Design and function General All engines are equipped with an exhaust-driven turbocharger which provides the engine with air at raised pressure. This increases the amount of oxygen provided to the engine. More fuel can be burned at the same time as combustion becomes more efficient. The result is higher power, lower specific fuel consumption and cleaner exhaust emissions. The TAMD63P-A, -72A, -72P-A have a turbocharger with wastegate valve (pressure relief valve).
Design and function Wastegate valve The purpose of the wastegate valve is to prevent the small turbine from over-speeding at high engine speeds. The valve is controlled by a pressure box containing a spring-loaded diaphragm which is controlled by boost pressure via a hose from the compressor housing. When a specific boost pressure has been obtained, the wastegate valve opens and allows a proportion of the exhaust gas (6) to bypass the turbine wheel and go straight to the exhaust pipe.
Repair instructions Turbocharger, removal Turbocharger, installation A vital requirement for satisfactory operation of the turbocharger unit is that the lubrication system of the engine is kept in good repair and the correct grade of oil is used (please refer to the workshop manual, “Technical data”, page 15). NOTE! Always find out the reason for turbine replacement when it is changed. Then attend to the reasons for the failure before installing the new turbocharger.
Repair instructions 3 11 Clean the inlet pipe between the compressor and the engine. After a turbine failure, foreign bodies such as fragments of a burst compressor wheel can be left behind, which can smash the new compressor or turbine wheel. Connect the coolant pipes to the turbine housing. Fill up with coolant and vent the system as in the instruction on page 28. 12 4 Connect the exhaust pipe to the turbocharger.
Repair instructions Boost pressure, checking Special tools: 9996065, 9996666, 9998491 When the exhaust emissions are highly sooty or if the engine is very down on power, the function of the turbocharger can be suspected. The boost pressure must always be checked before turbocharger replacement is considered. Note that low boost pressure can depend on other reasons than the turbocharger. Please refer to “Measures for low boost pressure” on page 16.
Repair instructions Actions for low boost pressure ● Air inlet If the boost pressure is still too low, check the following. ● Check that the air inlet to the engine bay is not blocked. Check that the air inlet is correctly dimensioned where appropriate, please refer to the manual. Check the injection advance and high idle speed. Check the function of the injection pump smoke limiter. ● ● Air filter Sealing Check sealing The inlet and exhaust pipes and all hose unions must not have any leaks.
Repair instructions Back pressure, checking Does not apply to TAMD61, -62, -71 late model and TAMD63, -72P-A Special tools: 885151 TAMD61, -62, -71 and TAMD72WJ-A: 884970 TAMD61, -62, -71 late model, TAMD63, -72P-A: 885164 Install the measurement flange (1) on the turbine housing, using gaskets on both sides. Install the exhaust pipe. If the exhaust system has too much back pressure, the boost pressure falls and gives reduced engine power, increased exhaust smoke and higher exhaust temperature.
Repair instructions Exhaust temperature, checking Special tools: 885151 TAMD61, -62, -71 and TAMD72WJ-A: 884970 TAMD61, -62, -71 late model, TAMD63, -72P-A: 885164 Exhaust temperature reflects the thermal loading of the engine. The temperature of the exhaust, relative to the highest permitted exhaust temperature, gives a measure of how well combustion in the engine functions at the loading in question.
Group 26 Cooling system Design and function General The engines are water cooled and have a sealed cooling system. The system is divided into two circuits. In the inner circuit (fresh water system), the coolant is pumped round by a centrifugal coolant pump (circulation pump). On the TAMD63, the engine is driven by a belt from the vibration damper. On the other engines, the pump is gear driven from the timing gear train.
Design and function Hull cooling TAMD61, -62, -71B The hull cooling system on the TAMD61, -62, -71B is a single circuit, sealed fresh water system which cools the engine through contact with the sea water. When the engine is equipped with a hull cooling system, it replaces the ordinary heat exchanger on the engine. The coolant in the system circulates through the reverse gear oil cooler, the aftercooler, engine, turbocharger and engine oil cooler.
Design and function Coolant pump TAMD61, -62, -71, -72 The coolant pump is mounted on the timing drive cover and is driven by a gear wheel from the timing drive system. The pump has three seals. Two coolant seals and an oil seal. The pump rotates on a double row ball bearing. Coolant pump TAMD63 The coolant pump is mounted on the front of the engine block and is driven by a belt from the crankshaft.
Design and function Heat exchanger and aftercooler TAMD61, -62 have one of each, whereas TAMD71, -72 have two series-connected heat exchangers and aftercoolers. The aftercooler(s) and heat exchanger(s) are mounted on the right-hand side of the engine with the heat exchanger(s) in front. In the heat exchanger, the heat from the inner cooling system of the engine (fresh water system) is transferred to the outer circuit (sea water).
Design and function Flow through aftercooler on TAMD63 Flow through heat exchanger TAMD63 1. Aftercooler 2. Heated air from turbocompressor 3. Cooled induction air to engine combustion chambers 4. Sea water inlet (from sea water pump) 5. Sea water outlet (to heat exchanger) 1. 2. 3. 4. 5. 6.
Design and function Oil cooler, engine The lubricating oil transports heat away from the hottest parts of the engine and evens out the temperature differences in the engine as it circulates. In the oil cooler, the heat is taken out of the oil. The oil temperature can thus be kept at a lower level under heavy loading and high engine speeds. This is beneficial for wear since the lubricating properties of the oil are impaired if the oil temperature gets too high.
Repair instructions Draining the coolant NOTE! Before the coolant is drained, the engine must be stopped, the filler cap unscrewed and the sea cocks shut. TAMD63 1 TAMD 61, -62, -71, -72 Open the drain taps and remove the drain plugs on the fresh water and sea water systems of the engine.
Repair instructions 2 Filling coolant Check that all water really runs out. There may be blockages behind the tap/plug which must be cleared out. There is otherwise a risk that the water could remain and cause severe damage. Check whether the installation has further taps or plugs at the lowest points of the cooling water and exhaust pipes. Note! DO NOT open the pressure cap or ventilation tap when the engine is hot.
Repair instructions 3 Sea water filter, inspection and cleaning NOTE! Close the bottom taps and drain any water in the sea water system before cleaning the sea water filter. Volvo Penta sells two kinds of sea water filter. A smaller filter with a transparent perspex (plexiglass) lid and a larger filter with a sheet metal lid.
Repair instructions Heat exchanger/aftercooler, cleaning 4 TAMD61, -62, -71, -72 Note: On engines with hull cooling, there is no heat exchanger. NOTE! Shut the sea cocks and drain the water in the sea water and fresh water systems before doing any work on the cooling system. 1 Undo the screws on the shields above the heat exchanger and aftercooler, and remove them. Remove the clamp rings beneath the housing. Remove the O-rings from the lower seal.
Repair instructions 6 Aftercooler, proof testing If you suspect leakage, the insert of the aftercooler or heat exchanger should be removed from the engine and proof tested separately. Use water for proof testing. Apply the pressure for 1 minute. No pressure drop is permitted. Proof pressure 200 kPa (2 kp/cm2). NOTE! Observe the applicable regulations. Install the inserts in the housing. NOTE! Be careful to ensure that the inserts are installed in the correct positions.
Repair instructions Heat exchanger/aftercooler, cleaning or replacement 6 6 TAMD63 Note: On engines with hull cooling, there is no heat exchanger. Heat exchanger/aftercooler, removal NOTE! Shut the sea cocks and drain the water in the sea water and fresh water systems before doing any work on the cooling system. Remove the screw behind the heat exchanger. 1 Remove both battery cables. 7 2 Remove the 5 remaining screws which hold the heat exchanger and lift it away from the engine.
Repair instructions Aftercooler and heat exchanger, disassembly 17 13 Remove the end panels on the heat exchanger or aftercooler (6 mm socket cap). Remove the O-rings and intermediate rings. 14 Check that the drain hole (1) at the rear of the aftercooler is not blocked. Aftercooler and heat exchanger, assembly 18 Install the inserts in the housing. Use new seal rings. Unscrew the plugs (1) over the two guide balls for the aftercooler insert a few turns (10 mm socket cap). Note.
Repair instructions Aftercooler and heat exchanger, installation 29 20 Lift the aftercooler with inlet pipe into place. Install and tighten all screws for the inlet pipe. 21 Tighten the screws behind the aftercooler. 22 Install the air supply pipe and hoses between the turbocharger and the aftercooler. Note. Carefully dry the mating surfaces of the hose against the turbocharger and air supply pipe to ensure that it is entirely free of grease. Use a suitable solvent.
Repair instructions Oil cooler, reverse gear, cleaning 2 NOTE! Close the sea cocks and drain the water in the sea water system. 1 Open the drain tap on the oil cooler. Remove the cooling hoses to and from the oil cooler. 2 Applies to all engines Unscrew the zinc anode on the reverse gear oil cooler. 3 Remove both the end lids and press the insert out (the insert can only be pulled out on the left side because there is a flange on this side).
Repair instructions 4 3 Change the anode if more than 50% of its original size has been used up. Otherwise clean the anode with emery cloth to remove the oxide coating. NOTE! Do not use a steel wire brush or other steel tools for cleaning, since this can impair the galvanic protection. 5 Install the zinc anode(s) Make sure that there is good metallic contact between the anode and its seat. 6 Shut the drain tap. Remove the pipe between the coolant pump and the heat exchanger.
Repair instructions Coolant pump, replacement TAMD63 6 Remove the coolant pump fastening screws and lift the coolant pump away. NOTE! Close the sea cocks and drain the water in the sea water system. 7 1 Clean all mating surfaces. Install a new seal ring between the coolant pump and the timing drive cover. Apply sealant 1161231-4 to the surface between the coolant pump and the timing drive cover. Drain the coolant from the cooling system. 2 Undo the belt tensioner and remove the drive belt.
Repair instructions Coolant pump, renovation 4 Pump already removed TAMD61, -62, -71, -72 Special tools: 2071, 2268, 2584, 4034, 4090, 6626, 6883, 6884, 6979, 8039, 8107, 8137 Other special equipment: 884985 Disassembly 1 Remove seal ring with extractor 9994090. 5 Remove the lock tab, lid and O-ring. 2 Press the shaft stub out together with bearing and gear wheel, using tool 999 4034. 6 Screw adaptor 999 6883 onto the drive shaft of the coolant pump. Place mandrel 9996884 on mandrel 884985.
Repair instructions Inspection 9 Replace all old components and replace them with the new ones in the repair kit. Check that the pump housing is not damaged before re-assembly. Assembly 7 Put the coolant pump into a hydraulic press, using mandrel 9994034 as a counterhold beneath the shaft stub. Press the gear wheel on using mandrel 9996626 until it contacts the bearing. Note: Use assembly paste on the press fit surfaces. 10 Check that the shaft stub with gear wheel rotates easily.
Repair instructions 12 15 Press the impeller shaft in place. Use 9998107 as a counterhold beneath the gear wheel. Press it until it bottoms. 13 Turn the pump over so that the impeller comes downwards and set it up with the impeller resting on tool 999 8137. Press the pump carefully with tool 9998107 until it contacts the press table. Note: Tool 9998137 gives the correct dimension between the impeller and the pump housing.
Repair instructions Coolant pump, renovation 4 Pump already removed Remove the circlip on the shaft stub and pull the extractor off with a claw puller. TAMD63 5 Special tools: 9992265, 9992679 Disassembly 1 Put the pump housing in a press and press the shaft and impeller out together. 6 Tap out the inner bearing and seal with a drift. 7 Replace the old components by new ones from the repair kit. 8 Put the pump housing in a bench press and put the large circlip on the pump housing shaft stub.
Repair instructions Sea water pump, impeller replacement NOTE! Close the sea cocks and drain the water in the sea water system. 1 Sea water pump replacement NOTE! Close the sea cocks and drain the water in the sea water system. 1 Remove the coolant pipes to and from the pump. 2 Undo the screws in the intermediate flange or pump housing and lift the pump away from the timing cover. 3 When the pump is installed, replace the seal rings by new ones. Remove the end lid of the pump.
Repair instructions Sea water pump, renovation 4 Pump already removed TAMD61, -62, -71, -72 Special tool: 9994034 1 Fix the pump in a vice with soft jaws. 2 Remove the comb by removing the screw on the outside of the housing. 5 Remove the nut and pull the gear wheel off with an extractor. Look after the key. 3 Remove the wear washer 6 Remove the lid and pull the impeller out with a pair of water pump pliers. Remove the circlip.
Repair instructions 7 10 Press the new bearing onto the shaft. Press the shaft and bearing out of the housing. 11 8 Install the seal on the oil side. Drive the seals out of the housing. 9 Press or pull the bearing off the shaft. 42 NOTE! Align the spring side of the bearing against the bearings. 12 Press the shaft and bearing into the housing and install the circlip.
Repair instructions 13 17 Install the throwout ring on the shaft. 14 Grease the shaft and install the impeller by turning it anti-clockwise. Use soapy water to facilitate insertion. Install the small lid on the impeller. Install the pump lid with a new gasket. Install the ceramic portion of the seal, using mandrel 9994034. Put a piece of plastic foil (from a plastic bag) on the ceramic seal to protect it from grease and finger marks. 18 15 Install the carbon track, using mandrel 9994034.
Repair instructions Sea water pump, renovation 4 Pump already removed TAMD63 Special tools: 9992457, 9994034 1 Fix the pump in a vice with soft jaws. Remove the comb by removing the screw. Remove the sealer on the comb and inside the housing. 2 5 Remove the nut and pull the gear wheel off with an extractor. Look after the key. 3 Remove the lid of the impeller housing. Pull the impeller out with a pair of water pump pliers. 44 Remove the wear washer from the pump 6 Remove the large circlip.
Repair instructions 7 11 Remove the small circlip. 8 Remove the circlip and thrust washer. Put the pump in a press and press the shaft out of the pump. 12 9 Install the new bearing, circlip and thrust washer. Install the bearing circlip. 13 Drive the oil seal and ceramic seal out with a drift. 10 Install the oil side seal ring. Put the shaft in a vice with soft jaws. Undo the bearing circlip and pull the bearing off the shaft. NOTE! The seal lip should face the bearing.
Repair instructions 14 17 Install the small circlip. Press it into place with mandrel 9994034. 18 Install the wear washer. Make sure that the dowel in the housing is located in the cutout in the washer. 19 Install the ceramic portion of the seal. NOTE! Put a piece of plastic foil (from a plastic bag) on the ceramic seal to protect it from grease. It is easiest to install with mandrel 9992457. 15 Apply Permatex® No. 77 around the screw hole on top of the comb and install the comb.
Repair instructions Thermostat replacement 7 Special tool: 9996863 Put the new, or checked and approved thermostat into the housing and install the lid. Use new seal rings. 1 Drain the requisite amount of coolant. 2 Shut the fuel taps and remove the fuel filters from the thermostat housing lid. 8 Install the fuel filters. Open the fuel taps and vent the fuel system if necessary, in accordance with the “Group 23, Fuel System” instruction in the workshop manual on page 39. 9 3 Top up with coolant.
Repair instructions Thermostat, function check A function check should be done before the thermostat is replaced. 3 Check after at least ½ minute that the thermostat is still closed. 1 Check that the thermostat closes fully. Hold the thermostat up against the light and check that no air gap is visible at the parting line. 4 If the thermostat does not close fully, it must be replaced.
Report form Do you have any complaints or other comments about this manual. Please make a copy of this page, write your comments down and send them to us. The address is at the bottom. We would prefer you to write in English or Swedish. From: ............................................................................ ...................................................................................... ...................................................................................... .................
7738383-4 English 4–1997