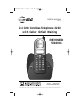
2230_book_1ATT 5/10/01 8:25 PM 1 Page ii USER’S MANUAL Part 2 2.4 GHz Cordless Telephone 2230 with Caller ID/Call Waiting REVISED 5/10/01 Please also read Part 1 — Important Product Information AT&T and the globe symbol are registered trademarks of AT&T Corp. licensed to Advanced American Telephones.
230_book_1ATT 5/10/01 8:25 PM Page iii © 2001 Advanced American Telephones. All rights reserved. Printed in China.
2230_book_1ATT 5/10/01 8:25 PM Page 1 CONTENTS TO COME
2230_book_1ATT 5/10/01 8:25 PM Page 2
2230_book_1ATT 5/10/01 8:25 PM Page 3 BEFORE YOU BEGIN About the Base and the Charger This cordless product provides you with two cordless handsets, a base station and a charger. You can charge either handset in the base or in the charger. You’ll need to connect the base to both AC power and a modular telephone jack. You’ll connect the charger to AC power only. For more installation information, please see INSTALLATION in this User Manual.
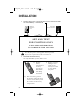
2230_book_1ATT 5/10/01 8:25 PM Page 4 INSTALLATION 1 Connect the power cord to the base and an electrical outlet not controlled by a wall switch. Standard electrical outlet Modular telephone jack 2 Connect the telephone line cord. ART AND TEXT FOR POSITION ONLY STILL NEED INFORMATION TO COMPLETE THIS SECTION Use only the power cord supplied with this product. If you need a replacement, call 1 800 222-3111. 3 Install the handset battery. Use only AT&T Battery 2401, SKU# 91077.
2230_book_1ATT 5/10/01 8:25 PM Page 5 INSTALLATION 4 5 Charge the handset battery. • Place the handset in the base (or a remote charging stand, purchased separately). • Charge the battery at least 12 hours. After the first charge, the battery will quick charge in only eight hours. Check for dial tone. • After the batteries are charged, lift the handset and press P; you should hear a dial tone. Belt Clip Attach belt clip to the cordless handset (optional).
2230_book_1ATT 5/10/01 8:25 PM Page 6 FEATURE SETUP Feature Setup Menu When you set features marked with * you are setting the feature for BOTH handsets. All other features must be set separately at each handset. Press to return to the previous menu item. NOTE: If you wait more than 30 seconds without pressing a key, the handset returns to the standby screen. Handset Volume Adjusting handset volume will not affect the volume of what the other party hears. Default setting is 3.
2230_book_1ATT 5/10/01 8:25 PM Page 7 FEATURE SETUP 4 5 Use the keypad to enter a volume setting (0 – 6) — OR — Press < or > to display desired setting. Press S to save displayed setting. Ring Pattern The external ring pattern sets which ringer you hear when you have an outside call. The internal ring pattern sets which ringer you hear when you have an intercom call from the other handset. External ring pattern default setting is 0; internal ring pattern default setting is 1. 1 Press S. 2 Press 4.
2230_book_1ATT 5/10/01 8:25 PM Page 8 FEATURE SETUP Key Click When this feature is on, each key press makes a sound, except when the keypad is locked. Default setting is ON. 1 Press S. 2 Press 6. The screen displays >KEY CLICK KEY LOCK 3 4 5 Press S. Press < or > to display ON or OFF. Press S to save the displayed setting. Key Lock When this feature is on, the keypad cannot be used to dial calls. You can still answer calls, but when the call is ended, the keypad lock is reactivated.
2230_book_1ATT 5/10/01 8:25 PM Page 9 FEATURE SETUP Handset Name You can customize the handset to display a name or word of your choice in place of the READY standby screen. The default setting is READY. 1 Press S. 2 Press 8. The screen displays >HANDSET NAME LANGUAGE 3 4 5 Press S. Use the chart on page XX to enter a handset name. Press S to save the displayed name. Language Setting You can set each handset so the display appears in English or Spanish. The default setting is English. 1 Press S.
2230_book_1ATT 5/10/01 8:25 PM Page 10 FEATURE SETUP Set Dial Mode* This phone comes set for touch tone (DTMF) dialing. If you have dial pulse (rotary) service, set the dial mode to PULSE. 1 Press S. 2 Press 1 1. The screen displays >DIALING FLASH TIME 3 Press S. The screen displays 4 5 6 Press S. Press < or > to display DTMF or PULSE. Press S to save displayed setting. >DIAL METHOD FLASH TIME Set Flash Time Some phone systems require longer or shorter tones when sending touch tone signals.
2230_book_1ATT 5/10/01 8:25 PM Page 11 TELEPHONE OPERATION Making a Call 1 Press P, then dial the number — OR — Dial the number, then press P. 2 Press P again to end the call. Answering a Call 1 Press P to answer a call. 2 Press P again to end the call. NOTE: If you have the Auto Answer feature turned on, you can answer a call by lifting the handset from the base or charger. Flash/Call Waiting 1 Press F to connect to the new call when you receive a call-waiting signal.
2230_book_1ATT 5/10/01 8:25 PM Page 12 TELEPHONE OPERATION Page/Handset Locator Page the handsets from the base by pressing L. The handsets will sound a repeating tone. Cancel the page by pressing any key on the handset, or wait 30 seconds. Transferring a Call You can transfer a call from one handset to the other. 1 Press I (your call is put on hold) to signal the second handset. 2 At the second handset, press P to take the call. 3 Place the first handset in the base or charger, or press P.
2230_book_1ATT 5/10/01 8:25 PM Page 13 TELEPHONE PHONE BOOK This telephone can store up to 20 telephone numbers and names. Storing a Number and Name in Phone Book 1 2 3 Press m. Press P. Enter the telephone number (up to 24 digits). 4 5 Press P. Enter a name connected with this number, using the chart below. 6 7 Press m. Enter a location number (01 – 20). 8 Begin at Step 2 to enter another telephone number and name — OR — Press to exit. FOR POSITION ONLY We need a screen illustration here.
2230_book_1ATT 5/10/01 8:25 PM Page 14 TELEPHONE PHONE BOOK Dialing a Number in Phone Book 1 2 3 Press m. Enter the memory location number (01 – 20) — OR — Press < or > to scroll through memory locations. Press P to dial the displayed number. Editing/Deleting a Number in Phone Book 1 2 3 14 Press S > S. Press < or > to scroll through memory locations. Press to erase a digit — OR — Press and hold to delete entire telephone number.
2230_book_1ATT 5/10/01 8:25 PM Page 15 CALLER ID OPERATION Caller’s name Caller’s telephone number FOR POSITION ONLY We need a screen illustration here with all icons called out, and basic caller id screen showing name, number, place in call history, new or repeat, etc. Time of call Position of call in Calls Log Date of call Reviewing Call History 1 Press S twice. The screen displays the most recent call in call history (call 1 is the most recent call).
2230_book_1ATT 5/10/01 8:25 PM Page 16 CALLER ID OPERATION Storing a Call Record in Phone Book You can store a number received by Caller ID in the Telephone Phone Book. 1 Press S twice. The screen displays the most recent call in call history (call 1 is the most recent call). 2 Press < or > to scroll through call history. 3 Press S to store displayed number in phone book. Display Dial Press P to dial a number displayed in call history.
2230_book_1ATT 5/10/01 8:25 PM Page 17 ART AND TEXT FOR POSITION ONLY BATTERIES STILL NEED INFORMATION TO COMPLETE THIS SECTION Battery Life Battery life depends on how far the handset is from the base, and other environmental conditions. NOTE: For optimum performance, charge your handset on the base or charger every night. Charge the Handset Battery Pack • • • • • This battery should remain charged for up to five days.
2230_book_1ATT 5/10/01 8:25 PM BATTERIES Page 18 ART AND TEXT FOR POSITION ONLY STILL NEED INFORMATION TO COMPLETE THIS SECTION Replace the Handset Battery Pack 1 2 Install the handset battery. Use only AT&T Battery 2401, SKU# 91077. Charge the handset battery. • Place the handset in the base or charger. • Charge the battery at least 12 hours. After the first charge, the battery will quick charge in only eight hours.
2230_book_1ATT 5/10/01 8:25 PM Page 19 IN CASE OF DIFFICULTY section not complete If you have difficulty operating this phone, try the suggestions below. For Customer Service, visit our website at www.telephones.att.com or call 1 800 222–3111. Please retain your receipt as your proof of purchase. If the phone does not work at all, check these items first: • Make sure the power cord is plugged into the base and an electrical outlet not controlled by a wall switch.
30_book_1ATT 5/10/01 8:25 PM Page 20 IN CASE OF DIFFICULTY section not complete If you hear noise or interference when using the phone: • • • You may be out of range. Move closer to the base. Household appliances plugged into the same circuit as the base can sometimes cause interference. Try moving the appliance or the base to another outlet. The layout of your home or office may be limiting the operating range. Try moving the base to another location, preferably on an upper floor.