DTU193_Manual.
DTU193_Manual.fm Page -2 Monday, September 15, 2008 2:42 PM DTU-1931A Installation Guide & User’s Manual Version 1.1, September 15, 2008 Copyright © Wacom Co., Ltd., 2008 All rights reserved. No part of this manual may be reproduced except for your express personal use. Wacom reserves the right to revise this publication without obligation to provide notification of such changes. Wacom does its best to provide current and accurate information in this manual.
DTU193_Manual.
DTU193_Manual.
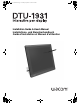
DTU193_Manual.fm Page 1 Monday, September 15, 2008 2:42 PM INTRODUCTION AND OVERVIEW The Wacom® DTU-1931 pen display combines the benefits of a Liquid Crystal Display (LCD) with the control, comfort, and productivity of Wacom’s cordless, battery-free pen technology. This gives you a direct pen-on-screen interface for your computer. The basic components of the DTU-1931 include a Wacom pen tablet internally mounted behind a 19.0" diagonal TFT color display, and a Wacom pen.
DTU193_Manual.fm Page 2 Monday, September 15, 2008 2:42 PM PRECAUTIONS To ensure the safe usage of your product, be sure to follow all instructions, cautions, and warnings found within this manual. Failure to do so could cause the loss of data or damage to your computer. Failure to do so could also void your warranty, in which case Wacom shall have no responsibility to repair or replace the product.
DTU193_Manual.fm Page 3 Monday, September 15, 2008 2:42 PM USAGE WARNING Only use the power adapter that came with the DTU-1931. If a different type of power adapter is used, the DTU-1931 will not work properly or may be damaged. Using a different type of power adapter also has the potential to result in fire. Use of a different power adapter will void your warranty. CAUTION Be sure to use a grounded power source when applying power to the DTU-1931.
DTU193_Manual.fm Page 4 Monday, September 15, 2008 2:42 PM CAUTION Do not put heavy articles on the pen display or push against it with a strong force; this may damage the display screen or bend the stand. CAUTION Do not place heavy articles on the DTU-1931 cabling, repeatedly bend the cables sharply, or apply heavy stress to the cable connectors; this may damage the unit or cabling. CAUTION If the pen tip becomes sharp or angular, it may damage the coating on the display screen.
DTU193_Manual.fm Page 5 Monday, September 15, 2008 2:42 PM CONTENTS Introduction and overview 1 . . . . . . . . . . . . . . . . . . . . . . . . . . . . . . . . . . . . . . . . . Precautions . . . . . . . . . . . . . . . . . . . . . . . . . . . . . . . . . . . . . . . . . . . . . . . . . . . . .2 Physical location . . . . . . . . . . . . . . . . . . . . . . . . . . . . . . . . . . . . . . . . . . . . . .2 Environment . . . . . . . . . . . . . . . . . . . . . . . . . . . . . . . . . . . . . . . . . . . . . .
DTU193_Manual.fm Page 6 Monday, September 15, 2008 2:42 PM About the Windows Vista Tablet PC Input Panel . . . . . . . . . . . . . . . . . Uninstalling the DTU-1931 . . . . . . . . . . . . . . . . . . . . . . . . . . . . . . . . . . . . . Product specifications . . . . . . . . . . . . . . . . . . . . . . . . . . . . . . . . . . . . . . . . . General specifications . . . . . . . . . . . . . . . . . . . . . . . . . . . . . . . . . . . . . Display . . . . . . . . . . . . . . . . . . . . . . . . . . . . . . .
DTU193_Manual.fm Page 7 Monday, September 15, 2008 2:42 PM YOUR NEW DTU-1931 PACKAGE CONTENTS Carefully unpack all items and place them on a stable desktop or work surface. Verify the contents are complete.
DTU193_Manual.fm Page 8 Monday, September 15, 2008 2:42 PM PEN DISPLAY COMPONENTS Familiarize yourself with the many features and components of your product. FRONT VIEW On Screen Display (OSD) controls These controls enable you to adjust a variety of display settings. See Adjusting the display on page 24. Status LED Lights blue when the pen is in the active area of the pen display tablet and the pen tip is pressed. The USB cable must also be plugged into an active USB port before the LED will light.
DTU193_Manual.fm Page 9 Monday, September 15, 2008 2:42 PM REAR VIEW Pen storage compartment To store, insert one end of the pen into either side of the compartment. Then gently press the other end of the pen into the compartment. To remove, press in on either end of the pen. This will pop the opposite end out of the compartment so you can remove the pen. Kensington security slot Allows easy attachment of a security cable.
DTU193_Manual.fm Page 10 Monday, September 15, 2008 2:42 PM ADJUSTING DISPLAY INCLINE • To open the display stand, pull up on the adjustment lever and swing the stand out to the desired incline. Release the lever to lock the stand in place. • To close the stand, pull up on the adjustment lever and gently move the stand back into the closed position until the latch catches. Release the lever to lock the stand in place.
DTU193_Manual.fm Page 11 Monday, September 15, 2008 2:42 PM INSTALLATION SYSTEM REQUIREMENTS Before installing the DTU-1931, make sure your computer meets the following minimum system requirements: • PC. Windows Vista™, Vista X64, XP, or XP x64. VGA or DVI video connector, available USB port, and CD-ROM drive. • Macintosh. OS X, v10.4 or greater. VGA or DVI video connector, available USB port, and CD-ROM drive. ADC connectors require an ADC to DVI adapter, not included.
DTU193_Manual.fm Page 12 Monday, September 15, 2008 2:42 PM STEP1: LCD MONITOR INSTALLATION In this step, the DTU-1931 is installed as a monitor on your system. IMPORTANT: Do not connect the USB data cable until instructed to do so. • Turn off your computer. Caution: Never connect or disconnect the video or power cables while your computer or DTU-1931 are powered on – this can damage the display or video card.
DTU193_Manual.fm Page 13 Monday, September 15, 2008 2:42 PM LCD MONITOR CABLING DIAGRAM CAUTION Make sure your video card has a VGA or DVI connector, and that you correctly set the DVI/VGA switch for the video connector you are using. Do not attach the USB data cable until instructed to do so. –A– VGA or DVI video card DVI/VGA switch Use the DVI-I OUT port to connect a second device, such as a projector or monitor, that mirrors the pen display.
DTU193_Manual.fm Page 14 Monday, September 15, 2008 2:42 PM • Next, turn on your computer. For Windows systems: The DTU-1931 will automatically install as a default monitor. If you want the DTU-1931 to be identified as a DTU-1931 display and if you want to install the color calibration profile for the DTU-1931, follow the instructions below to update the display driver: 1. Open the CONTROL PANEL folder. • For Windows Vista, under APPEARANCE and PERSONALIZATION select ADJUST SCREEN RESOLUTION.
DTU193_Manual.fm Page 15 Monday, September 15, 2008 2:42 PM • As necessary, configure the display control panel settings for the proper size and color resolution. The maximum (native) resolution of the DTU-1931 is 1280 x 1024 pixels. The display size and color resolution may be constrained by the capabilities of your video card. See the video card manufacturer’s documentation for details.
DTU193_Manual.fm Page 16 Monday, September 15, 2008 2:42 PM STEP 2: PEN TABLET INSTALLATION USB CABLE INSTALLATION Plug the square end of the USB cable into the DTU-1931 port labeled USB. Plug the other end into an available USB port on your computer or on a USB hub attached to your computer. See – E – in the diagram below. Next, move on to the Software installation on page 17.
DTU193_Manual.fm Page 17 Monday, September 15, 2008 2:42 PM SOFTWARE INSTALLATION IMPORTANT: You MUST install the Wacom pen tablet driver software for correct pen-onscreen functionality. To install the tablet software: • Save your work and close all open applications. Temporarily disable any virus protection programs. • Insert the Installation CD into your computer’s CD-ROM drive. If the software installer menu does not automatically display, double-click on the Install icon located on the CD.
DTU193_Manual.fm Page 18 Monday, September 15, 2008 2:42 PM WORKING WITH YOUR DTU-1931 As you work with the DTU-1931 pen display you can rest your hand lightly on the display screen, just as if it were a drawing board or sheet of paper. Because the DTU-1931 surface will be a little higher than your desk, consider adjusting the height of your desk or chair to assure comfortable use of the device. SETTING UP YOUR WORK AREA To minimize fatigue, organize your work area so you can work comfortably.
DTU193_Manual.fm Page 19 Monday, September 15, 2008 2:42 PM USING THE PEN The pen is cordless, battery-free, and senses the amount of pressure you apply to the tip. Hold the pen like you would a normal pen or pencil. As you work with the DTU-1931, you can rest your hand lightly on the display screen, just as if it were a drawing board or sheet of paper. You can tilt the pen in any way that feels most comfortable for drawing. PEN COMPONENTS Eraser: When equipped and the eraser is brought within 5 mm (0.
DTU193_Manual.fm Page 20 Monday, September 15, 2008 2:42 PM BASIC PEN OPERATIONS Pointing and selecting: Move the pen slightly above the DTU-1931 display screen to position the screen cursor; you do not need to touch the display surface. The cursor jumps to the location where you place the pen. Press the pen tip on the display screen to make a selection. Note: You must calibrate the pen display tablet to correctly align the screen cursor with the pen tip. (See Calibrating the DTU-1931 on page 23.
DTU193_Manual.fm Page 21 Monday, September 15, 2008 2:42 PM CUSTOMIZING After you master the basics of using your pen on the DTU-1931 pen display, you may want to customize the way the pen works. The Wacom Tablet control panel makes it easy to customize the DTU-1931 and pen. OPENING THE CONTROL PANEL To open the control panel, use the DTU-1931 pen on the pen display tablet: Windows. Click on the Windows START button and choose ALL PROGRAMS.
DTU193_Manual.fm Page 22 Monday, September 15, 2008 2:42 PM CUSTOMIZATION BASICS This manual only covers the basics of customizing the DTU-1931. For detailed information see the electronic Software User’s Manual. Use the Wacom Tablet control panel to customize your product. When you open the control panel, an icon for the pen is displayed in the TOOL list and the appropriate tabs are displayed. To customize the pen, make your changes to the tab controls.
DTU193_Manual.fm Page 23 Monday, September 15, 2008 2:42 PM CALIBRATING THE DTU-1931 You must calibrate the pen display tablet in order to align the screen cursor with the position of the pen on the display screen. This is required to adjust for parallax caused by the display screen cover glass and coating. Set the DTU-1931 in its working position, then follow the procedure below. IMPORTANT: When using a VGA connection, make sure the display is properly adjusted before calibrating the tablet.
DTU193_Manual.fm Page 24 Monday, September 15, 2008 2:42 PM ADJUSTING THE DISPLAY FACTORY PRESETS, AUTO-SYNC, AND USER SETTINGS Factory presets: For optimal display quality, set your video card to the DTU-1931’s native resolution of 1280 x 1024 pixels (SXGA). See page 44 for signal specifications. Auto-sync: The DTU-1931 automatically synchronizes to the incoming signal. The auto-sync function sets the horizontal and vertical screen position, as well as pitch and phase.
DTU193_Manual.fm Page 25 Monday, September 15, 2008 2:42 PM When you open the On Screen Display, the menu options are displayed. LANGUAGE menu options allow you to choose the language in which the OSD menu will be displayed. OSD POSITION menu options include: • VERTICAL. Adjusts the vertical position of the OSD menu window. • HORIZONTAL. Adjusts the horizontal position of the OSD menu window. • TRANSPARENCY. Changes the opaqueness of the OSD menu background. DISPLAY menu options include: • BRIGHTNESS.
DTU193_Manual.fm Page 26 Monday, September 15, 2008 2:42 PM SCALING menu options include: • FULL. Resizes the image to fill the whole screen. • ASPECT. Resizes the image to fill as much of the screen as possible while maintaining the correct aspect ratio. • 1:1. Displays the image at the actual resolution. OTHER menu options include: • PHASE. (VGA only.) Synchronizes the signal timing of the pen display to that of your graphics card.
DTU193_Manual.fm Page 27 Monday, September 15, 2008 2:42 PM ADJUSTING PITCH AND PHASE (VGA ONLY) Some computers and video cards may not allow the auto-sync function to fully work when the DTU-1931 is first connected. If some portion of text appears blurred, use the AUTO ADJUST option to automatically synchronize to the incoming signal (see the description about auto-sync on page 24). If the image is still blurred, adjust pitch and phase by following the procedure below.
DTU193_Manual.fm Page 28 Monday, September 15, 2008 2:42 PM TROUBLESHOOTING Most of the time your pen display tablet will work flawlessly. But if you are having trouble, Wacom recommends you do the following: 1. If the Wacom tablet driver failed to load properly, first perform the recommended action in any error message that may appear on your screen. If that does not solve the problem, review the troubleshooting procedures in this chapter. 2.
DTU193_Manual.fm Page 29 Monday, September 15, 2008 2:42 PM 3. Verify that the tablet and pen are working: • • Press the pen tip against the display and verify that the status LED lights blue. • Be sure that the USB port to which you are connecting has not been disabled. It may be necessary to check your system BIOS setting to verify that you have connected the DTU-1931 to an active USB port.
DTU193_Manual.fm Page 30 Monday, September 15, 2008 2:42 PM TESTING YOUR PEN If the pen does not work as you expect, it is a good idea to first check the assigned functions or reset the pen to its default conditions. A quick way to reset a pen to its default settings is to remove it from the TOOL list by clicking on the list’s [ – ] button. After the pen has been removed, place it back onto the display screen surface and the pen will be re-added to the TOOL list with its default settings.
DTU193_Manual.fm Page 31 Monday, September 15, 2008 2:42 PM DISPLAY TROUBLESHOOTING If you encounter problems with the DTU-1931 display, refer to the following tables; your problem may be described here and you can try the solution offered. For additional information about color issues, see the documentation that came with your operating system or applications. GENERAL DISPLAY PROBLEMS No display. The power LED is off.
DTU193_Manual.fm Page 32 Monday, September 15, 2008 2:42 PM When a still image is displayed for a long period of time without refreshing the screen, an after-image remains for a short period of time. • Use a screen saver or other power management feature. Color quality is inaccurate. • • Open the OSD menu and select the RESET option. • Any changes to the contrast setting should be made in small increments as changes in contrast may affect color accuracy.
DTU193_Manual.fm Page 33 Monday, September 15, 2008 2:42 PM PEN TABLET TROUBLESHOOTING If you encounter problems with the DTU-1931 pen display tablet, see the following tables. Your problem may be described here, and you can try the solution offered. Be sure you refer to the DTU-1931 Read Me file for the latest information. For additional information, visit Wacom’s web site at http://www.wacom.com/productsupport. GENERAL PROBLEMS The computer does not have an available USB port.
DTU193_Manual.fm Page 34 Monday, September 15, 2008 2:42 PM You notice a delay at the beginning of pen or inking strokes. Open the Wacom Tablet control panel and go to the PEN tab. Try decreasing the TIP DOUBLE CLICK DISTANCE. If that does not work, try dragging the TIP DOUBLE CLICK DISTANCE slider to the OFF position in order to turn off double-click assist. You have to press hard with the pen when clicking, drawing, or writing. Open the Wacom Tablet control panel and go to the PEN tab.
DTU193_Manual.fm Page 35 Monday, September 15, 2008 2:42 PM When using the pen display tablet on a multiple monitor system, you cannot use the pen to control the other monitor(s). Set a pen button to DISPLAY TOGGLE, and then press that button to cycle between pen control for the DTU-1931 and your other displays. See the electronic Software User’s Manual for details on working with DISPLAY TOGGLE. You can also use your pen to control the other monitors in mouse mode.
DTU193_Manual.fm Page 36 Monday, September 15, 2008 2:42 PM WINDOWS-SPECIFIC PROBLEMS After changing right- and left-handed settings in the computer’s mouse control panel, the pen tip no longer functions properly. Restart Windows for your Wacom tool settings to be correctly recognized. MACINTOSH-SPECIFIC PROBLEMS At startup, a dialog box appears telling you that either the driver failed to load or the tablet preferences have not yet been created. The pen display tablet was not detected at startup.
DTU193_Manual.fm Page 37 Monday, September 15, 2008 2:42 PM TECHNICAL SUPPORT OPTIONS If you have a problem with your DTU-1931 pen display, first check the appropriate Installation section in this guide to make sure the unit is installed correctly. Then review the Troubleshooting procedures. If you cannot find the answer in this guide, you may find updated information about your problem in the appropriate Read Me file for your platform (located on the Installation CD).
DTU193_Manual.fm Page 38 Monday, September 15, 2008 2:42 PM OBTAINING DRIVER DOWNLOADS Wacom periodically updates the pen tablet software driver to maintain compatibility with new products. If you are having a compatibility problem between your DTU-1931 pen display and a new hardware or software product, it may be helpful to download a new Wacom tablet software driver (when available) from the Internet. USA, Canada, Central and South America Worldwide Web: http://www.wacom.
DTU193_Manual.fm Page 39 Monday, September 15, 2008 2:42 PM APPENDIX CARING FOR THE DTU-1931 Keep the pen and the DTU-1931 LCD screen surface clean. Dust and dirt particles can stick to the pen and cause excessive wear to the display screen surface. Regular cleaning will help prolong the life of your LCD screen surface and pen. Keep the DTU-1931 and pen in a clean, dry place and avoid extremes in temperature. Room temperature is best. The DTU-1931 and pen are not made to come apart.
DTU193_Manual.fm Page 40 Monday, September 15, 2008 2:42 PM USING AN ALTERNATE MOUNT OR STAND If you will be using the DTU-1931 in an installation that requires the use of an alternate mounting platform, you can remove the adjustable stand from the unit and mount the pen display onto any mount arm or stand conforming to the VESA 100 mm standard. Mounting screws that are 4 mm wide with a 0.7 mm pitch (M4 Regular), with a screw clearance depth of 15 mm are required.
DTU193_Manual.fm Page 41 Monday, September 15, 2008 2:42 PM PEN AND DIGITAL INK CAPABILITIES IN WINDOWS VISTA Microsoft Windows Vista provides extensive support for pen* and touch input. When using the DTU-1931 with a computer running Windows Vista, your experience is enhanced by powerful note taking, handwriting recognition, fast navigation, and other digital inking options designed to give you quick, intuitive results with the Wacom pen. • Note taking.
DTU193_Manual.fm Page 42 Monday, September 15, 2008 2:42 PM ABOUT THE WINDOWS VISTA TABLET PC INPUT PANEL The Input Panel enables you to use handwriting or an on-screen keyboard to directly enter text with your Wacom pen. There are different ways to launch the Input Panel: • Click on the Input Panel icon which appears when you move the screen cursor into a text entry area. • • Click on the Input Panel tab, located by default on the left edge of the display screen.
DTU193_Manual.fm Page 43 Monday, September 15, 2008 2:42 PM UNINSTALLING THE DTU-1931 Follow the appropriate procedure below to remove the Wacom tablet software and the DTU-1931 from your system. IMPORTANT: When you remove the Wacom tablet software from your system, your Wacom tablet will no longer operate with full tablet functionality but will continue to function as a mouse device. Windows: 1. Click on the Windows START button and open the CONTROL PANEL. 2.
DTU193_Manual.fm Page 44 Monday, September 15, 2008 2:42 PM PRODUCT SPECIFICATIONS GENERAL SPECIFICATIONS Physical dimensions (W x D x H) 452.0 x 398.0 x 55.5 mm (17.8 x 15.7 x 2.2 in), excluding stand Weight 7.05 kg (15.
DTU193_Manual.fm Page 45 Monday, September 15, 2008 2:42 PM POWER ADAPTER Input voltage 100 to 240 VAC, 50/60 Hz Output voltage 12 VDC, 5.0 A (max) PEN (MODEL UP-817E) Pressure levels 512 Pen tip travel 0.2 mm (0.008 in) or less Physical dimensions (L x D) 147.5 x 12.5 mm (5.81 x 0.49 in) Weight 12 g (0.
DTU193_Manual.fm Page 46 Monday, September 15, 2008 2:42 PM RADIO AND TELEVISION INTERFERENCE The equipment described in this manual generates, uses, and can radiate radio-frequency energy. If it is not installed and used properly – that is, in strict accordance with applicable instructions – it may cause interference with radio and television reception. FEDERAL COMMUNICATIONS COMMISSION (FCC) NOTICE This device complies with Part 15 of the FCC Rules.
DTU193_Manual.fm Page 47 Monday, September 15, 2008 2:42 PM INDUSTRY CANADA (CANADA ONLY) Industry Canada, Class B “This Class (B) digital apparatus complies with Canadian ICES-003” “Cet appareil numérique de la classe (B) est conforme à la norme NMB-003 du Canada.
DTU193_Manual.
DTU193_Manual.fm Page 49 Monday, September 15, 2008 2:42 PM WARRANTY SERVICE IN THE U.S.A. AND CANADA To obtain Warranty service within the U.S. or Canada contact: Wacom Technical Support Phone: 1.360.896.9833 Fax: 1.360.896.9724 Inquiry form: http://www.wacom.com/productsupport/email.cfm E-mail: support@wacom.com WARRANTY SERVICE OUTSIDE OF THE U.S.A. AND CANADA For products purchased or used outside of the United States and Canada, the warranty period is one (1) year from the date of original purchase.
DTU193_Manual.fm Page 50 Monday, September 15, 2008 2:42 PM WARRANTY (EUROPE, AFRICA AND MIDDLE EAST) SOFTWARE LICENSE AGREEMENT Important Notice to Customers This product contains copyrighted computer programs (“software”) which are the inalienable intellectual property of Wacom Europe GmbH (“Wacom”). This software is both integrated within the product and also contained on the accompanying data carrier.
DTU193_Manual.
DTU193_Manual.fm Page 52 Monday, September 15, 2008 2:42 PM This page intentionally left blank.