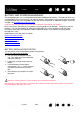
Contents Index 1 User’s manual for Windows & Macintosh ® ® Inkling (model MDP-123) Before you start Setting up Sketching Saving your work Sketch management Troubleshooting Contents Index 1
Contents Index 2 InklingTM User’s Manual for Windows® & Macintosh® Version 1.0, Rev K1010 Copyright © Wacom Co., Ltd., 2010 All rights reserved. No part of this manual may be reproduced except for your express personal use. Wacom reserves the right to revise this publication without obligation to provide notification of such changes. Wacom does its best to provide current and accurate information in this manual.
Contents Index 3 CONTENTS About the manual 4 YOUR INKLING Inkling digital pen Inkling receiver Inkling charging case Battery and power management Battery installation for pen Receiver battery information Charging batteries Battery life information Power saving features Status lights Replacing the pen cartridge 5 6 7 8 9 9 10 11 12 12 13 14 WORKING WITH INKLING Preparing to sketch Attaching the receiver to paper Sketching Holding the pen Sketching with pressure and tilt Adding layers Changing pages Vi
Contents Index 4 ABOUT THE MANUAL This manual provides quick access to information about Inkling. The information is common to Windows and Macintosh computers and Windows screen captures are shown, unless otherwise noted. • Go directly to contents or index topics by clicking on them. • Your Inkling is the introductory chapter. It describes the Inkling components and available features. • Working with Inkling will help you to understand how to create digital sketches with Inkling.
Contents Index 5 YOUR INKLING Inkling can be used anywhere you might use a regular pencil, pen, and paper. As you sketch on any kind of paper, Inkling digitally captures your sketches and saves them for uploading to your computer at a later time. Inkling consists of two basic elements: the Inkling digital pen and the Inkling receiver. The pen works with the receiver to digitally capture your sketches. Together, the pen and receiver act like a portable digital sketchbook.
Contents Index 6 INKLING DIGITAL PEN Use the digital pen to write and sketch on regular paper. See sketching. As you work, the Inkling receiver digitally captures your sketches and saves them for uploading to your computer at a later time. Charging contacts See charging batteries. Pen LED See status lights. Grip area Battery compartment See battery installation for pen. Pen tip cone See holding the pen. Replaceable cartridge (pen tip) Uses standard Mini Ballpoint Ink refills.
Contents Index 7 INKLING RECEIVER The receiver can digitally store hundreds of multiple-layer sketches that you create with the Inkling digital pen. The receiver also functions as a standard USB flash drive. See working with Inkling. Power button Press to turn on or off. See also power saving features. New layer button Press to create a new layer. See adding layers. Power, status, and new layer LEDs See status lights. USB port See charging batteries and viewing and uploading a sketch.
Contents Index 8 INKLING CHARGING CASE Store your Inkling components within the charging case. The case is used to charge the pen and receiver. Pen cartridges USB cable Connects the Inkling receiver or charging case to a USB port located directly on your computer, or to a powered USB hub. Pen cartridge extractor See replacing the pen cartridge. Pen and receiver USB port Power input and data connection. See charging batteries and viewing and uploading a sketch.
Contents Index 9 BATTERY AND POWER MANAGEMENT The Inkling digital pen uses a rechargeable Nickel Metal Hydride (Ni-MH) battery. The Inkling receiver uses a rechargeable Lithium-Ion Polymer (Li-Ion Polymer) battery. The batteries have a long life span, but should be replaced when they have exceeded their life span and no longer hold an adequate charge or cannot be charged. See available parts and accessories. Important: Be sure to use only the correct Wacom batteries specified for your product.
Contents Index 10 RECEIVER BATTERY INFORMATION Your Inkling receiver comes with the battery pre-installed. Important: Fully charge the receiver battery before using Inkling for the first time. See charging batteries. Under normal conditions the rechargeable receiver battery will have a long life span. If the battery fails unexpectedly or has outlived its useful life and must be replaced, please contact your local Wacom service provider. Warnings: Choking hazard.
Contents Index 11 CHARGING BATTERIES Important: Before using Inkling for the first time, you should fully charge the pen and receiver batteries. The pen and receiver can be charged separately, or together within the Inkling charging case. The receiver can be charged independently of the charging case, and will charge whenever it is connected to your computer or other powered USB source. When charging, the case or receiver can be connected to a computer, powered USB hub, or AC adapter with USB connector.
Contents Index 12 BATTERY LIFE INFORMATION All batteries age over time and gradually lose their ability to hold a charge. • When you are done working, turn off the Inkling receiver to conserve battery power. • Always charge the receiver when the receiver power LED glows red. Always charge the pen when the pen LED glows red. See charging batteries. • When a battery is no longer capable of holding an adequate charge, it should be replaced.
Contents Index 13 STATUS LIGHTS LEDs indicate the operational status of your Inkling: Pen LED Receiver power LED status is visible through charging case top. Power LED Status LED New layer LED Pen charging status LED INKLING DIGITAL PEN LED INDICATIONS Pen LED Off: Pen not in use, in sleep mode, or battery has fully drained. Green: Pen in use, battery charge okay. Red: Low battery charge. INKLING RECEIVER LED INDICATIONS Power LED Off: Receiver is powered off, or battery has fully drained.
Contents Index 14 REPLACING THE PEN CARTRIDGE The pen cartridge will eventually run out of ink with normal use and need to be replaced. See available parts and accessories. Replacement cartridges Pen cartridge extractor 1. Remove the pen cartridge by first placing the pen tip in the cartridge extractor. Lever the pen slightly to one side. When you feel tension on the pen tip, lift the pen away from the charging case to remove the pen cartridge.
Contents Index 15 WORKING WITH INKLING Inkling gives you the power to create sketches on paper and digitally capture them at the same time. You can use the Inkling Sketch Manager to view, organize, and prepare your sketches before exporting and editing them in your favorite applications. This chapter describes how to use Inkling. It includes information to help you work more comfortably, and to better understand how Inkling interacts with your computer.
Contents Index 16 PREPARING TO SKETCH It is easy to create sketches with Inkling: • Start by attaching the receiver to paper. • Turn on the receiver. The power LED blinks briefly, then glows green when the receiver is ready. • Begin sketching with the pen. • Whenever you feel like adding layers to the sketch, press the new layer button (located on the receiver). Continue to sketch, adding new layers as you desire.
Contents Index 17 ATTACHING THE RECEIVER TO PAPER A new sketch file is created whenever the receiver clip is opened and then closed as you attach the Inkling receiver to a sheet of paper. Attach the receiver to loose sheets, or to pages in a notebook or drawing pad. The receiver can accept up to 10 pages (1 mm or 0.04 inch total thickness) at a time. The Inkling default condition is for placement of the receiver at the top center of an A4/letter sized page in portrait orientation.
Contents Index 18 SKETCHING The Inkling digital pen is cordless and pressure sensitive. As you write and sketch on regular paper with the pen, the Inkling receiver digitally captures your sketches and saves them for uploading to your computer at a later time. Holding the pen Sketching with pressure and tilt HOLDING THE PEN Hold the pen at a comfortable angle like you would a normal pen or pencil. Proper position shown, with fingers on the grip area above the pen tip cone.
Contents Index 19 SKETCHING WITH PRESSURE AND TILT As you sketch on paper, Inkling will digitally capture the variations in pen tip pressure and tilt. Tip: The receiver will automatically turn itself off and save the currently open file after 30 minutes without pen activity. See also status lights. If you make a mistake you can delete unwanted strokes in the Inkling Sketch Manager or export to another application and make changes there.
Contents Index 20 VIEWING AND UPLOADING A SKETCH After you have finished sketching, connect the Inkling receiver to your computer. Upload the files to your computer for further editing. 1. Attach the small end of the provided USB cable to the receiver. Connect the other end to a primary USB port located directly on your computer, or to a powered USB hub. The power LED will glow green or red, depending on battery charge. The Inkling Sketch Manager will open automatically.
Contents Index 21 INKLING SKETCH MANAGER The Inkling Sketch Manager is a software application that enables you to view and work with the sketch files you create using Inkling. This chapter describes how to use the Sketch Manager, and includes information about some of the more difficult concepts.
Contents Index 22 WORKING WITH THE SKETCH MANAGER The Inkling Sketch Manager opens to the PREVIEWER when you connect the Inkling receiver to your computer. You can also open the Sketch Manager by clicking on the Inkling icon. The icon will be located on the Windows taskbar or Macintosh menu bar. Use the PREVIEWER to quickly identify and select your sketches for further action. • Tool tips are available for most Sketch Manager controls.
Contents Index 23 TOOLBAR OPTIONS Within the Inkling Sketch Manager, use the upper toolbar to work with your files, change Inkling settings, and view the user’s manual. UPPER TOOLBAR OPTIONS FILE EDIT VIEW TOOLS (Windows) SKETCH MANAGER (Macintosh) HELP Access file commands, such as OPEN FILE, SAVE, EXPORT TO, and PRINT. Access common editing commands. Toggle the folder tree on or off and change how the sketch file is previewed. Select SETTINGS to work with your Inkling settings. Select PREFERENCES...
Contents Index 24 CONTROL BUTTONS Use the Inkling Sketch Manager controls to operate the software and work with your files. CONTROL BUTTON OPTIONS Available options may vary, depending on the current Sketch Manager view. Move back through folder tree navigation history. Move forward through folder tree navigation history. Zoom in. Zoom out. Rotate selected file counter-clockwise around virtual paper center. Rotate selected file clockwise around virtual paper center. Redo previous action.
Contents Index 25 IDENTIFYING AND OPENING A SKETCH FILE 1. Within the Inkling Sketch Manager, navigate the folder tree to locate sketch files on the Inkling receiver, or on your computer. • New sketch files you have created are saved to the MY SKETCHES folder, located on the receiver. They are sorted by date. • You can browse all directories listed in the tree to locate and work with sketch files in Inkling readable format. Inkling readable file formats include: .wpi and .wac.
Contents Index 26 EDITING AND WORKING WITH LAYERS Sketches you create with the Inkling digital pen and receiver are composed of pen strokes, and can include layers. See adding layers. Use the Inkling Sketch Manager EDITOR to fine-tune a sketch: • Delete pen strokes or layers. Create new layers by splitting or merging existing layers. • Save the modified sketch. Save as or export to another application for further editing. • For more information, visit the Inkling web site for your region.
Contents Index Use the SCRUBBER to isolate strokes within the selected layer(s). To isolate any combination of strokes, move the left or right scrubber heads along the bar. As you move a scrubber head, the pen strokes selected by that scrubber will change color to indicate a grouping of strokes. The number of strokes you have selected are displayed in the left (L) or right (R) strokes counter boxes.
Contents Index 28 Zoom in or out of PLAYER view. Use the PLAYER toolbar controls to see how your sketches were created. Increase or decrease PLAYER speed. Return to PREVIEWER screen. PLAYER TOOLBAR CONTROLS Go to first stroke. Go to previous stroke from current playback location. Play selected file, showing your pen strokes. Note: Strokes may be shown on a stroke-by-stroke basis, or combined and shown in small clusters, depending on how the Inkling software interprets the sketch file. Stop playback.
Contents Index 29 SAVING A SKETCH To save a sketch in Inkling compatible format, click on the Sketch Manager Save Document button. Your files are saved to .wac format. CONVERTING A SKETCH FILE To convert your sketch or a selected sketch layer to a different file format, click on the Sketch Manager Save Document As button. From the upper toolbar you can select FILE and SAVE DOCUMENT AS. Your files are saved to .wac format. You can also select FILE and SAVE DOCUMENT AS DIFFERENT FORMAT.
Contents Index 30 MANAGING INKLING SETTINGS Use the Inkling Sketch Manager to change your Inkling settings. From the upper toolbar choose TOOLS and SETTINGS (Windows) or SKETCH MANAGER and PREFERENCES... (Macintosh). Within the SETTINGS dialog choose a tab and make your changes. Click APPLY or OK to save your changes. All options are available from the PREVIEWER. The GENERAL options are also available when in EDITOR view.
Contents Index 31 SETTINGS TABS PEN Choose options in the PEN tab to define how the pen strokes you make on paper will appear in digital form. • Choose the BALLPOINT DIAMETER of the cartridge that you will use in the Inkling digital pen. This serves as a baseline ink width. Different ball sizes affect the presentation of your strokes in digital form. • DEFAULT BRUSH SIZE sets the size of the pen stroke width in digital form, and is based on the BALLPOINT DIAMETER.
Contents Index 32 SETTINGS TABS CLICK THRESHOLD Use this tab to calibrate your pen click threshold to the inking cartridge. 1. To adjust the click threshold, clip the Inkling receiver to a typical piece of sketching paper and then connect the receiver to your computer using the included USB cable or any other USB to USB Mini-B cable (commonly available). 2. As soon as you connect the receiver to the computer, the pen will start moving the screen cursor. 3.
Contents Index 33 SETTINGS TABS GENERAL You can modify general Inkling settings. • SET DEFAULT LOCATION FOLDER allows you to change the location to which the Inkling Sketch Manager automatically navigates when the application is open and the receiver is not connected to your computer. • SET RECEIVER REAL TIME DOCK is used to set the local date and time of the receiver.
Contents Index 34 UNINSTALLING THE SOFTWARE If you previously installed the Inkling software and would like to remove it from your system, follow the appropriate procedure below. Windows 7 and Vista: Click on the Windows START button and choose CONTROL PANEL. In the CONTROL PANEL window, click on UNINSTALL A PROGRAM. In the dialog box that appears, choose INKLING SKETCH MANAGER. Click UNINSTALL and follow the prompts to remove the software. (If prompted, enter your administrator login name and password.
Contents Index 35 TROUBLESHOOTING Most of the time Inkling will work flawlessly. But if you are having trouble, Wacom recommends you do the following: 1. First perform the recommended action in any error message that may appear on your screen. If that does not solve the problem, review the troubleshooting procedures in this chapter. 2. Look in the troubleshooting tables. Your problem may be described there and you can try the solution offered. 3.
Contents Index 36 TEST YOUR INKLING 1. Verify the pen and receiver are communicating. As you use the pen on paper, the pen LED and the status LED on the receiver should both glow green to indicate correct functionality. See status lights. If not, then check that you have turned the receiver on by pressing the power button. Go to the next step. 2. Check the receiver. • If the power LED is red or off, charge the receiver battery. See charging batteries.
Contents Index 37 TROUBLESHOOTING TABLES If you encounter problems with Inkling, refer to the following tables. Your problem may be described here and you can try the solution offered. Be sure to check the Read Me file for the latest information updates. For additional information, visit Wacom’s web site at http://www.wacom.com/productsupport. GENERAL PROBLEMS The receiver power LED is red or off. The computer does not have an available USB port. The receiver battery does not charge.
Contents When working in online mode, double-clicking is difficult. The pen does not draw on paper. The pen writes on paper, but does not seem to communicate with the Inkling receiver. Sketches are not always recorded, or some strokes are missing. Some strokes or portions of strokes are missing from the sketch closest to where the receiver was located on the paper. The computer does not go to sleep when working with Inkling in online mode. The computer does not recognize the receiver.
Contents Index 39 TECHNICAL SUPPORT OPTIONS If you have a problem with Inkling, first check the installation guide to be sure Inkling is installed correctly. Then review the troubleshooting procedures. If you cannot find the answer in this manual, you may find updated information about your problem in the appropriate Read Me file for your platform (located on the Inkling receiver). You can also check the product FAQs (Frequently Asked Questions) on the Wacom web site for your region.
Contents Index 40 OBTAINING SOFTWARE DOWNLOADS Wacom periodically updates the Inkling software to maintain compatibility with new products. If you are having a compatibility problem between Inkling and a new hardware or software product, it may be helpful to download the latest Inkling software (when available) from the Internet. USA, Canada, Central and South America Worldwide Web: http://www.wacom.com/productsupport Software updates Europe, Middle East and Africa Worldwide Web: http://www.wacom.
Contents Index 41 APPENDIX This section contains tips on caring for Inkling, instructions on how to use Inkling as a computer navigation tool, and more. Care for Inkling Online mode Product information Available parts and accessories Ordering parts and accessories CARE FOR INKLING Keep your Inkling components clean. Regular cleaning with a soft, damp (not wet) cloth will help to prolong the life of your product. You can also slightly dampen the cloth using a very mild soap diluted with water.
Contents Index 42 ONLINE MODE Whenever the Inkling receiver is properly connected to your computer, you can use the Inkling digital pen to point, click, double-click, and navigate your computer. 1. Clip the receiver to the top center of a single or notepad sheet of paper. 2. Using the provided USB cable, properly connect the receiver to a primary USB port located directly on your computer, or to a powered USB hub. If an autorun dialog opens, dismiss the dialog. 3.
Contents Index 43 PRODUCT INFORMATION To learn more about Inkling, visit the Wacom web site for your region: USA, Canada, Central and South America http://www.wacom.com/productinfo Europe, Middle East and Africa http://www.wacom.eu# Japan http://tablet.wacom.co.jp Asia Pacific (English) http://www.wacom-asia.com China (Simplified Chinese) http://www.wacom.com.cn Hong Kong (Traditional Chinese) http://www.wacom.com.hk Korea http://www.wacomkorea.com Taiwan http://www.wacom.com.
Contents Index 44 ORDERING PARTS AND ACCESSORIES To purchase available parts and accessories, refer to the Inkling Read Me file and see who to call for your region. You can also do the following: • In the USA or Canada, call 1.888.884.1870 (toll-free) or visit Wacom’s web site at http://www.WacomDirect.com (USA only). • In Europe, call +49 (0)180.500.03.75 or send an Email to spareparts@wacom.eu. Or, visit http://shop.wacom.eu.
Contents Index 45 GLOSSARY Cartridge. The replaceable pen tip. Click force. The amount of force you must apply to the pen tip for a click to occur. Inkling digital pen. The Inkling digital pen is a cordless, pressure-sensitive drawing instrument that works with the Inkling receiver. Inkling receiver. The Inkling receiver works with the Inkling digital pen to digitally capture your sketches. LED. Light Emitting Diode. LEDs are used to indicate the operational and battery charge status of Inkling. MAPI.
Contents Index 46 INDEX About the manual Accessories and parts available ordering Batteries charging installation for pen life, information management receiver, information Care, for Inkling Cartridge, replacing Charging case, features Converting a sketch file Drawing preparing to with pressure with tilt Editing, files Exporting layers Features, power saving General problems, troubleshooting Identifying a sketch Information, product Inkling about care Sketch Manager storing testing Layers adding creating
Contents identifying opening a file saving selecting sharing uploading viewing Sketching preparing to with pressure with tilt Software downloads, obtaining installing uninstalling Contents Index 25 25 29 25 29 20 20 18 16 19 19 47 Status LEDs Technical Support, contacting Testing Tilt, sketching with Troubleshooting general problems tables Uninstalling software Uploading a sketch Viewing a sketch Wacom international offices Working with Inkling 13 39 36 19 35 37 37 34 20 20 48 15 40 21 34 Index 47
Contents Index 48 WACOM INTERNATIONAL OFFICES WACOM TECHNOLOGY CORPORATION WACOM EUROPE GMBH 1311 SE Cardinal Court Europark Fichtenhain A9 Vancouver, WA 98683 47807 Krefeld U.S.A. Germany Telephone: +1.360.896.9833 Internet: http://www.wacom.eu Fax: +1.360.896.9724 WACOM CO., LTD. JAPAN TABLET SALES DIVISION WACOM CO., LTD.