
User Guide


English
6 © Wagner Spray Tech. - All Rights Reserved
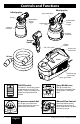
Assembly
Before you begin:
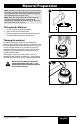
NEVER point the spray gun at
any part of the body.
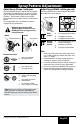
Note: Your unit includes two spray guns. See below to
determine the correct spray gun for your spraying project.
Yellow spray gun - designed for spraying thinner materials,
such as oil-based stains and thinned paints. The yellow spray
gun leaves a smooth nish.
White spray gun - designed for spraying thicker materials,
such as latex paints and stains. Spraying with this gun will
leave a slightly coarser nish that is between a roller and ne-
nish sprayer.
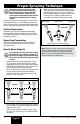
Note: These two spray guns have dierent spray pattern
/ width controls. Make sure to familiarize yourself with
the controls on each spray gun head. See the “Controls”
section, page 8-9.
To Assemble:
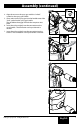
IMPORTANT: Make sure the power cord is unplugged.
1. Insert the suction tube into the intake opening.
2. Align the suction tube -
a. If you are going to be spraying in a downward
direction, the angled end of the suction tube should
be pointing toward the front of the gun.
b. If you are going to be spraying in an upward direction,
the angled end of the suction tube should be pointing
toward the rear of the gun.
Note: Make sure the suction tube is inserted as far as it will
go to ensure a tight t.
3. Carefully screw the cup back onto the spray gun
assembly. Tighten rmly.
1
2a
2b
3