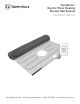
TempZone™ Electric Floor Heating Shower Mat System Installation Manual Free Design Service • 24/7 Installation Support • (800) 875-5285 • www.WarmlyYours.
Understanding The System How The System Works You can feel the heat of a campfire even though you are not directly above it. Radiant energy transfer is caused by a warm surface (the campfire) giving up its heat to a cooler surface (your body). This radiant energy travels through space without heating the space itself. It only turns into heat when it contacts a cooler surface. By transferring this heat to all of the objects in the room, the heat slowly moves to warm the air which starts to rise.
Items Needed For The System Installation System Components From WarmlyYours 1. Heating mat (15-watt/ sq. ft.) If multiple mats are connected to the same control device, they must be of the same voltage type and wired in parallel. 2. nSpiration Series control device IMPORTANT - Cross check the items you received against the packing list and the materials list on the installation plan to ensure that the roll length(s) and thermostat type(s) are an exact match.
WarmlyYours Floor Heating System. The Heating Mat A. Heating Element B. Fiberglass Mesh C. Drain Hole D. Cold Lead Wire The Heating Element The Heating Element consists of two copper alloy resistance wires covered by Flouropolymer insulation. A braided metal surrounds the primary Flouropolymer insulation and serves as ground sheath. The Heating Element (A) attached with tape (C) in a serpentine pattern to a flexible Fiberglass Mesh (B).
Testing DO NOT SUPPLY THE SYSTEM WITH ELECTRIC CURRENT Go by the Numbers All testing is done with a digital Ohmmeter. Supplying the system with a 120 volt electric current before the installation is complete is not needed to test the system. Taking the Ohm Readings The electrical resistance of the Heating Roll(s) must be checked before you start, and monitored throughout the installation process to ensure there has been no damage causing shorts or breaks. We recommend at least three readings be taken: 1.
Example of Wiring a Control to Twin Conductor Twin Conductor Turn off Breaker 1. Attach neutral (120V) from breaker box to the terminal screw on the line side labeled “3 / L2(N)” 2. Attach line (120V) from breaker to the terminal screw on the line side labeled “2 / L1(L)” 3. Attach wire (yellow) from heating, roll to the terminal screw on the load side labeled “4” 4. Attach black wire from heating roll to the terminal screw on the load side labeled “1” 5.
Installer’s Guide STEP 1 Electrical Planning The power supply to the Floor Heating System and the control device will be located at the same point in the room and indicated on your plan. If this location has changed, call WarmlyYours to determine if this will require a new Installation Plan. The lead wire is 15’ long. You can relocate the control device as long as your leads reach the new location. The thermostat requires a single gang box and should be positioned in a convenient place for easy access.
Installer’s Guide Installation Recommendations The space heating cable shall not extend beyond the room or area in which it originates. The space heating cable is not installed in closets, over walls or partitions that extend to the ceiling, or over cabinets whose clearance from the ceiling is less than the minimum horizontal dimension of the nearest cabinet edge that is open to the room or area. Isolated single runs of cable may pass over partitions where they are embedded.
Shower Mat (Bench & Floor) - Installation Guide STEP 1 Step 1 Once the skim coat of mortar has set, dry fit the TempZone™ Shower Mat to verify its dimensions and ensure it fits the contours of the shower area. Conduct insulation & resistance tests. Record readings on the warranty card found inside the TempZone™ Installation instructions. STEP 2 Step 2 Attach the mat to the subfloor thinset using hot glue.Prepare the latex-modified thinset.
Electrician’s Guide – Trouble Shooting “Beware of Using a Continuity Checker!” Locating a Break or a Short Checking for Electrical Short Our smaller Heating Mats have a high Ohm resistance and some continuity checkers do not send enough current to get completely through the wire and emit the noise or light that affirms proper continuity. If your instrument cannot function on a small Heating Roll, please use a digital Ohm meter.
Important General Considerations IMPORTANT INFORMATION The most important consideration is to maintain the integrity of the Heating Element; following these simple rules can easily do this: 1. NEVER CUT the Heating Element. 2. N EVER CUT the Heating Mat to make it shorter. 3. N EVER fold or position the Heating Element so that it overlaps itself or other wires. The heating portion of the heating device set shall not touch, cross over, or overlap itself. This will cause dangerous overheating. 4.
Note for the System Installer Complete the Warranty Card and return to WarmlyYours within 90 days. Keep this installation manual safe for future reference. Record your installation information here: Name/Company of Electrician______________________________________________ Address_______________________________________________________________ Tel.
Warranty Information Please complete and return the Warranty Card (online or you may send/fax this form) Thank you for purchasing your new WarmlyYours TempZone™ floor warming system. To register your system, go online to www.WarmlyYours.com/warranty, or simply complete, detach and mail the Warranty Card within 30 days of date of purchase to: WarmlyYours, 590 Telser Rd Lake Zurich, IL 60047. For your convenience, you may also fax this card to (800) 408-1100. 1. HOMEOWNER INFORMATION 4.
WarmlyYours Inc 590 Telser Rd Ste B Lake Zurich, IL 60047 POSTAGE WILL BE PAID BY ADDRESSEE FIRST-CLASS MAIL PERMIT NO 77 LONG GROVE IL B U S I N E S S R E P LY M A I L NO POSTAGE NECESSARY IF MAILED IN THE UNITED STATES