
User guide


Default Threat Protection
152 Firebox X Edge e-Series
Block sites temporarily
Follow these steps to configure your Firebox to automatically block sites temporarily:
1. Connect to the System Status page. Type
https:// in the browser address bar, and the IP address of
the Firebox X Edge trusted interface.
The default URL is https://192.168.111.1
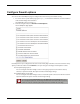
2. From the navigation bar, click Firewall > Default Threat Protection. Click the Auto-Block tab.
3. Select the Auto-block source of packets not handled check box to add the IP addresses of any site
denied by the Edge’s default firewall policy to the temporary Blocked Sites list. To understand your
Edge’s default firewall policy, look at Firewall > Incoming. If you enable the auto-block feature, the
source IP address of any traffic that is denied by the Edge because there is no rule to allow it will be
added to the auto-blocked sites list.
4. Change the amount of time a site stays on the auto-blocked sites list with the Duration for
automatically blocked sites drop-down list. The default is 30 minutes.
5. You can create exceptions to the auto-blocked sites rules. No traffic from an IP address on the Auto-
block exceptions list is ever blocked by the auto-blocking feature. Use the drop-down list to select
whether you want to enter a host IP address, a network address, or a range of IP addresses. Type the
value in the adjacent text box and click Add.
To see a list of IP addresses auto-blocked by the Edge, go to System Status > Hostile Sites. You can
look at the temporary Blocked Sites list together with your log messages to help you make decisions
about which IP addresses to block permanently.