
User guide

User Guide 151
Configuring the MUVPN Client
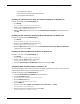
5 Click the DNS tab and click Add.
6 Type the IP address of your DNS server.
To add more DNS servers, repeat steps 5 and 6 for each server.
Note
The DNS server on the private network of the Firebox X Edge must be the first server in the list.
7 Click the WINS Address tab, type the IP address of your WINS server in the applicable field, and
then click OK.
You also can add a secondary or backup WINS server IP address.
8 Click Close to close the Network window.
The Network Settings Change dialog box appears.
9 Click Ye s to restart the computer.
The computer restarts and your settings are applied.
Windows 2000 setup
Use this section to install and configure the network components for the Windows 2000 operating sys-
tem. These components must be installed before you can use the MUVPN client on a Windows 2000
computer.
From the Windows desktop:
1 Select Start > Settings > Network and Dial-up Connections.
2 Right-click the connection you use to get Internet access and select Properties.
The connection properties window appears.
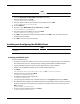
3 Click the Networking tab.
4 Make sure these components are installed and enabled:
To enable a component, click the adjacent check box. If a component is not installed, use the instructions to install it.
- Internet Protocol (TCP/IP)
- File and Printer Sharing for Microsoft Networks
- Client for Microsoft Networks
Installing the Internet Protocol (TCP/IP) network component on Windows 2000
From the connection window Networking tab:
1 Click Install.
The Select Network Component Type window appears.
2 Double-click the Protocol network component.
The Select Network Protocol window appears.
3 Below the Microsoft manufacturer, select the Internet Protocol (TCP/IP) network protocol and
click OK.
Installing the File and Printer Sharing for Microsoft Networks on Windows 2000
From the connection window Networking tab:
1 Click Install.
The Select Network Component Type window appears.
2 Double-click the Services network component.
The Select Network Service window appears.
3 Below the Microsoft manufacturer, select the File and Printer Sharing for Microsoft Networks
network service and click OK.