
User guide


CHAPTER 8 ZONES & CHANNELS 87
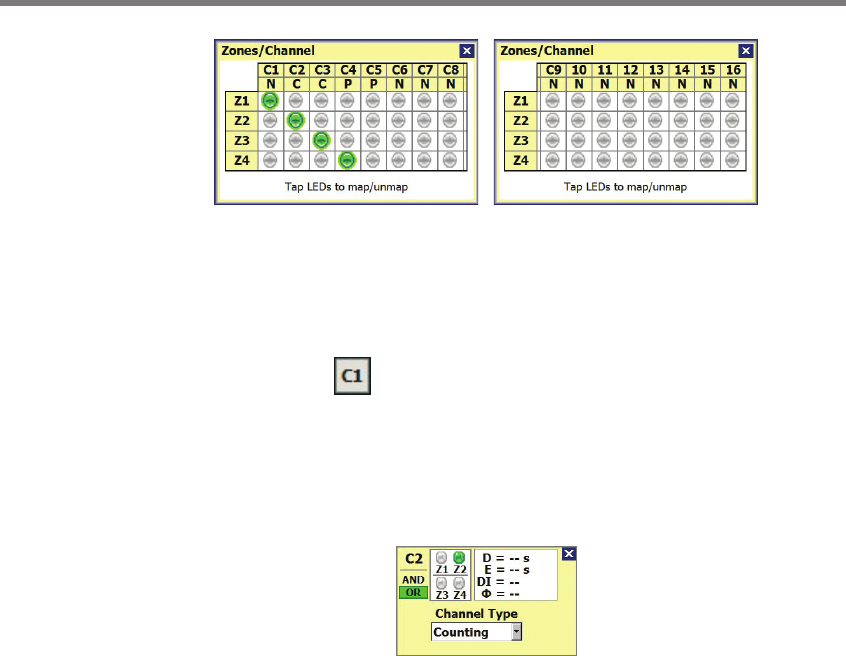
Figure 8.10 – Zone/Channel Map Window
Each channel column contains channel number and channel type (N=normal, C=count,
P=pulse). Click on the individual zones in the zone column to highlight the zones in the
edit area.
Editing Channels
e Edit Channel button will allow you to choose the channel type, map/un-map zones
to a selected channel, and change delay/extend settings (see Figure 8.11). Click on the
Z1–Z16 indicators to map a zone/zones to the channel (only the congured zones will be
visible). Click on the channel indicator in the top-left corner or the Edit Channel button
to quickly cycle through channels.
Figure 8.11 – Edit Channel Window
e Edit Channel window also allows you to do the following:
AND/OR – Channels support AND and OR logic for all zones. Using the AND logic
means that all the selected zones have to be active for the channel to be triggered; the
OR logic means that any activity in any zone will trigger the channel. Click on the
AND or OR button to change the logic.
Delay/Extend Settings – Delay and extend settings can be viewed and then edited for
a selected channel. e channel delay is used to ignore alert outputs that are shorter
than the specied delay time. e extend feature is used to continue a channel output
after the required conditions have been met. e delay and extend settings will be
disabled for all counting channels and the extend setting will be disabled for all pulse
channels.
To edit the extend and delay, click anywhere in the white box with the D and E, and
the corresponding box will appear (see Figure 8.12). Manually edit or use the up/down
buttons to change the delay/extend settings.