
User's Manual

69
CHAPTer 6 o LANE SETUP
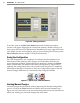
Restarting Lane Congurations
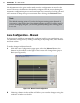
To completely erase the SmartSensor’s current conguration and restart the lane
conguration routine, change from Manual back to Automatic mode by clicking
on the Automatic buon and then clicking on the Restart buon located near the
Update and Undo buons below the Manual toolbar (see Figure 6.6).
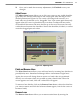
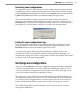
This erases all manual changes that have been made, and the SmartSensor
Manager will automatically recongure the road for you. After clicking on the
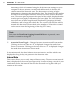
Restart buon, a window will be displayed asking whether you want to proceed
(see Figure 6.7). Click on Yes to continue or on No to quit this procedure.
Conrmation of RestartFigure 6.7 –
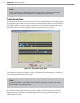
Exiting the Lane Conguration Page
Once all automatic and manual congurations have been completed, you may
perform a nal save and exit the Lane Conguration page by clicking on the
Finished buon located at the boom right of the screen.
A window will appear indicating that the changes are being saved to the
SmartSensor. After the changes have been saved, SmartSensor Manager will
automatically change from Lane Conguration to Trac (Event) Data View mode
so that you can verify lane conguration.
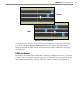
Verifying Lane Conguration
After you click Finished on the Lane Conguration page, SmartSensor Manager
will take you immediately to the View Trac (Event Data) page. Here you can
view your saved lane conguration and see trac in real time, allowing you to
verify that the lanes have been congured correctly.
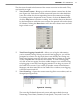
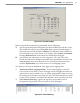
The other way to view data is the Interval Data screen, which shows numerical
data gathered per lane by the sensor. You can switch back and forth between the
two screens with the toggle buon in the lower right corner of each screen; this
buon will be marked with the name of the screen you’re going to switch to.
The Trac (Event) Data and Interval Data screens can both also be accessed
through the View menu.