
Full Product Manual


PURE WATER TECHNOLOGIES, LLC | dba Wayde King Water Filtration™ www.KingWaterFiltration.com |
5502 S. Fort Apache Rd. Suite # 100, Las Vegas, NV 89148 | Customer Service Ph: 855.957.2166 | customerservice@kingwaterfiltration.com
9
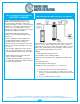
GUIDE FOR REPLACING MEDIA
1. Turn off the water to the unit and unplug from the power source.
2. Disconnect the unit from your plumbing.
3. Carefully unscrew the control valve off the top of the tank.
4. Remove the riser tube from inside the mineral tank.
5. Lay the tank on its side or lay over a trash can to remove media.
6. Rinse the inside of the tank clean with a garden hose, discard old resin, and save the old gravel.
7. Stand media tank upright. Plug a slip cap or put a piece of tape over the top of the distributor/riser tube to prevent media from
entering the tube while loading the media.
8. Place the media funnel in the top of the media tank with the riser tube still inside and centered.
9. Begin replacing media by putting gravel into the tank first. Make sure the riser tube is firmly on the bottom of the tank. If the
riser tube is pulled out of the gravel once the media is added, it is impossible to put it back in without removing the other media
from the tank.
10. Pour resin/media into the funnel, slowly letting it fall down inside the media tank around the riser tube. If you have a twin
alternating system, divide the resin/media equally between the two tanks. The media tank should be approximately 3/4 full.
The media tank should be approximately ¾ full but this can vary based on the media for your specific system.
11. Remove the funnel and the slip plug or tape from the top of the riser tube.
12. Brush any loose resin/media off the top opening of the tank. Clean the top edge with a cloth so the O-ring can seal securely to
the valve base. Lubricate o-ring with clean food grade silicon grease.
13. Look at the bottom of your control valve and locate the upper basket. Inside the basket, the control valve has O-rings that will
seal on the riser tube. Install the valve on top of the media tank, making sure the top of the riser tube inserts inside the opening
of the upper basket. Guide the riser into the O-ring seal and tighten gently. Be careful not to over-torque the valve as the
threads are plastic.
14. Screw the control valve back onto the top of the tank. Be sure to hold the control valve where there will be no damage to the
valve from the pressure you exert from tightening the valve back onto the tank.
15. Reconnect your plumbing to your unit and plug the control valve back in, making sure to set the correct time of day. Turn on
the water to the unit and check for leaks.
16. Leave all faucets turned off inside the house and open a single faucet (such as an outside faucet), letting the water run for 3-5
minutes. This rinses the new resin/media inside the tank, and any particles or color will rinse out through the one open faucet,
and not throughout your home plumbing system.
17. Manually turn your regeneration/backwash control knob slowly through a complete cycle, allowing the water to run through the
unit for a minute or so in each position.
18. Once the regeneration/backwash knob is back in the service position, your unit is in service and ready to operate!