
User Manual


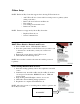
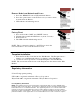
Table Of Contents

4
Z-Wave Setup
NOTE: The Room Key Controller supports the following Z-Wave functions.
• Add Z-Wave Node to Scene with Level and promote to primary (when
adding controllers).
• Remove Node from Scene and Network.
• Factory Reset.
• Join existing network with scenes.
• Inclusion Controller.
NOTE: Features not supported by Room Key Controller.
• Replicate Network out.
• Scene Command Class.
Add Z-Wave Node to Network and Scene
1. Press “COPY” button. LED will flash. Release.
2. Press the operate button on the Z-Wave node you want to add
to the network. At this time you may also set the level
(dimmers).
3. Release the operate button on the Z-Wave node.
4. LED will turn off indicating success.
NOTE: If a controller is added to the network it will be promoted
to primary.
Join Existing Network with Scenes.
1. Place the sending (primary) remote into replication send with
scenes.
2. Simultaneously, insert Room Key into Room Key Controller
slot and press and hold the “REMOVE” button. LED will
begin to flash.
3. Keep holding until LED lights solid for one second.
4. LED will continue blinking during replication.
5. Replication is complete when LED turns off.
NOTE: All nodes in scene 1 of sending remote will be copied into the
Room Key Controller.
ROOM KEY