Vinyl Railing Gate Installation Guide
Welcome Blending optimal function and performance. All of our railing gates are designed and manufactured with function and long-term performance in mind. We use the most durable gate hardware in the industry. This guide will help make your installation easy. For questions, please call 1-855-224-9761 and welcome to Weatherables.
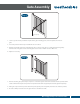
Gate Assembly Step 1 Measuring Tape 1. Locate, lay out and dry-assemble all parts of the gate including posts, rails and pickets. Do not use glue. 2. Insert the pickets into the top and bottom rails as needed. 3. Measure the width at the top and bottom of gate to ensure your gate is a square. Measure diagonally from the left and right to ensure both lengths are the same or within 1/8” of a difference. 4. Adjust as necessary. Step 2 1.
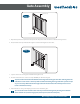
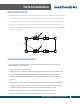
Gate Assembly Measuring Tape Step 3 Measuring Tape 1. Repeat the previous steps for the other post. This may take some assistance to do before the glue sets. 2. Next, measure the top and bottom of gate to ensure both lengths are the same. Step 4 1. Lay the cross-brace on the gate and mark the length to cut. 2. Pre-drill 2 holes into the cross-brace only. DO NOT pre-drill into the gate. Tip : The cross brace rests at the bottom on the hinge side of the gate.
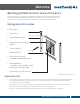
Gate Installation GATE INSTALLATION 1. Determine the direction the gate is to swing, it usually swings away from deck. Check your local codes! 2. Locate and follow the hardware installation instructions. The gate will be mounted flush with the side of the railing that the gate will be swinging off of. See the illustration below. Be sure the gate is high enough to clear obstructions such as snow. The gate posts may be cut on site as needed.