
Installation Guide

Office Tel 877.933.9334
Office Fax 847.357.9819
Office E-Mail order@wedicorp.com
www.wedicorp.com
www.facebook.com/wedicorp
www.youtube.com/wedicorp
wedi
®
Corporation / wedi
®
Americas
171 S. Gary Avenue
Carol Stream , Il 60188
STEP 1
STEP 3 STEP 4
STEP 2
Bucket•
Mixer•
Modified thinset•
1/4“ x 1/4“ trowel • (if substrate is even)
Caulk gun•
Putty knife•
NEEDED FOR INSTALLATION
Make sure the concrete floor is even, fully cu-
red and free of debris, oil or waxes. The wedi
®
Building Panels are installed using modified
thinset mortar using a 1/4“ x 1/4“ notch trowel.
Stagger all joints when laying wedi
®
Building
Panels on the floor. Apply some weight on the
boards during initial thinset setting time and
especially over board transitions.
wedi
®
Joint Sealant can be applied with a
continuous 1/4“ bead while setting the panels
in position (seams butted tightly) or after they
are set and with the bead of sealant installed
over the seam before it is spread flat using a
putty knife. All excess sealant must be spread
flat so joint sealant covers the seams at least
1/2“ to 3/4“ on either side of the seam.
Install electric floor warming system according
to manufacturers recommendations. Please
make sure the wedi
®
Building Panels are not
punctured by staples or other mounting
devices.
STEP BY STEP INSTALLATION
KIT INCLUDES
5x wedi•
®
2x4 ft x 1/4“ Building Panel
1x wedi•
®
Joint Sealant, 10.5 oz.
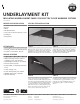
UNDERLAYMENT KIT
INSULATING UNDERLAYMENT PANELS FOR ELECTRIC FLOOR WARMING SYSTEMS
SPECIAL FEATURES
100% internally and throughout •
waterproof not only resistant
Lightweight and easy to cut cleanly•
Shorter warm up times•
Comfortable, consistently warm tile •
floors
Lower energy costs•
Comes with system joint sealant•
UPC/IPC approved / compliant•
10 year warranty•
SAVE UP TO
ON ENERGY
CONSUMPTION
Item # US4000002