
assembly Instructions

Techn. Änderungen vorbehalten! 10 Copyright weka-Holzbau GmbH, Neubrandenburg
The roofing felt provided serves primarily as a temporary protection against the weather. TO ensure lasting
protection we recommend you to cover the roof only with sanded bitumen shingles. This creates the basis for
a long life and resistance to the influences of the weather. Otherwise damage to your weka product is to be
expected.
If you have decided to cover your house with bitumen tiles, we recommend that they are laid directly on the
roof boards.
Make sure you remove the film on the bitumen strips before laying!
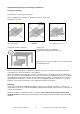
Ensure that no rigid connections of the individual wall boards occur beneath each other, e.g. by installing a
shelf, a gutter downpipe or similar, so that these can work unhindered.
The possibility of differing wood moisture + tolerances in individual components may lead to variations in
dimensions, particularly in the area of the pediment/side wall height,
which must be adjusted during installation using appropriate means (e.g. electric plane).
The window/door panes must be sealed all round with transparent silicone for windows immediately after
assembly
and painting to ensure full resistance to driving rain.
Otherwise extreme rainfall may lead to interior leaks which cause discoloration and damage to the wood.
The manufacturer will accept no liability for such damage, there will be no replacement within the scope of
the guarantee nor is it covered by the manufacturer’s warranty. We therefore refer you again to our
guarantee conditions at this point.
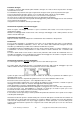
Tools
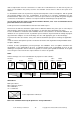
You should have the following tools to hand before beginning assembly:
Tape measure Drill Electric screwdriver Hammer Pencil Burring iron Rubber mallet
Saw Universal cutter Cord Spirit level Spanner
Abbreviations
RW = Rear wall
WS = Wall thickness
mm = Millimetre
cm = Centimetre
= Not included in delivery!
We hope you have a successful installation and wish you many happy hours enjoying your
weka product.