6˝ VARIABLE SPEED SCROLL SAW Model # 3920 bit.ly/wenvideo IMPORTANT: Your new tool has been engineered and manufactured to WEN’s highest standards for dependability, ease of operation, and operator safety. When properly cared for, this product will supply you years of rugged, trouble-free performance. Pay close attention to the rules for safe operation, warnings, and cautions. If you use your tool properly and for intended purpose, you will enjoy years of safe, reliable service.
TABLE OF CONTENTS 2 3 5 6 8 9 15 19 20 22 Technical Data General Safety Rules Specific Safety Rules For Scroll Saw Electrical Information Know Your Scroll Saw Assembly and Adjustments Operation Maintenance Exploded View and Parts List Warranty TECHNICAL DATA Model Number: Motor: Speed: Throat Depth: Blade: Blade Stroke: Cutting Capacity: Table tilt: Overall dimensions: Weight: Includes: 2 3920 120 V, 60 Hz, 1.
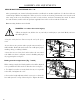
GENERAL SAFETY RULES Safety is a combination of common sense, staying alert and knowing how your item works. SAVE THESE SAFETY INSTRUCTIONS. WARNING: To avoid mistakes and serious injury, do not plug in your tool until the following steps have been read and understood. 1. READ and become familiar with this entire instruction manual. LEARN the tool’s applications, limitations, and possible hazards. 2. AVOID DANGEROUS CONDITIONS. Do not use power tools in wet or damp areas or expose them to rain.
GENERAL SAFETY RULES 15. DO NOT OVERREACH. Keep proper footing and balance at all times. Wear oil-resistant rubber-soled footwear. Keep the floor clear of oil, scrap, and other debris. 16. MAINTAIN TOOLS PROPERLY. ALWAYS keep tools clean and in good working order. Follow instructions for lubricating and changing accessories. 17. CHECK FOR DAMAGED PARTS. Check for alignment of moving parts, jamming, breakage, improper mounting, or any other conditions that may affect the tool’s operation.
SPECIFIC RULES FOR THE SCROLL SAW 7. To avoid injury from accidental startups of the scroll saw: - Make sure to turn OFF the switch and unplug the power cord from the electric outlet before changing the blade, performing maintenance or making adjustments. - Make sure the switch is OFF before plugging in the power cord to an electric outlet. 8. To avoid injury from a fire hazard, do not operate the scroll saw near flammable liquids, vapors or gases. 9.
ELECTRICAL INFORMATION GROUNDING INSTRUCTIONS IN THE EVENT OF A MALFUNCTION OR BREAKDOWN, grounding provides the path of least resistance for an electric current and reduces the risk of electric shock. This tool is equipped with an electric cord that has an equipment grounding conductor and a grounding plug. The plug MUST be plugged into a matching outlet that is properly installed and grounded in accordance with ALL local codes and ordinances. DO NOT MODIFY THE PLUG PROVIDED.
KNOW YOUR SCROLL SAW 19 18 17 16 A 15 14 13 12 11 10 9 8 7 6 5 4 3 2 1 T B L R M P K N C M L K 20 19 18 17 16 15 14 13 12 11 10 9 8 7 6 5 4 3 2 1 T J J D R H E P F G G N I H F M T N O A - Blade Tension Knob B - Arm Housing C - Rubber Bearing Covers D - Table E - Sawdust Blower F - Storage Area G - Base H - Bevel Scale and Pointer I - Table/Bevel Lock Knob J - Lower Blade Holder K - Blade Guard Foot L - Blade Guard Root Lock Knob M - LED Light
ASSEMBLY AND ADJUSTMENTS UNPACKING Carefully unpack the scroll saw and all of its parts. Compare them against the list below. Do not discard the carton or any packaging until the scroll saw is completely assembled. CAUTION: do not lift the saw by the arm that holds the blade. The saw will be damaged. WARNING: To avoid injury from accidental startups, turn switch OFF and remove the plug from the power source outlet before making any adjustments. INCLUDES (Fig.
ASSEMBLY AND ADJUSTMENTS Prior to making adjustments, mount the scroll saw on a stable surface. See “Bench mounting the saw.” ALIGN THE BEVEL INDICATOR (Fig. 3-6) The bevel indicator has been factory adjusted. It should be rechecked prior to use for best operation. 1. Remove the blade guard foot (1) using the hex key to loosen the screw (2). 2. Loosen the table bevel lock knob (3) and move the table until it is approximately at a right angle to the blade. 1 2 Fig. 3 3.
ASSEMBLY AND ADJUSTMENTS BENCH MOUNTING THE SAW (Fig. 7-8) Before operating the saw, it must be firmly mounted to a workbench or another rigid frame. Use the base of the saw to mark and pre-drill the mounting holes. If the saw is to be used in one location, permanently secure it to the work surface using wood screws if mounting to wood. Use bolts, washers, and nuts if mounting into metal. To reduce noise and vibration, install a soft foam pad (not supplied) between the scroll saw and the workbench.
ASSEMBLY AND ADJUSTMENTS ADJUSTING THE DUST BLOWER (Fig. 9) For best results, the dust blower tube (1) should be adjusted to direct air at both the blade and the work piece. 1 Fig. 9 SAWDUST COLLECTION PORT (Fig. 10 and 11) This scroll saw allows a hose or vacuum accessory (not provided) to be connected to the dust chute (2). If excessive sawdust buildup occurs inside the base, use a wet/dry vacuum cleaner or manually remove sawdust by removing the screws (3) and metal plate on the left side of the saw.
ASSEMBLY AND ADJUSTMENTS BLADE SELECTION (Fig. 12) This scroll saw accepts 5” length pin end and pinless blades, with a wide variety of blade thicknesses and widths. The type of material and intricacies of cutting operations will determine the number of teeth per inch. Always select the narrowest blades for intricate curve cutting and the widest blades for straight and large curve cutting operations. The following table represents suggestions for various materials.
ASSEMBLY AND ADJUSTMENTS BLADE REMOVAL AND INSTALLATION (Fig. 13 to 15) WARNING: To prevent personal injury, always turn saw OFF and disconnect the plug from the power source before changing blades or making adjustments. This saw uses pinned and pinless blades. Pinned blades are thicker for stability and for faster assembly. They provide faster cutting on a variety of materials.
R ASSEMBLY AND ADJUSTMENTS P N 19 18 17 16 15 14 13 12 11 10 9 8 7 6 5 4 M ADJUSTING THE BLADE DIRECTION (Fig. 16 & 17) L The WEN Scroll Saw accepts pinned blades in two different positions to accommodate a wider variety of workpieces. Notice the two various slots for pinned blades that appear on the head of the saw (Fig. 16). K Fig. 16 J Pinned blades can be placed in either of the two slots, changing the direction of the blade by 90 degrees.
OPERATION RECOMMENDATIONS FOR CUTTING A scroll saw is basically a curve-cutting machine. It can also be used for straight cutting and beveling or angle cutting operations. Please read and understand the following items before attempting to use the saw. 1. When feeding the work piece into the blade do not force it against the blade. This could cause blade deflection. Allow the saw to cut the material by guiding the work piece into the blade as it cuts. 2. The blade teeth cut material ONLY on the down stroke.
OPERATION ON/OFF & SPEED CONTROL SWITCH (Fig. 20) Always wait for the saw to come to a complete stop before restarting. 1. To turn the saw on, flip the ON/OFF switch to ON (2). When first starting the saw, it is best to move the speed control knob (1) to the middle speed position. 2. Adjust the blade speed to the desired setting between 400 to 1600 strokes per minute (SPM). Turning the control knob clockwise increases speed; turning it counterclockwise reduces speed. 3.
OPERATION ANGLE CUTTING (BEVELING) (Fig. 22) 1. Layout or secure design to work piece. 2. Move the blade guard foot to the highest position by loosening the height adjustment knob (1). Retighten. 1 3. Tilt the table to the desired angle by loosening the table bevel lock handle (2). Move the table to the proper angle using the degree scale and the pointer (3). 4. Tighten the table bevel lock handle (2). 5. Loosen the blade guard screw, and tilt the blade guard to the same angle as the table.
OPERATION RIP OR STRAIGHT LINE CUTTING (Fig. 24) 1. Raise the blade guard foot (1) by loosening the height adjustment knob (2). 1 2. Measure from the tip of the blade to the desired distance. Position the straight edge parallel to the blade at that distance. 3. Clamp the straight edge to the table. 4. Recheck your measurements using the work piece to be cut and make sure the straight edge is secure. 5.
MAINTENANCE WARNING: Always turn the switch OFF and unplug the power cord from the outlet before maintaining or lubricating the scroll saw. To ensure that the wood glides smoothly across the work surface, periodically apply a coat of paste wax (sold separately) to the surface of the worktable. If the power cord is worn out or damaged in any way, replace it immediately. Do not attempt to oil the motor bearings or service the motor’s internal parts. LUBRICATION (Fig.
EXPLODED VIEW & PARTS LIST 20
EXPLODED VIEW & PARTS LIST (3920C) Item 1 2 3 4 5 6 7 8A 8B 9 10 11 12 13 14 15 16 17 18 20 21 22 23 24 25 26 27 28 29 30 31 32 33 34 35 36 37 38 39 40 41 42 43 44 45 46 47 48 49 Stock # 3920B-001 3920B-002 3920B-003 3920B-004 3920B-005 3920B-006 3920B-007 3920C-008A 3920C-008B 3920B-009 3920B-010 3920B-011 3920B-012 3920B-013 3920C-013 3920C-014 3920C-015 3920C-016 3920B-018 3920B-020 3920B-021 3920B-022 3920B-023 3920B-024 3920B-025 3920B-026 3920B-027 3920B-028 3920B-029 3920B-030 3920C-030 3920B-032 39
LIMITED TWO YEAR WARRANTY WEN Products is committed to building tools that are dependable for years. Our warranties are consistent with this commitment and our dedication to quality. LIMITED WARRANTY OF WEN CONSUMER POWER TOOLS PRODUCTS FOR HOME USE GREAT LAKES TECHNOLOGIES, LLC (“Seller”) warrants to the original purchaser only, that all WEN consumer power tools will be free from defects in material or workmanship for a period of two (2) years from date of purchase.