6˝ ELECTRIC CHAIN SAW Model # 4017 bit.ly/wenvideo IMPORTANT: Your new tool has been engineered and manufactured to WEN’s highest standards for dependability, ease of operation, and operator safety. When properly cared for, this product will supply you years of rugged, trouble-free performance. Pay close attention to the rules for safe operation, warnings, and cautions. If you use your tool properly and for intended purpose, you will enjoy years of safe, reliable service.
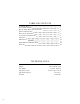
TABLE OF CONTENTS 2 3 4 6 7 8 10 12 13 14 16 Technical Data General Safety Rules Specific Safety Rules For Chain Saws Electrical Information Know Your Chain Saws Assembly and Adjustments Operation Maintenance Troubleshooting Guide Exploded View and Parts List Warranty TECHNICAL DATA Model Number: Motor: Saw Chain: Speed (no load): Oil Tank Capacity: Weight: 2 4017 120 V, 60 Hz, 12A 16 inch, Oregon 44.2 feet per second 3.
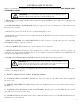
GENERAL SAFETY RULES Safety is a combination of common sense, staying alert and knowing how your item works. SAVE THESE SAFETY INSTRUCTIONS. WARNING: To avoid mistakes and serious injury, do not plug in your tool until the following steps have been read and understood. 1. READ and become familiar with this entire instruction manual. LEARN the tool’s applications, limitations, and possible hazards. 2. AVOID DANGEROUS CONDITIONS. Do not use power tools in wet or damp areas or expose them to rain.
GENERAL SAFETY RULES 15. DO NOT OVERREACH. Keep proper footing and balance at all times. Wear oil-resistant rubber-soled footwear. Keep the floor clear of oil, scrap, and other debris. 16. MAINTAIN TOOLS PROPERLY. ALWAYS keep tools clean and in good working order. Follow instructions for lubricating and changing accessories. 17. CHECK FOR DAMAGED PARTS. Check for alignment of moving parts, jamming, breakage, improper mounting, or any other conditions that may affect the tool’s operation.
SPECIFIC RULES FOR CHAIN SAWS 8. Use extreme caution when cutting brush and saplings. The slender material may catch the saw chain, whipping towards you or pulling you off balance. 9. Carry the chain saw by the front handle with the chain saw switched off and away from your body. When transporting or storing the chain saw always protect the blade with a scabbard (blade cover). 10. Routinely lubricate, adjust chain tension, and check blades for dullness.
ELECTRICAL INFORMATION GROUNDING INSTRUCTIONS IN THE EVENT OF A MALFUNCTION OR BREAKDOWN, grounding provides the path of least resistance for an electric current and reduces the risk of electric shock. This tool is equipped with an electric cord that has an equipment grounding conductor and a grounding plug. The plug MUST be plugged into a matching outlet that is properly installed and grounded in accordance with ALL local codes and ordinances. DO NOT MODIFY THE PLUG PROVIDED.
KNOW YOUR CHAIN SAW 3 1 8 4 5 6 7 9 2 10 14 1 2 3 4 5 6 7 8 9 10 11 12 13 14 13 11 12 Power Cable Rear Handle Safety Button (not shown - opposite side of handle) Trigger Switch Oil Cap Sprocket Cover Bar Adjustment Locking Knob Front Handle Front Hand Guard Guide Bar Saw Chain Chain Tensioning Wheel Oil Level Indicator Cable Strain Relief Notch 7
ASSEMBLY AND ADJUSTMENTS WARNING: Always be sure that the tool is switched off and unplugged before adjusting, adding accessories, or checking a function on the tool. ASSEMBLY OF GUIDE BAR AND SAW CHAIN 1. Place the saw body on a firm and level surface. 2. Rotate the bar adjust locking knob counterclockwise (Figure A - 1) to remove the cover from the saw’s body. 3. With the help of protective gloves, wrap the saw chain around the guide bar, making sure that the teeth are aimed in the direction of rotation.
ASSEMBLY AND ADJUSTMENTS REPLACING THE CHAIN 1. Rotate the bar adjustment locking knob and remove the cover of the saw’s body (see Assembly of Guide Bar and Chain for more details - Page 8). 2. Lift the worn saw chain out of the fitted slot in the guide bar. Fig. D WARNING - when handling saw chains, always wear protective gloves. 3. Place the new chain in this position, making sure the teeth are facing the correct direction and that the edge of the chain fits into the slot around the guide bar. 4.
OPERATION PREPARATION Before each use, check the following items to ensure safe working conditions. CHAIN SAW: before beginning work, inspect the chain saw for damage to the housing, the extension cord, the saw chain and the guide bar. Never use an obviously damaged machine. OIL TANK: check the fill level of the oil tank. Also check whether there is sufficient oil available while working.
OPERATION SAWING TECHNIQUES Saw off the lower branches on the tree first. By doing so, it is easier for the cut branches to fall to the ground. At the end of the cut, the weight of the saw suddenly increases for the user since it is no longer being supported by a branch. There is a risk of losing control of the saw, so make sure to stay alert during the entire sawing operation. Only pull the saw out of a cut while the saw is running. By doing so, you prevent the chain from jamming in the wood.
MAINTENANCE CLEANING Regularly clean the tensioning mechanisms by blowing compressed air onto it or by cleaning it with a brush. Do not use any tools for the cleaning. Keep the oil away from the handle in order to ensure a secure hold. Clean the machine as necessary with a damp cloth and a mild cleanser, if appropriate. If the chain saw is not used for an extended period of time, remove the chain oil from the tank. Briefly place the chain and the guide bar in an oil bath and then wrap in oil paper to dry.
TROUBLESHOOTING GUIDE PROBLEM Saw does not operate properly CAUSE SOLUTION No power supply Check the power supply. Defective outlet Try a different source of power. Change as necessary. Damaged Extension cable Check cable and replace if necessary. Safety button not pushed Push the safety button before pulling the trigger. Overheating Chain/Bar Chain too tight Adjust the chain tension. Lubrication needed Check the oil levels and add oil as necessary.
EXPLODED VIEW AND PARTS LIST 14 No. Part Number Part Description Qty No.
EXPLODED VIEW AND PARTS LIST 15
LIMITED TWO YEARS WARRANTY WEN Products is committed to building tools that are dependable for years. Our warranties are consistent with this commitment and our dedication to quality. LIMITED WARRANTY OF WEN CONSUMER POWER TOOLS PRODUCTS FOR HOME USE GREAT LAKES TECHNOLOGIES, LLC (“Seller”) warrants to the original purchaser only, that all WEN consumer power tools will be free from defects in material or workmanship for a period of two (2) years from date of purchase.