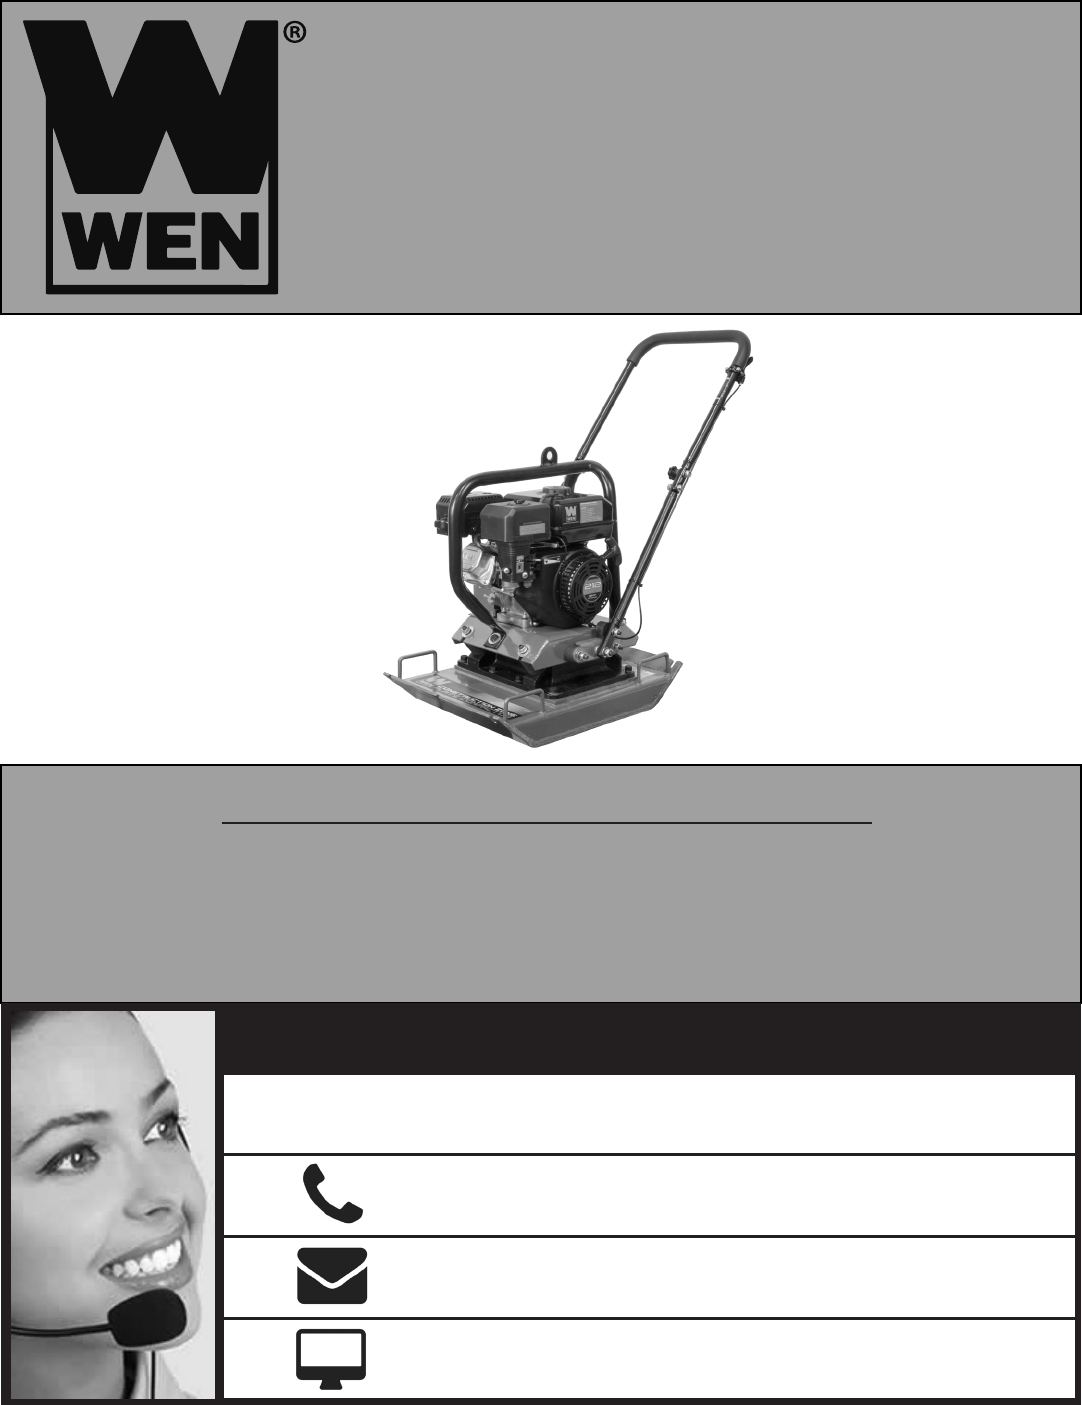
Plate Compactor For replacement parts visit WENPRODUCTS.COM bit.ly/WENvideo IMPORTANT: Your new tool has been engineered and manufactured to WEN’s highest standards for dependability, ease of operation, and operator safety. When properly cared for, this product will supply you years of rugged, trouble-free performance. Pay close attention to the rules for safe operation, warnings, and cautions. If you use your tool properly and for intended purpose, you will enjoy years of safe, reliable service.
TABLE OF CONTENTS Identification Service Record Specifications Introduction Safety Information Know Your Plate Compactor Assembly Preparation Operation Maintenance Troubleshooting Exploded View and Parts List Warranty Statement 2 2 3 4 4 7 8 8 9 12 17 18 26 IDENTIFICATION If assistance for information or service is required, please contact the Customer Service Help Line by calling 800-232-1195; customer will be asked to provide the following information when calling.
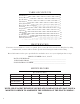
SPECIFICATIONS Engine Compaction Force Plate Size Forward Travel Vibrations per Minute Dimensions Weight Compaction Pressure 212cc, 4 Stroke 4496 lbs. 24 x 18 in. Up to 82 Feet per Minute 5400 25 x 18.5 x 27.5 in. 207 lbs. 1498.66 lb/ft² Engine Type Spark Plug Gap Ignition System Displacement Fuel Tank Capacity Engine Oil Capacity Spark Plug 4 stroke, OHV, single cylinder with forced air cooling system 0.6 - 0.8 mm (0.023 - 0.031 in) Non-contact transistor 212cc 1 Gallon 20 fl. oz (0.
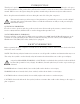
INTRODUCTION Thank you for purchasing a WEN Plate Compactor. This manual provides information regarding the safe operation and maintenance of this product. Every effort has been made to ensure the accuracy of the information in this manual. WEN reserves the right to change this product, manual and specifications at any time without notice. Please keep this manual available to all users during the entire life of the plate compactor.
SAFETY INFORMATION For any questions regarding the hazard and safety notices listed in this manual or on the product, please call (800) 232-1195 M-F 8-5 CST before using the plate compactor. DANGER: CARBON MONOXIDE Using a plate compactor indoors CAN KILL YOU IN MINUTES. Engine exhaust contains carbon monoxide (CO). This is a poison gas you cannot see or smell. If you can smell the engine exhaust, you are breathing CO. But even if you cannot smell the exhaust, you could be breathing CO.
SAFETY INFORMATION 11) Only use the plate compactor for its intended purposes. 12) Operate only on dry, level surfaces. 13) Turn the engine switch to “OFF” position when the engine is not running. 14) Do not operate or service this machine before reading the entire manual. 15) Never operate this equipment without proper protective clothing, shatterproof ANSI-approved glasses, steeltoed boots, and other protective job site devices.
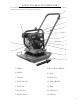
KNOW YOUR PLATE COMPACTOR Use the illustration below to become familiar with the locations and functions of the various components and controls of this plate compactor. 2 3 4 1 5 6 7 8 14 9 10 13 11 l ve Tra f o on 12 cti Dire 1. Muffler 8. Recoil Starter Handle 2. Handle 9. Choke 3. Throttle 10. Fuel Valve 4. Gas Tank Cap 11. Lifting Handle 5. Gas Tank 12. Base 6. Air Cleaner 13. Carburetor 7. Engine Switch 14.
ASSEMBLY In order to best protect the plate compactor while in the package, this product comes with some components disassembled. Please complete the following assembly step before proceeding to use the plate compactor. If after reading this section, you are unsure about how to perform any of the steps, please call 800-232-1195 (M-F 8-5 CST) WARNING: This plate compactor is heavy. Some procedures may require lifting equipment or two people.
PREPARATION STEP 2 - ADD GASOLINE: Use fresh (within 30 days from purchase), lead-free gasoline with a minimum of 87 octane rating. Do not mix oil with gasoline. 1. Make sure the plate compactor is on a level surface. Fig. 3 2. Unscrew fuel cap and set aside. NOTE: The fuel cap may be tight and hard to unscrew. 3. Slowly add unleaded gasoline to the fuel tank. Be careful not to overfill. The capacity of the fuel tank is 1 gallon. NOTE: Do not fill the fuel tank to the very top.
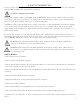
OPERATION STARTING THE PLATE COMPACTOR: 1. Check the oil and fuel levels. 2. Turn the fuel valve to the “ON” position. 3. Move the choke lever to the “START” position. 4. Set the engine switch to the “ON” position. 5. Move throttle lever to “MIN” position. 6. Pull on the recoil starter handle slowly until a slight resistance is felt. Then pull quickly to start the engine. Return cord gently into the machine. Never allow the cord to snap back. 7. If engine fails to start, repeat steps 1 through 6.
OPERATION Grip the handle firmly with both hands. To avoid injury, keep hands, fingers, and feet away from the compactor base. Grip the handle of the compactor firmly with both hands. If both hands are holding the handle and your feet are clear of the compactor base, your hands, fingers, and feet cannot be injured by the plate. Adjust the throttle lever between its “MIN” to “MAX” position, depending on the desired vibration speed.
OPERATION STOPPING THE PLATE COMPACTOR: 1. Move handle lever to “MIN” position to disengage the compactor. 2. Turn the engine switch to the “OFF” position. 3. Turn the fuel valve to the “OFF” position. FOR EMERGENCY SHUTDOWNS, move the throttle to the idle position and turn the engine switch OFF. WARNING: Allow the unit to cool for several minutes before touching areas that become hot during use.
MAINTENANCE 1 FILLING CRANKCASE WITH OIL: 1. Make sure the plate compactor is on a level surface. Tilting the plate compactor to assist in filling will cause oil to flow into engine areas and will cause damage. Keep plate compactor level! 2. Remove the oil filler/dipstick cap (Fig. 5 - 1) from the engine. 3. Using a funnel, add the appropriate type and amount of oil into the crankcase. The crankcase is full when the oil level has reached the second thread Fig. 5 from the lip of the opening (Fig. 6). 4.
MAINTENANCE AIR CLEANER MAINTENANCE: Routine maintenance of the air cleaner helps maintain proper air flow to the carburetor. Check that the air cleaner is free of excessive dirt. 1 1. Remove air cleaner cover (Fig. 9 - 1). Remove both elements and inspect them for holes or tears. Replace damaged elements. 2 2. Tap paper element (Fig. 9 - 2) lightly to remove excess dirt. Replace paper element if it appears heavily soiled. 3 3. Wash foam element (Fig.
MAINTENANCE DRAINING THE FUEL TANK: Clean the fuel tank each year or before storing the plate compactor for extended periods of time. To drain the fuel tank and carburetor: 1 1. Turn the fuel valve to the “OFF” position (Fig. 13 - 1). 2. Remove the fuel line between the fuel valve and carburetor (Fig. 14 - 1) Fig. 13 CAUTION: A small amount of fuel may leak from the hose during removal. 3. Attach a fuel line (not included with the plate compactor) to exposed end of the fuel valve. 1 4.
MAINTENANCE STORING THE PLATE COMPACTOR: If the unit is being stored for short periods of time (30 to 60 days), then when taking the unit out of storage, add gasoline and fuel stabilizer in the proper ratio to the tank until the tank is full. NOTE: Filling the tank reduces the amount of air in the tank and helps reduce deterioration of fuel. Run the engine for 5 – 10 minutes allowing stabilized fuel mixture to circulate through the carburetor.
TROUBLESHOOTING IMPORTANT: If trouble persists, please email techsupport@wenproducts.com or call our customer help line at (800) 232-1195 M-F 8-5 Central Time. PROBLEM CAUSE SOLUTION Engine switch is set to “OFF.” Set engine switch to “ON.” Fuel valve is turned to “OFF.” Turn the fuel valve to the “ON” position. Choke is open. Close the choke. Engine is out of fuel. Add gasoline. Engine is filled with contaminated or Change the gasoline in the gas tank and drain/ old gasoline. clean the carburetor.
EXPLODED VIEW AND PARTS LIST (VIBRATOR ASSEMBLY) 18
EXPLODED VIEW AND PARTS LIST (VIBRATOR ASSEMBLY) No.
11 EXPLODED VIEW AND PARTS LIST (PLATE COMPACTOR) 20
EXPLODED VIEW AND PARTS LIST (PLATE COMPACTOR) No.
EXPLODED VIEW AND PARTS LIST (ENGINE) NOTE: The entire engine is available as a single assembly under model number 56035-E-000. Fig. 1 - Cylinder Head Assembly No. Part Description Cylinder Head Fig. 1 - 1 56035-E-001 Gasket Cylinder Head Fig. 1 - 2 P54066 Cover Assembly Cylinder Head Fig. 1 - 3 P54064 Cover Gasket Fig. 1 - 4 56035-E-004 Breather Tube Fig. 1 - 5 P54040 Bolt Fig. 1 - 6 56035-E-006 Stud Fig. 1 - 7 P54058 Stud Fig. 1 - 8 P54048 Pin Cylinder Head Fig. 1 - 9 P54062 Bolt Fig.
EXPLODED VIEW AND PARTS LIST (ENGINE) No. Fig. 4 - 1 No. Fig. 6 - 1 Fig. 6 - 3 Fig. 6 - 5 Fig. 6 - 6 Fig. 6 - 7 Fig. 6 - 8 Fig. 6 - 9 Fig. 6 - 10 Fig. 6 - 11 Fig. 6 - 12 Fig. 4 - Crankshaft Part Description Crankshaft 56035-E-031 Assembly Qty. 1 Fig. 6 - Valve/Camshaft Part Description Qty.
EXPLODED VIEW AND PARTS LIST (ENGINE) No. Fig. 8 - 1 Fig. 8 - 2 Fig. 8 - 3 Fig. 8 - 4 Fig. 8 - 5 Fig. 8 - 6 Fig. 8 - 7 Fig. 8 - 8 Fig. 8 - 9 Fig. 8 - 10 Fig. 8 - Shroud Part Description P54668 Shroud Cylinder Body 56035-E-058 Shroud 56035-E-059 Lower Shield P54612 Oil Protector Stop Engine 56035-E-061 Switch Subassembly P54040 Bolt P54040 Bolt P54596-1 Collar P54186 Bolt P54040 Bolt Fig. 10 - Air Cleaner No. Part Description Fig. 10 - 1 56035-E-073 Air Cleaner Fig. 10 - 2 P54179 Nut Air Cleaner Fig.
EXPLODED VIEW AND PARTS LIST (ENGINE) No. Fig. 12 - 1 Fig. 12 - 2 Fig. 12 - 3 Fig. 12 - 4 Fig. 12 - 5 Fig. 12 - 6 Fig. 12 - 7 Fig. 12 - 8 Fig. 12 - 9 Fig. 12 - Gas Tank Part Description Qty. 56035-E-078 Fuel Tank 1 56035-E-079 Fuel Strainer 1 56035-E-080 Fuel Tank Cover 1 Fuel Tank Oil 56035-E-081 1 Outlet Subassembly 56035-E-082 Collar 2 56035-E-083 Fuel Tube 1 56035-E-084 Bolt 1 P54179 Nut 2 56035-E-102 Rubber Jacket 1 No. Fig. 13 - 1 Fig. 13 - 2 Fig. 13 - 3 Fig. 13 - 4 Fig. 13 - 5 Fig. 13 - 6 No.
WARRANTY STATEMENT Remember to save the receipt and to accurately fill out and mail the product registration card. Proof of purchase is required for all warranty work. WEN® Plate Compactors are under warranty to be free from defects in materials and workmanship for a period of two (2) years from date of original purchase. Plate compactors used for Commercial or Rental use have a warranty period of 90 days from date of original purchase.