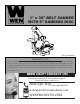
" x 30" BELT SANDER WITH 5" SANDING DISC bit.ly/wenvideo IMPORTANT: Your new tool has been engineered and manufactured to WEN’s highest standards for dependability, ease of operation, and operator safety. When properly cared for, this product will supply you years of rugged, trouble-free performance. Pay close attention to the rules for safe operation, warnings, and cautions. If you use your tool properly and for its intended purpose, you will enjoy years of safe, reliable service.
TABLE OF CONTENTS 2 3 4 5 6 7 10 11 12 14 15 Technical Data General Safety Rules Specific Safety Rules For Belt/Disc Sander Electrical Information Know Your Belt/Disc Sander Assembly and Adjustments Operation Maintenance Exploded View and Parts List Troubleshooting Warranty TECHNICAL DATA Model Numbers: Motor: No Load Disc Speed: Disc Diameter: No Load Belt Speed: Belt Size: Dust Port Size: Dust Port Adapter: Included Sanding Disc: Included Sanding Belt: Net Weight: Product Dimensions: 2 6515, 6515T 120
GENERAL SAFETY RULES Safety is a combination of common sense, staying alert and knowing how your item works. SAVE THESE SAFETY INSTRUCTIONS. WARNING: To avoid mistakes and serious injury, do not plug in your tool until the following steps have been read and understood. 1. READ and become familiar with this entire instruction manual. LEARN the tool’s applications, limitations, and possible hazards. 2. AVOID DANGEROUS CONDITIONS. Do not use power tools in wet or damp areas or expose them to rain.
GENERAL SAFETY RULES 15. DO NOT OVERREACH. Keep proper footing and balance at all times. Wear oil-resistant rubber-soled footwear. Keep the floor clear of oil, scrap, and other debris. 16. MAINTAIN TOOLS PROPERLY. ALWAYS keep tools clean and in good working order. Follow instructions for lubricating and changing accessories. 17. CHECK FOR DAMAGED PARTS. Check for alignment of moving parts, jamming, breakage, improper mounting, or any other conditions that may affect the tool’s operation.
SPECIFIC RULES FOR THE BELT SANDER 10. Do not sand pieces of material that are too small to be safely supported. 11. When sanding a large workpiece, provide additional table height support. 12. Do not sand with the workpiece unsupported. Always support the workpiece with the table. 13. Always remove scrap pieces and other objects from the tables before turning the sander ON. 14. Never perform layout, assembly or set-up work on the table while the sander is operating. 15.
ELECTRICAL INFORMATION GUIDELINES FOR USING EXTENSION CORDS Make sure your extension cord is in good condition. When using an extension cord, be sure to use one heavy enough to carry the current your product will draw. An undersized cord will cause a drop in line voltage resulting in loss of power and overheating. The table below shows the correct size to be used according to cord length and nameplate ampere rating. When in doubt, use a heavier cord. The smaller the gauge number, the heavier the cord.
ASSEMBLY AND ADJUSTMENTS NOTE: Before making any adjustments check that the power switch is in the OFF position and that the plug is disconnected from the power source. 6 3 4 SANDING BELT TABLE This machine is equipped with a tilting table secured by a lock lever. To install the table: 1. Pass the sanding belt through the slot on the table and position the table on the machine (Fig. B - 1). 1 5 2. Secure the table into position using the locking lever (Fig. B - 2). 2 Fig.
ASSEMBLY AND ADJUSTMENTS DUST PORTS For optimal dust removal and minimal clean-up, this sander is equipped with two dust ports: one for the belt and one for the disc. The sanding belt dust port with the side guard is mounted to the machine using a lock knob (Fig. B - 5) and three screws/washers (Fig. B - 4). 5 3 The sanding disc dust port attaches to the back of the dust port (Fig. G - 2) using three screws and washers (Fig. G - 1).
ASSEMBLY AND ADJUSTMENTS TESTING THE MACHINE Once you have properly assembled the machine, perform a test run to see that everything powers up and runs correctly. All of the tools for assembly and adjustments should be removed and cleared away before turning on the machine. During the test run, make sure the ON/OFF switch along with all safety features are working properly before applying a load. After connecting the machine to the correct power source, stand to the side of the machine and power it on.
OPERATION ON/OFF SWITCH 1. To start the sander, push the switch to the ON position. 2. To stop the sander, push switch to the OFF position. SURFACE SANDING ON SANDING BELT Hold the workpiece firmly with both hands. Keep fingers away from sanding belt. Keep the workpiece flat against the belt table and move it slowly across the sanding belt. Apply enough pressure to remove material; excessive pressure will reduce sanding efficiency.
MAINTENANCE NOTE: All ball bearings are sealed and permanently lubricated. Do not add any external lubrication. Always check the sander for worn/damaged wires, loose mounting hardware, damaged abrasive discs and belts or for any other unsafe conditions before operation. SANDING BELT REPLACEMENT To replace the sanding belt: 1. Make sure the switch is in the OFF position and the cord is disconnected from the power source. 2 1 2. Remove the upper guard (Fig.
EXPLODED VIEW AND PARTS LIST NO. PARTS NUMBER 12 DESCRIPTION QTY. NO. PARTS NUMBER DESCRIPTION QTY.
EXPLODED VIEW AND PARTS LIST 13
TROUBLESHOOTING PROBLEM Sanding grains easily rub off belt or discs Deep sanding grooves or scars in workpiece. Sanding surface clogs quickly Burns on workpiece CAUSE 1) Sanding belt/disc has been stored in an incorrect environment. 2) Sanding belt/disc has been damaged or folded. 1) Sanding belt/disc grit is too coarse for the desired finish. 2) Workpiece sanded across the grain. 3) Too much sanding force on workpiece. 4) Workpiece held still against belt-disc for too long.
LIMITED TWO YEAR WARRANTY WEN Products is committed to building tools that are dependable for years. Our warranties are consistent with this commitment and our dedication to quality. LIMITED WARRANTY OF WEN CONSUMER POWER TOOLS PRODUCTS FOR HOME USE GREAT LAKES TECHNOLOGIES, LLC (“Seller”) warrants to the original purchaser only, that all WEN consumer power tools will be free from defects in material or workmanship for a period of two (2) years from date of purchase.
THANKS FOR REMEMBERING