
Use and Care Manual


7
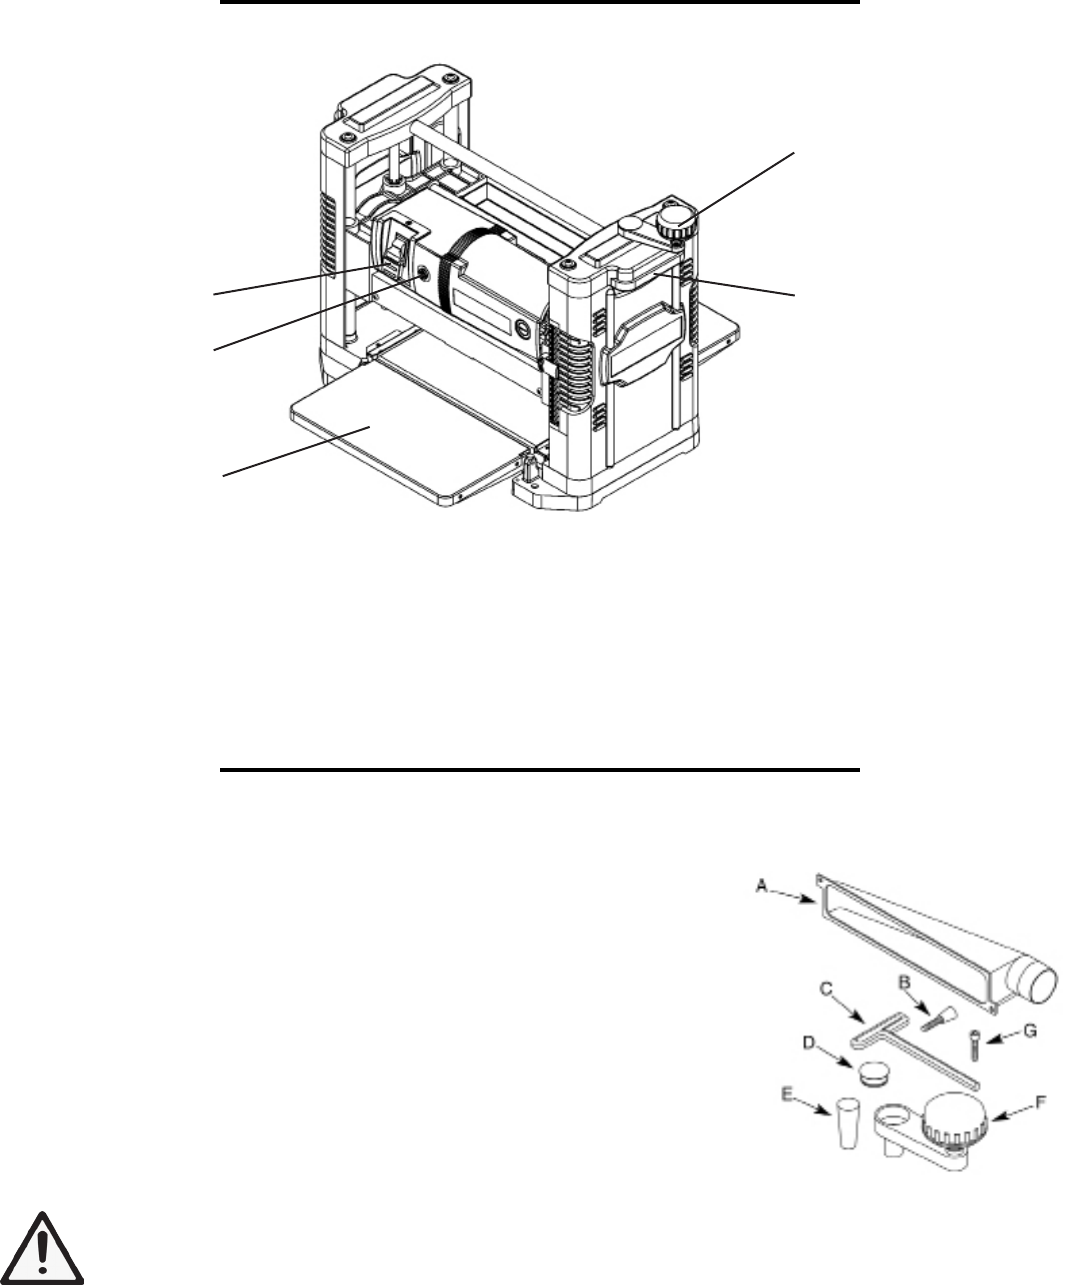
KNOW YOUR PLANER
ASSEMBLY AND ADJUSTMENTS
Extension Table
Circuit Breaker
Switch
Carrying Handle
Depth Adjusting Handle
Figure 1
UNPACKING (FIGURE 1)
IMPORTANT: Remove protective paper from the table before operating
the unit.
The planer comes assembled as one unit. Additional parts which need to be
fastened to planer should be located and accounted for before assembling.
A Dust Chute
B Thumb Screw (2)
C T-handle Hex Wrench (on planer)
D Plug
E Magnet (2, on planer)
F Depth adjusting handle
G Bolt with Lock Washer
WARNING: Do not attempt assembly if parts are missing. Use
this manual to order replacement parts.