% * - % .
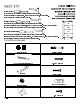
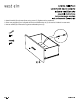
K M F L J L Anti tip kit 2x N Nylon Strap 2x O I P L P Q Q F R Mounting Plate 4x L Kit anti chavirement – 2x Plate de montage - x4 G H I F J I F F Small Screw 4x Large Screw 4x Kit para evitar que voltee Bretelle en nylon – x2 Cinta de Nylon 2x Vis petite x4 Vis grande x4 Placa de montaje 4x Tornillo Pequeño 4x Tornillo Largo 4x ? @ A B C D E F F
[ W \ Z ] \ Z Z S T U V W X Y Z Z
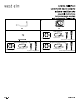
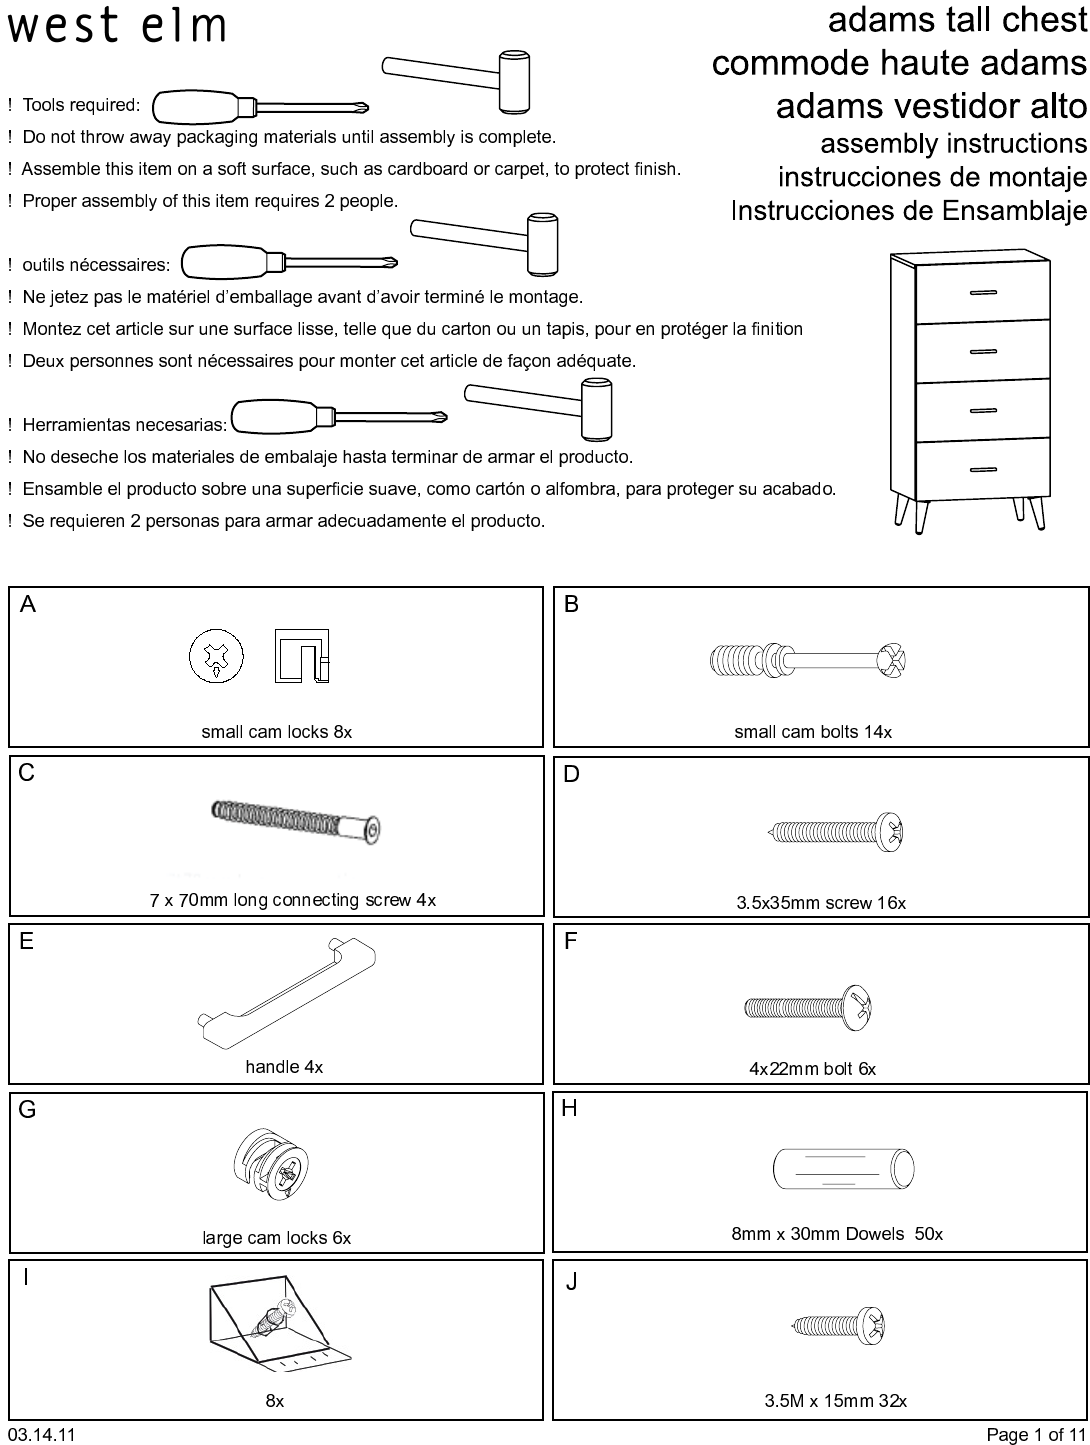
Drawer Construction repeat for all 4 drawers: 1. Screw in 2 small cam bolts (B) into back of drawer fronts. 1. Vissez 2 petites vis à came (B) sur la surface arrière de la façade des tiroirs. 1. Inserte 2 pernos pequeños (B) en la parte trasera del frente de las gavetas. 2. Insert 2 small cam locks (A) and 4 small dowels (C) into 2 opposite drawer sides. Attach left and right drawer sides to front panel. Fasten 4 cams with screwdriver. Align drawer guides (20) as shown. Insert screws (J).
3. Slide drawer bottom into grooves on drawer sides and front. Align drawer back like shown. 3. Glissez le panneau du fond dans les rainures du panneau latéral droit et gauche. Alignez le panneau ar rière du tiroir comme illustré. 3. Deslice la parte baja de la gaveta en el canal en los paneles izquierdo y derecho. Enfile la parte trasera como se muestra. 4. Insert dowels (H) into the drawer backs. Press drawer backs into place. Insert large screw (D) through drawer sides into drawer back as shown.
5. Attach handle (E) to drawer front using screw (F). Tighten with screwdriver. 5. Fixez une poignée (E) sur la façade du tiroir en utilisant des vis (F). Serrez-les à l’aide d’un tournevis. 5. Anexe manilla (E) al frente de la gaveta utilizando perno (F).
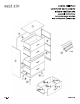
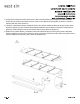
6. Locate the 2 end panels and lay them onto a clean smooth surface such as carpet or cardboard. Insert dowels (J) into ends of end panels as shown. Insert screws (M) into drawer guides as shown. Locate the rails (#4) and (#5). Insert dowels (J). 6. Situez les 2 panneaux latéraux et déposez-les sur une surface moelleuse telle que du tapis ou du carton. Insérez les goujons (J) dans les bouts des panneaux latéraux comme illustrés. Insérez les vis (M) dans les glissières, comme illustrées.
7. Insert large cam bolts (B) into top panel. 7. Insérez les gros boulons à came (B) dans le panneau supérieur. 7. Inserte pernos (B) en el panel superior. 8. Insert cam lock (G) into the rails. Align the rails (4 & 5) along with panel (6) with the end panel. Press firmly together. Insert screw (C) thru panel (6). 8. Insérez les serrures à came (G) dans les traverses. Alignez les traverses (4 et 5) ainsi que le panneau (6) avec le panneau latéral. Pressez-les fermement ensemble.
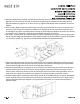
. With help, align bottom panel (6), and the other end panel (2) over the dowels and cam locks. Press firmly together. Turn the cam locks with the provided hex key 180 degrees until they lock the rails into place. Align the bottom leg supports (L) an insert screws (J). Tighten with phillips-head screwdriver. Do not over tighten! 9. Avec de l’aide, alignez le panneau inférieur (6), et les autres panneaux latéraux (2) avec les goujons et les serrures à came. Pressez-les ensemble.
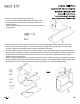
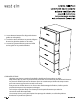
11. Insert drawers bottom first. Align with drawer guides on side panels. 11. Insérez les tiroirs inférieurs en premier. Alignezles avec les glissières situées sur les côtés. 11. Inserte las gavetas inferiores primero. Enfile con las guías en los paneles laterales. CARE INSTRUCTIONS Hardware may loosen overtime. Periodically check that all connections are tight. Wipe with a soft, dry cloth. To protect finish, avoid the use of chemicals and household cleaners.
back side wall NOTICE: To prevent injury and property damage from unexpected tipping of furniture, we highly recommend installa tion of the anti-tip kit included with this product. Attaching furniture to wall with anti-tip kits. 1. Determine where the piece is to be placed and mark location on the wall for the mounting bracket screw holes. They should be placed approximately 1” below the top on the back of the piece of furniture. 2.