
Assembly Instruction

Important Safety Instructions:
•For safety purposes, this lamp is equipped with a polarized plug (one blade is wider than the other). If the
Plug does not t securely into your outlet; do not force it-contact a professional electrician. Use the plug
With an extension cord only if it can be fully inserted into the cord’s socket. Never alter the plug in any way.
•This instruction is provided for your safety. It is important that they are read carefully and completely before
Assembling xture.
•This xture has been rated for up to (1) 60-watt TYPE A standard bulb (not included).
To avoid the risk of re, do not exceed the recommended wattage.
Warning:
•To reduce the risk of re, electrical shock or personal injury, always turn o and unplug lamp and allow it
to cool prior to replacing light bulb.
•Do not touch bulb when xture is turned on. Do not look directly at lit bulb.
•Keep ammable materials away from lit bulb.
Pre-assembly:
•Remove all parts and hardware from box along with any plastic protective packaging.
•Do not discard any contents until after assembly is complete
to avoid accidentally discarding small parts or hardware.
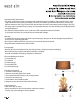
Parts and hardware enclosed:
(1) Lamp Base (A)
(1) Socket (B)
(1) Shade ring (C)
(1) Lampshade (D)
(1) Cord with plug (E)
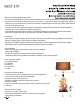
Assembly Instructions:
1. Screw the shade ring o
2. Remove protective plastic from shade
3. Turn upside down the shade to its correct position
4. Screw on the shade ring
5. Insert bulb in the threaded socket
6. Plug into proper electrical outlet and test xture
Care instructions:
•Clean with soft, dry cloth.
•Always avoid the use of harsh chemicals or abrasive cleaners
As they may cause damage to the lamp nish.