
Administrator and Maintenance Guide User guide


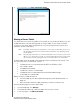
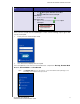

Table Of Contents
- WD® Service and Support
- WD Guardian Services
- Important User Information
- Product Overview
- Connecting the Server and Getting Started
- Managing the WD Sentinel Server (Dashboard)
- Setting up WD Sentinel Server & Connecting Computers
- Accessing the Dashboard
- Tips for Performing Dashboard Tasks
- Adding a User Account
- Performing Dashboard Tasks
- Using the Home Page
- Managing User Accounts
- Managing Devices
- Managing Storage
- Monitoring Applications
- Monitoring System Health and Alerts
- Updating Software
- Managing Server Settings
- Shutting Down and Rebooting the Server
- Managing Storage on the WD Sentinel Server
- Using the WD Sentinel Server’s Features
- Using the Launchpad (Internal Users)
- Accessing Shared Folders Over Your Network
- Accessing Computers and Shared Folders Remotely
- Backing up (Windows PC)
- Backing up with Time Machine (Mac)
- Recovering/Restoring (Windows PC)
- Recovering/Restoring (Mac)
- Backing up your WD Sentinel Server
- Recovering a WD Sentinel Server Image or Resetting the Boot Drives to Factory Defaults
- Best Practices
- Troubleshooting
- Regulatory and Warranty Information
- Appendix
- Index
MANAGING STORAGE ON THE WD SENTINEL SERVER
46
WD SENTINEL DS5100/DS6100
ADMINISTRATOR AND MAINTENANCE GUIDE
3. On the Create Options pull-down menu, select a RAID option.
It is a best practice to select RAID 5 for your WD Sentinel server storage.
4. Click Submit.
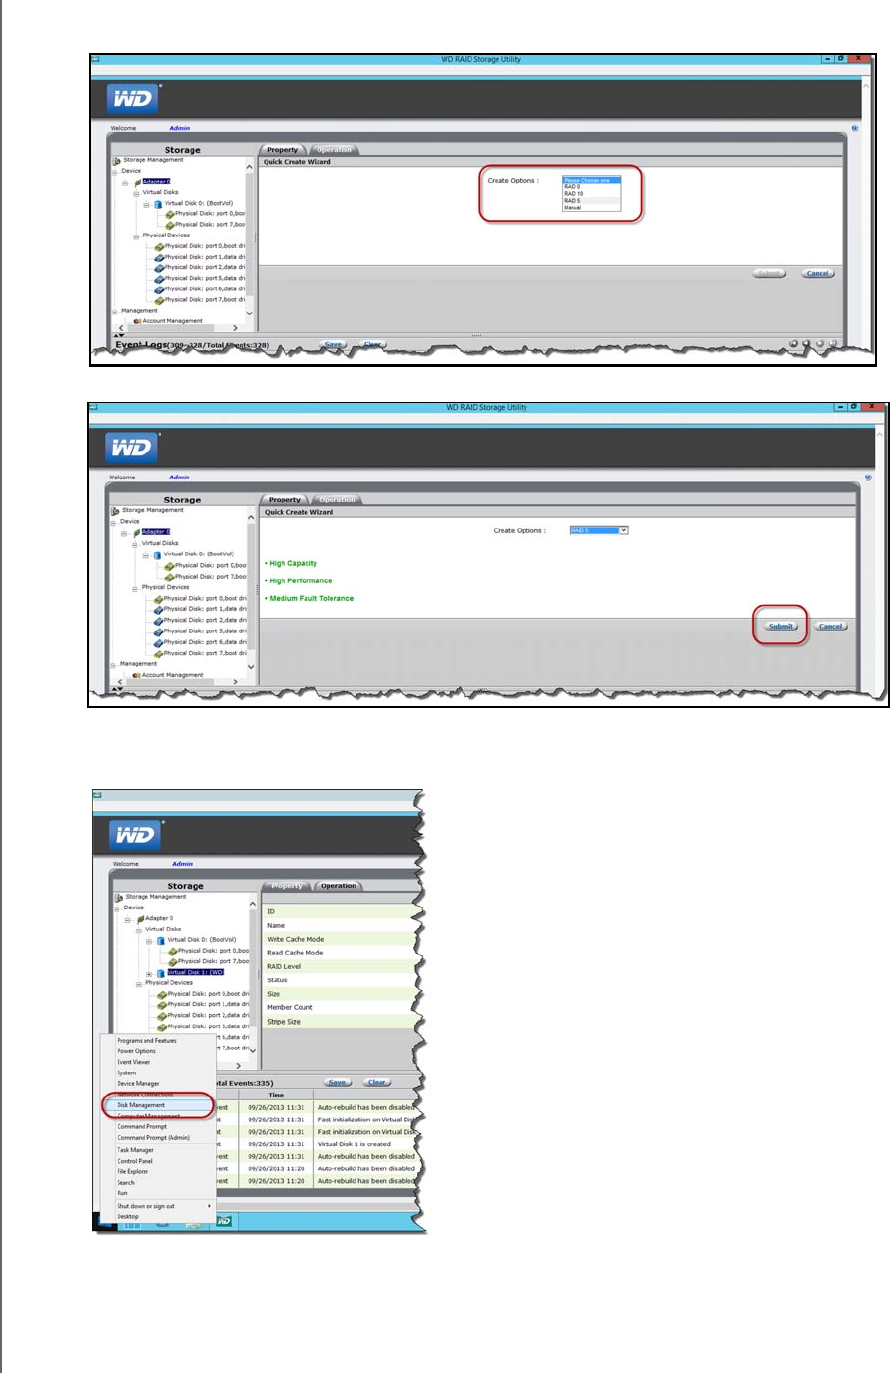
5. Click OK. Your RAID storage is created. Now, lets mount your new disk.
6. Right-click the lower-left corner of your desktop, then select Disk Management.