
Instruction manual


Installing the appliance
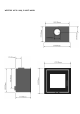
I) Remove door and frame
a. Open door and lift so bottom hinge in lifts out of holder.
b. Tilt base away from stove and lower door.
c. Door should now be released.
d. Place door in a safe place.
II) Remove frame from stove.
a. Once door is removed
b. Loosen four Allen keys and frame will come away.
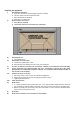
III) Remove Brick set
a. See manual below
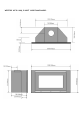
IV) Remove Bar from flue collar
a. Loosen bolts holding flue collar
b. Remove flue collar taking care not to lose nuts and bolts.
V) Fit collar to stainless steel flue( we recommend a 500mm of 1mm stainless steel if possible)
VI) Fill any Void with at the back and sides with a 6;1 vermiculite to cement mix or any other
good quality non-combustible insulation material. It is important that the back and sides of
the stove are well insulated.
VII) Connect the stove to the flue
a. Pull stove collar to top of stove from inside the appliance.
b. Align bolt locations and re-bolt the spigot( and Flue) to stove.
c. Tighten bolts and secure.
VIII) Finish around stove
IX) Re-fit frame
a. If a newly plastered room please take care not to leave painted frame and door fitted as
the extremes of moisture while the plaster dries and can cause corrosion to the paint work.
b. Before re-fitting door and frame, store door and frame in a dry and well ventilated place
while allowing the plaster to dry
X) Re-fit door
XI) Re-fit brick as shown in the instructions in this booklet.