
Instructions / Assembly


11
ETL-ES-S umter-WH16
LIGHT FIXTURE INSTALLATION
INSTALACIÓN DEL ARTEFACTO LUMINOSO
13 14
Remove the 3 attachment screws from the light kit cap, keep them for next step. Find
the wire plugs from the light kit and from the motor and slide together. Connect the
blue wire from the switch housing, to the black wire from the light kit, and the white
wire from the switch housing to the white wire from the light kit. Attach light kit to
the switch housing by aligning the light kit cap with its notch positioned to accom-
modate the reverse switch in switch housing, and installing the 3 screws previously
removed.
Quítale los 3 tornillos de la tapa del artefacto luminoso, guárdalos para uso en el próx-
imo paso. Identifique los conectores para cables de salida del artefacto luminoso y del
motor y deslícelos para unirlos. Conecte el cable azul del alojamiento del interruptor al
cable negro del artefacto luminoso y el cable blanco del alojamiento del interruptor al
cable blanco del artefacto luminoso. Adjuntas el artefacto luminoso al alojamiento del
interruptor alineando la muesca de la tapa del artefacto luminoso y acomodando el
interruptor de inversión. Instala los 3 tornillos que previamente quitaste de la tapa del
artefacto luminoso.
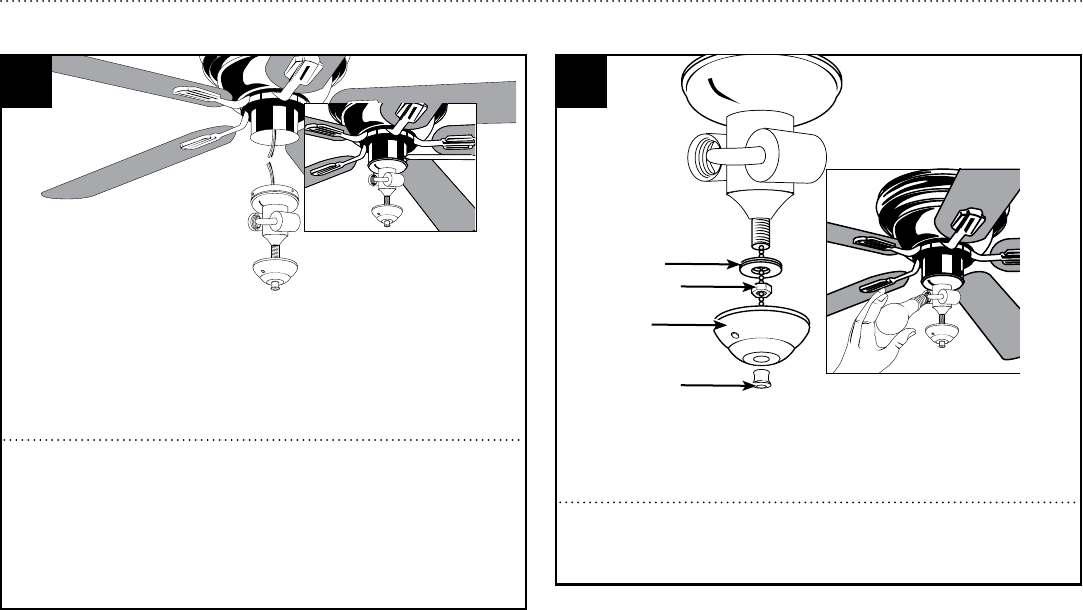
Unscrew and remove the finial (1), decorative cap (2), nut (3), and rubber/metal
washer (4) from the bottom of the light kit. Install the bulbs (included).
Desenrosque y quite el florón (1), la tapa decorativa (2), la tuerca (3) y la arandela
de caucho/metal (4) de la parte inferior del juego de luces. Instale las bombillas de
luz (incluidas).
4
3
2
1