
User manual


8
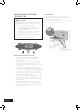
DESCRIPTION
BEFORE OPERATING YOUR APPLIANCE
FOR THE FIRST TIME
WARNING
SETTING THE TIME
If you have purchased a model fitted with a 3 button
programmable timer, you must set the time of day
before you can operate your appliance.
• After the appliance has been electrically
connected “12.00” will be displayed and the
“clock indicator” will flash.
• To set the time of day, press the – or + buttons.
5 seconds after the last change, the “clock
indicator” will disappear, confirming the time has
been set.
Note: The clock has a 24-hour display.
PREPARING YOUR APPLIANCE FOR THE FIRST TIME
• Please remove all internal boxes and bags from
the oven & remove visible labels from surfaces
before operation.
• Please wipe out the oven interior prior to operation
with warm soapy water and polish dry with a soft
clean cloth. Do not close the oven door until the oven
is completely dry.
• New appliances can have an odour during rst
operation. It is recommended to ‘run in’ your oven before
you cook for the first time. Run the oven at 180°C for
2-4 hours and ensure that the room is well ventilated.
• Please install oven furniture as outlined in the “Fitting
Oven Accessories and Cleaning” section.
• If your appliance is tted with solid hotplates, turn heat
setting to high for 3 minutes to fully harden the coating.
When cooled, apply a thin coating of cooking oil to
seal the surface.
• The gas grill may have oils left on the grill during
manufacture. Before you cook on the grill for the first
time, turn on for 15 minutes with 10mm of water in the
bottom of the grill dish.
FITTING OVEN SHELVES
1. Ensure shelf orientation is correct (refer picture).
2. Slide into oven at an angle until raised back of shelf
is past the stop on side runners.
3. Lower front of shelf and push in until stop is reached.
NOTE: The top ledge is not a shelf position.
Note the orientation of the
side and rear features