USER’S MANUAL MANUEL DE L’UTILISATEUR MANUAL DEL USUARIO WB55F1D1 WB65F1D1 WB70F1D1
Interactive White Board Owner’s Operating Manual Before operating the unit, please read this manual thoroughly, and retain it for future reference.
Safety Warning Before operating the unit, please read this manual thoroughly, and retain it for future reference. Placement Do not place the unit on an unstable cart, stand, tripod, bracket, table, or shelf. Do not expose the unit to direct sunlight and other sources of heat. Do not place the unit near appliances that create magnetic fields. Do not handle liquids near or on the unit. Never spill liquid of any kind into the unit Do not put heavy objects on top of the unit.
Humidity Do not expose machine to rain, damp area or place near water. Ensure the indoor operating humidity is 10~90%, storage humidity is 10~95%. Ventilation Keep all ventilation openings clear. Ensure that the unit has enough space for ventilation around: left, right and back >10cm, top> 20cm. Earphone Prolonged use of earphone with louder sound can affects your hearing. Before using earphone, please turn down the sound volume. Standby Standby mode will not turn off the unit.
Installations Open your package 1) Checking parts: Warranty Card, Quick Use, Remote Control, Power Cord, VGA/USB/Audio/AV/YPBPR cables, Batteries, hand-write-touch-pen and CD
2).The mobile bracket (matched) takes material object as the standard 3).The wall bracket (matched) takes material object as the standard 2) Installation 1).Please read “Mobile Bracket Installing Instruction” while installing. 2).Please read “Wall Bracket Installing Instruction” while installing.
1 ○ YPbPr 2 ○ AUDIO OUT 3 ○ AV-1 IN 4 ○ AV-2 IN YPbPr signal input (DVD, set ‐top ‐box with YPbPr output etc) Earphone or to another external Audio equipment Composite video and Audio signals (R-L) Composite Video and Audio signals (R-L) by RCA terminals Digital sound signal interface 5 ○ SPDIF-audio 6 ○ RS232 7 ○ USB 8 ○ POWER 9 ○ POWER PC 10 ○ RESET PC 11 ○ VGA-1 IN 12 ○ VGA-2 IN 13 ○ VGA OUT 14 ○ Audio-1 IN 15 Audio-2 IN Audio‐2 input (related to VGA‐2 input) 16 Mic IN M
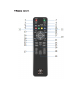
5 Remote control
Remote Control Buttons` Function Description 2 MUTE Power supply switch, Turn on and off the AC source Mute ON/OFF. 3 P.MODE Picture mode selection 4 S.MODE Sound Mode selection.
2 Remote Control Instruction Insert the Batteries 1 Remove the cover on the rear of the remote control 2 Insert two “AAA” batteries 3 Place the cover Remote control area The range of remote control receiver as shown
CAUTION RISK OF DAMAGE IF BATTERY IS REPLACED WITH AN INCORRECT TYPE DISPOSE OF USED BATTERIES ACCORDING TO THE INSTRUCTIONS Connecting and Setting For the safety of you and your unit, please do not connect any power source before the external device is installed 1 External Computer and Touch Connecting (1) Connect a VGA cable (15pin) between the PC-VGA Input and Output of external PC. Connect an audio cable between the PC and display.
(1) Connect an AV cable between display and external device through the AV out(). Yellow is Video, Red is Audio-R, White is Audio-L . (2) Plug-in the POWER cord and turn ON the display. (3) Press 1 (one) to turn the power on located on the front of the display. (4) Press INPUT to change source to AV. 2).MIC IN (1).Connect microphone to the MIC IN jack. (2).Plug-in the POWER cord and switch it on from the rear panel. (3).Press 1 (one) to turn the power on.
3). Y-Pb-Pr (1). Connect the Y-Pb-Pr cable between the display and an external device. (2). Plug-in the POWER cord and switch it on from the rear panel. (3). Press 1 (one) to turn the power on. (4). Press INPUT to change source to YPbPr. 4). HDMI1/ HDMI2 (1) Connect a HDMI cable from the display to an external device. (2).Plug-in the POWER cord and switch it on from the rear panel. (3) Press 1 (one) to turn the power on. (4)Press INPUT to change source to HDMI.
3 Coaxial Connecting (1) Connect a Coaxial cable from display to an external device. (2) Plug-in the POWER cord and switch it on from the rear panel. (3) Press 1 (one) to turn the power on 4 Video-OUT 1) VGA -OUT (1) Connect a VGA cable from the display to an external device, Connect a Earphone cable from the display’s audio-out to an external device. (2) Plug-in the POWER cord and switch it on from the rear panel. (3) Press 1 (one) to turn power ON. (4) Press INPUT to change source input to PC.
Connections to Internal PC 1 Network cable 2 Microphone Cable 3 USB Device
RS232 connection After connecting the central control system and unit, you can use some of the function, such as power on/off or adjust the volume etc. Internal PC basic operations: 1. Wait about 30 seconds after installing PC to back of the display, press POWER to turn on the TV and PC together; 2. While booting, press the POWER button, wait for 2 to 3 seconds and then press the power button again to turn off the TV and PC together; 3.
Internal PC unit (option) location With the model which included the PC unit inside, the location of PC dock located at behind of the set.
OSD Operation 1. Press menu to display the main menu. 2. Use " / " key to navigate through the menu.
Source Menu Select "Source Menu ", use "▲ /▼ " to navigate of each feature press "OK" to make the selection. Picture 1. Press "Menu" key access OSD menu, use " / " to select "Picture" menu.
2. Use "▲ /▼ " to select "Picture Mode", access by "Enter" key, use " / " to select the picture mode. 3. Use "▲ /▼ " to select "Color Temperature", access by "Enter" key, use " / " to select. /▼ " to select "Aspect Ratio 16:9", access by "Enter" key, use " / " to select. 4. Use "▲ /▼ " to select "Noise Reduction", access by "Enter" key , use " / " to select. 5. Use "▲ 6. Use "▲ /▼ " to select "PC SETUP", access by "Enter" key ,use " / " to select. Press the "Menu" key to return. Sound 1.
1.Press "Menu" key to access OSD menu, use " / " to select "Time" menu. /▼ " to select "Time", access by "Enter" key ,use "▲ /▼ / / " to set the time. 2. Use "▲ 3. Use "▲ /▼ " to select "Clock", access by "Enter" key ,use "▲ /▼ / / " to set the clock time. 4. Use "▲ /▼ " to select "Off Time", access by "Enter" key ,use "▲ /▼ / / " to choose the selection. /▼ " to select "On Time", access by "Enter" key ,use "▲ /▼ / / " to choose 5. Use "▲ the selection. 6.
3.Use "▲ /▼ " to select "Restore Factory Default", access by "Enter" key, use " / " to choose necessary operation selection. 4. Use "▲ /▼ " to select "Transparency", access by "Enter" key, use " / " to choose the selection. /▼ " to select "OSD Duration", access by "Enter" key, use " / " to choose the 5. Use "▲ selection. Press the "Menu" key to return. USB When USB module inserted, the picture as like as right appears indicating that the module is accepted.
Next/previous music REW/FF key : Stop playing and return to the menu. Remark: press "▲ /▼ / / " to choose the selection, enter by "enter" key. MOVIE Use " / " key to select "MOVIE" and "Enter", press "▲ /▼ / / " to choose the selection, enter by "enter" key. Press " " key to play. Press "EXIT" key to return the menu. " " key to play or pause. Next/previous movie REW/FF key : Stop playing and return to the menu. Remark: Press "▲ /▼ / / " to choose your selection, enter by "enter" key.
correct. 3. Check whether the batteries are exhausted. The unit shuts down 1. Check sleep function if operated. automatically 2. Check whether there is a sudden power failure. 3. Check for the signal to system and control. PC mode No signal 1. Check display setting. 2. Check the resolution. 3. Adjust the Hs & Vs (synchronization) in the menu. Background streaking 1 .Choose auto-adjust. 2. Adjust clock and phase. False color 1. Check the VGA. 2. Adjust color, tint, brightness and contrast.
Poor picture 1 .Adjust chroma, brightness and contrast in the menu. 2. Check the signal cable. Audio not working properly No sound 1. Check the mute function if operated. 2. Adjust sound volume. 3. Check the audio cable. One speaker 1. Adjust sound balance in the menu. 2. Check the setting in sound control panel of computer. 3. Check the audio cable. VGA-OUT silence 1. Check for proper earphone connection. Care and Maintenance With proper care, your unit will provide you many years of service.
2.
www.westinghousedigital.