USER MANUAL GAS COOKTOPS WHG644SC, WHG648SC, WHG643SC,WHG645SC, WHG645WC, WHG758SC,WHG954SC, WHG958SC, WHG953SC, WHG955SC, WHG955WC, WHG638BC, WHG958BC
CONGRATULATIONS CONTENTS Dear customer, Important safety instructions.........................................................3 Congratulations and thank you for choosing our cooktop. We are sure you will find your new cooktop a pleasure to use and a great asset to your cooking. Before you use the cooktop, we recommend that you read through the whole user manual which provides the description of the cooktop and its functions. Installation and use summary.................................................
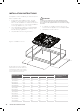
IMPORTANT SAFETY INSTRUCTIONS Please read the user manual carefully and store in a handy place for later reference. • Handles should be turned away from the front of the bench to avoid accidents. • Do not modify this appliance. TIPS & INFORMATION IMPORTANT Important – check for any damages or marks. Figure 1 If you find the cooktop is damaged or marked, you must report it within 7 days if you wish to claim for damage/ marks under the manufacturer’s warranty. This does not affect your statutory rights.
INSTALLATION WARNING CAUTION USING YOUR COOKTOP Controls You must read these warnings carefully before installing or using the cooktop. If you need assistance, contact our Customer Care Department. • Each burner is controlled by a control knob. The markings on the control panel indicate which burner the knob controls, and the settings for that burner. (See Figure 2).
CARE AND CLEANING Choice of burners For your convenience there is a choice of burners: • A small burner for special low heat and slow cooking. • A medium burner for normal cooking and simmering. (one on 4-burner models and two on 5-burner models). • A large burner for fast heating and large pots and pans. • A wok burner for very fast heating using a wok or large pot or pan.
TROUBLESHOOTING If you have a problem with the cooktop, check the table below. You may be able to solve the problem and this will save you from paying for a service call. You will have to pay for a service call even in the warranty period if the problem is one listed below. FAULT POSSIBLE CAUSES REMEDY Burner will not light even though the sparker is working.
TECHNICAL DATA FEATURES WHG644SC WHG648SC WHG643SC WHG645SC WHG645WC Cooking zones 4 4 4 4 4 Wok Yes Yes Yes Yes Yes Ignition 220-240V 220-240V 220-240V 220-240V 220-240V Trivet Cast Cast Wire Cast Cast Hob material Stainless steel Stainless steel Stainless steel Stainless steel Enamelled White Features Ignition through knob Ignition through knob Ignition through knob Ignition through knob Ignition through knob Flame safeguard Yes Yes Yes Yes Yes Colours Stai
TECHNICAL DATA (CONTINUED) FEATURES WHG758SC WHG954SC WHG958SC WHG953SC Cooking zones 5 5 5 5 Wok Yes Yes Yes Yes Ignition 220-240V 220-240V 220-240V 220-240V Trivet Cast Cast Cast Wire Hob material Stainless steel Stainless steel Stainless steel Stainless steel Features Ignition through knob Ignition through knob Ignition through knob Ignition through knob Flame safeguard Yes Yes Yes Yes Colours Stainless steel Stainless steel Stainless steel Stainless steel Gas
TECHNICAL DATA (CONTINUED) FEATURES WHG955SC WHG955WC WHG638BC WHG958BC Cooking zones 5 5 3 5 Wok Yes Yes Yes Yes Ignition 220-240V 220-240V 220-240V 220-240V Trivet Cast Cast Cast Cast Hob material Stainless steel Enamelled White Tempered Glass Tempered Glass Features Ignition through knob Ignition through knob Ignition through knob Ignition through knob Flame safeguard Yes Yes Yes Yes Colours Stainless steel Enamelled White Black Black Gas Types NG, (LP conver
INSTALLATION INSTRUCTIONS This appliance must be installed by an authorised person and in compliance with: WARNING CAUTION Cooktops are supplied for use with natural gas (NG). To use with LPG the injectors MUST be changed using the conversion kit supplied. Refer LP Conversion on page 12 and 13. 1. AS/NZS 5601.1 Gas Installations Part 1: General Installations, and AS/NZS 5601.
INSTALLATION PROCEDURE 1. The bench cutout should be made as per cutout dimensions in Figure 4. 2. Adjacent walls, cupboards and protection for combustible materials. Ensure that the appliance is installed in accordance with AS/NZS 5601.1, or AS/NZS 5601.2 with regard to clearances to combustible surfaces and materials, and clearances to rangehoods and exhaust fans. To ensure clearances of 200mm from burners to vertical combustible surfaces observe the minimum dimensions shown in Figure 5.
MODEL CODE E F G WHG644SC 126 115 114 WHG648SC 134 115 114 WHG643SC 126 115 114 WHG645SC 126 115 114 WHG645WC 126 115 114 WHG758SC 108 115 126 WHG954SC 115 115 102 WHG958SC 122 115 102 WHG953SC 115 115 102 WHG955SC 115 115 102 WHG955WC 115 115 102 WHG638BC 121 115 111 WHG958BC 120 115 99 Figure 6c - Mastic seal position (WHG954SC WHG958SC WHG953SC WHG955SC WHG955WC) 25mm (490mm) DIMENSION(MM) (860mm) Figure 7 seal hob benchtop Figure 6a - Masti
GAS CONNECTION WARNING CAUTION This appliance is supplied for use with Natural Gas. However, it can be converted for use with LPG. Refer to LP conversion on pages 12 and 13. Supply pipe sizing The total hourly gas consumption for the appliance is shown on the data label. The required supply pressure (i.e. at inlet to appliance regulator) for each gas type is shown on the data label, and given in Technical Data table.
4. With the appliance operating check the outlet pressure: •w hen all burners of the appliance are operating at maximum, •w hen the smallest burner of the appliance is operating at minimum. 2. Check that the regulator has been fitted to the gas supply line in the correct orientation, the arrow on the base of the body indicates the direction of gas flow. Once these checks have been completed, if the regulator still fails to perform in a satisfactory manner it should be replaced.
LPG CONVERSION This appliance is supplied set up for Natural Gas usage. A conversion kit is included with the product for Universal LPG usage. The conversion kit contains the appropriate injectors and 1 LPG sticker. Please follow the procedure below if a conversion to suit UNIVERSAL LPG is required: 1. Remove the hotplate trivets, burner caps and burner crowns to access the hotplate injectors. Replace the factory fitted injectors with the appropriate injectors, as supplied.
ELECTRICAL CONNECTION (220-240 VOLTS) The appliance is supplied with a standard 7.5Amp service cord terminated by a 3-pin plug for connection to a standard household socket. The electrical supply is required to power the electronic ignition system. NOTE: It will be necessary for servicing purposes to disconnect the electrical power supply. The power point should therefore be accessible after the appliance is installed, as specified in the local wiring regulations.
TESTING APPLIANCE OPERATION After installation, test the appliance and ensure that it operates correctly before handing it over to the customer. The following procedure is recommended: 1. Turn on the gas and electricity supply and attempt ignition on all burners, both separately and in combination. (For correct procedure, refer to page 4). Note that additional time needs to be allowed for the initial lighting as air has to be purged from the pipes. 2. Observe the flame appearance on each burner.
NOTES 18 NOTES
Warranty FOR SALES IN AUSTRALIA AND NEW ZEALAND APPLIANCE: WESTINGHOUSE BUILT-IN OVENS, COOKTOPS AND FREESTANDING COOKER This document sets out the terms and conditions of the product warranties for Westinghouse Appliances. It is an important document. Please keep it with your proof of purchase documents in a safe place for future reference should there be a manufacturing defect in your Appliance. This warranty is in addition to other rights you may have under the Australian Consumer Law. 1.
For more information on all Westinghouse appliances, or for dimension and installation information, call into your retailer, phone or email our customer care team or visit our website: AUSTRALIA phone: 13 13 49 email: customercare@electrolux.com.au web: westinghouse.com.au NEW ZEALAND phone: 0800 436 245 email: customercare@electrolux.co.nz web: westinghouse.co.nz and WESTINGHOUSE are trademarks of Westinghouse Electric Corporation. Used under license. All Rights Reserved.