USER MANUAL REFRIGERATION Top Mount, Bottom Mount, French Door & Single Door
CONGRATULATIONS CONTENTS Dear customer, Congratulations and thank you for choosing our refrigerator. We are sure you will find your new refrigerator a pleasure to use. Before you use the refrigerator we recommend that you read through the relevant sections of this manual, which provides a description of your refrigerator and its functions.
IMPORTANT SAFETY INSTRUCTIONS Note: You must read these warnings carefully before installing or using the refrigerator. If you need assistance, contact your customer care centre. The manufacturer will not accept liability, should these instructions or any other safety instructions incorporated in this book be ignored.
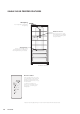
TOP MOUNT REFRIGERATOR FEATURES Freezer temperature control Adjustable freezer bin divider Refer to the section “Temperature control” for details on using this feature. Use the dividers to organise stored items by twisting to lock into the holes provided. Twist & Serve Ice Refer to the section “Using your Refrigerator” for details on removing, relocating and using this feature.
BOTTOM MOUNT REFRIGERATOR FEATURES FamilySafe lockable compartment LED lighting Your refrigerator is fitted with LED lighting. This compartment can be used to store dairy and is also lockable for storing items like cosmetics and medicines. To operate the lock, turn the knob located on the front of the bin. Bottle rack (Available in selected models only) FlexFresh crisper Use the crisper to store vegetables, fruit or small goods. Change the humidity by sliding the humidity control.
FRENCH DOOR REFRIGERATOR FEATURES FamilySafe lockable compartment LED lighting This compartment can be used to store dairy and is also lockable for storing items like cosmetics and medicines. To operate the lock, turn the knob located on the front of the bin. Your refrigerator is fitted with LED lighting. Bottle rack (Available in selected models only) FlexFresh crisper FlexStor door bins Use the crisper to store vegetables, fruit or small goods. Change the humidity by sliding the humidity control.
BOTTOM MOUNT ICE & WATER REFRIGERATOR FEATURES LED lighting Your refrigerator is fitted with LED lighting. FamilySafe lockable compartment This compartment can be used to store dairy and is also lockable for storing items like cosmetics and medicines. To operate the lock, turn the knob located on the front of the bin. Water filter Bottle rack (Available in selected models only) FlexStor door bins FlexFresh crisper Slide FlexStor bins to meet different storage needs. To remove, lift and tilt.
FRENCH DOOR ICE & WATER REFRIGERATOR FEATURES LED lighting Your refrigerator is fitted with LED lighting. FamilySafe lockable compartment This compartment can be used to store dairy and is also lockable for storing items like cosmetics and medicines. To operate the lock, turn the knob located on the front of the bin. Water filter Bottle Rack (Available in selected models only) FlexStor bins FlexFresh crisper Slide FlexStor bins to meet different storage needs. To remove, lift and tilt.
SINGLE DOOR REFRIGERATOR FEATURES FamilySafe lockable compartment LED Lighting This compartment can be used to store dairy and is also lockable for storing items like cosmetics and medicines. To operate the lock, turn the knob located on the front of the bin. Your refrigerator is fitted with LED lighting. Deli drawer Use the deli drawer to store foods like small goods, fresh or cooked meat and cheese, or as an additional crisper.
SINGLE DOOR FREEZER FEATURES LED lighting Your refrigerator is fitted with LED lighting. Twist & serve ice Refer to the section “Using your Refrigerator” for details on removing, relocating and using this feature. Storage bins Refer to the section “Using your Refrigerator” for details on removing, and using this feature.
INSTALLING YOUR NEW APPLIANCE Unpacking Installing your refrigerator 1. ENVIRONMENT ENVIRONMENTAL TIPS Most of the packing materials are recyclable. Please dispose of those materials through your local recycling depot or by placing them in appropriate collection containers. Important – check for any damages or marks. If you find the refrigerator is damaged or marked, you must report it within 7 days should you wish to claim for damage/ marks under the manufacturers warranty.
INSTALLING YOUR NEW APPLIANCE ICE AND WATER INSTALLATION WARNING WARNING 5. If you find your refrigerator rocks from corner to corner, it means your floor is uneven. Find a piece of plastic or hardboard etc. and pack it firmly under the roller. Connect to potable water supply only. If using tank or bore water it is recommended to also use an external filter (not supplied). 6. You may now need to fine-tune the installation by repeating steps 3, 4 and 5.
Please read before beginning installation. Step 5. The water connection to your ice and water product can be self installed. However, it is recommended that you seek advice from a licensed plumber before commencing the installation. Turn on water and check all joints and tubes for leaks. Step 6. Reconnect the power. TIPS & INFORMATION IMPORTANT Check for water leaks at all water connection points in the first 2 to 3 hours after installation, and correct it in case of any water leak.
ICE AND WATER INSTALLATION TIPS & INFORMATION IMPORTANT • Always fit the filter as per manufacturer’s instructions. • If you need to replace water tube, only use approved water quality piping that meets the pressure requirements. • Make sure your refrigerator is level to avoid uneven ice cubes. • Replace filter at suggested intervals to avoid water/ice reduction and irregularities in taste. • Remove and clean ice bin once a month, discarding unused ice cubes.
USING YOUR REFRIGERATOR REMOVING FEATURES Refrigerators work by transferring heat from the food inside to the outside air. This operation makes the back and sides of the refrigerator feel warm or even hot particularly at start-up and on warm days – this is normal. Crisper Bin Avoid placing food against the air vents in the refrigerator as it affects efficient circulation. If the door is opened frequently, a light frosting will occasionally occur on the freezer’s interior.
REMOVING FEATURES Drawers fitted with telescopic slides Twist and Serve Ice To remove the drawer for cleaning. Mounting the twist & serve dispenser to the other side of the freezer. 1. Empty food from the drawer. 2. emove the drawer by pulling it forward and lifting R the front to unhook it from the slides. Once you have removed the drawer, ensure the slides are pushed back so they are fully closed. NOTE: this is only possible on Top mount models. 1. Remove the ice bin and ice cube tray.
TEMPERATURE CONTROL The factory default settings; Top mount Refrigerator Mid Freezer Mid Bottom mount & French door Refrigerator 3°C Freezer -18°C All Refrigerator Mid All Freezer -18°C If you want to change the temperature, follow the instructions in the section about the user interface for your model. Ensure that you make only small adjustments and wait 24 hours to see if it’s correct to your liking.
ABOUT THE USER INTERFACE Controls – Top mount and single door refrigerator models Quick chill on/ off icon Refrigerator temperature scale icons Temperature adjust/quick chill on/off button DESCRIPTION OPERATION / PRIMARY FUNCTION Refrigerator temperature scale icons • Indicates the temperature setting of the refrigerator compartment.
Controls – Bottom mount and French door Quick freeze on/off icon Quick freeze on/off icon Quick freeze button Refrigerator temperature scale icons Freezer temperature scale icons Temperature adjust Refrigerator indication icon Compartment select button Freezer indication icon DESCRIPTION OPERATION / PRIMARY FUNCTION Quick Freeze on/ off icon • Quick Freeze button Use the Quick Freeze function when you add a large amount of food to the freezer compartment.
ABOUT THE USER INTERFACE Controls – Bottom mount ice & water and French door ice & water models 1 3 2 4 5 6 7 10 8 9 11 12 13 15 14 BUTTON / ICON DESCRIPTION PRIMARY FUNCTION 1 Compartment Selector button Selects controllable compartment. 2 Lock Icon Indicates if the user interface is locked. 3 Compartment Icon Indicates controllable compartment. ECO Icon Indicates if the appliance is operating in its most energy efficient mode.
FUNCTIONS OF THE USER INTERFACE Bottom mount ice and water models FUNCTION ICON OPERATION Setting the freezer temperature • • Press button 1 until freezer is displayed on icon 3. Press buttons 6 or 7 to adjust temperature up or down. Setting the refrigerator temperature • • Press button 1 until the refrigerator is displayed on icon 3. Press buttons 6 or 7 to adjust temperature up or down. Shopping mode Increases the chill rate of the refrigerator for 90mins before returning to pre-set mode.
ABOUT THE USER INTERFACE Controls – Single door freezer models Quick Freeze on/off icons Quick Freeze/ drinks chill on/off button Drinks Chill on/off icons Temperature adjust button Freezer temperature scale icons DESCRIPTION OPERATION / PRIMARY FUNCTION Quick Freeze on/off icon • Indicates the status of the Quick Freeze function. Drinks Chill on/ off icon • Indicates the status of the Drinks Chill function.
ERROR CODES & ALARMS Alarms ALARM ICON WHAT IT MEANS OPERATION Freezer Temperature Alarm • Activates if the freezer temperature is 10°c over set temperature for a period of 50 minutes (except during a defrost). o deactivate the alarm for 50 T minutes press any button. • o deactivate alarm for 12 hrs on the T ice & water model press and hold Select Mode for 10 seconds for non ice and water models press and hold any button for 10 seconds. An alarm will sound the temperature icons will flash.
CLEANING YOUR REFRIGERATOR WARNING WARNING BEFORE CLEANING: Turn the refrigerator off at the power point and unplug the cord to prevent any chance of electrocuting yourself. Doors and exterior (white and silver): You should only clean the doors with lukewarm soapy water and a soft cloth. Stainless Steel: Your stainless steel refrigerator is manufactured from mark-resistant stainless steel.
FOOD STORAGE GUIDE CATEGORY PRODUCT FREEZER STORAGE TIPS MEAT Sausages and Mince 1-2 Days 2-3 Months Chops and Steak 3-4 Days 4-6 Months Keep cold meat at the back of the refrigerator where it is coldest. Cold Meats 3-5 Days 4-6 Months Roasts 3-5 Days 12 Months Chicken 1-2 Days 2 Months Roast Chicken 3-5 Days 12 Months Eggs 6 Weeks Not Suitable POULTRY REFRIGERATOR Plastic can cause meat to sweat if stored in refrigerator for more than a day.
TROUBLESHOOTING Appliance does not operate at desired temperature In a modern frost free refrigerator / freezer, cold air is circulated around the various compartments through air vents using a high efficiency fan. CONCERN WHAT TO DO Refrigerator is too warm Ensure food is allowed to cool before placing inside the refrigerator. Ensure the appliance is set up as per instructions on page 11. Ensure that contents are not obstructing the cooling vents.
Refrigerator operation CONCERN WHAT TO DO Appliance will not run Ensure that the cord is plugged into a live power outlet and outlet is switched on. It is normal for the freezer fan not to operate during the automatic defrost cycle, or for a short time after the appliance is switched on. Compressor motor seems to run too long At normal room temperatures, expect your motor to run about 40% to 80% of the time. Under warmer conditions, expect it to run even more often.
TROUBLESHOOTING Door operation CONCERN WHAT TO DO Freezer door pops open. This is normal and should re-close. This happens when the refrigerator door is closed too quickly. If the freezer door stays open, it indicates that the appliance needs to be tilted backwards a little further. Refer to section “Installing your new appliance”. Self close not working. Check if your appliance has self closing hinges as not all models do. It indicates that the appliance needs to be tilted backwards a little further.
NOTES NOTES 29
NOTES 30 NOTES
Warranty FOR SALES IN AUSTRALIA AND NEW ZEALAND APPLIANCE: REFRIGERATION This document sets out the terms and conditions of the product warranties for Electrolux Appliances. It is an important document. Please keep it with your proof of purchase documents in a safe place for future reference should you require service for your Appliance. 1.
For more information on all Westinghouse appliances, or for dimension and installation information, call into your retailer, phone or email our customer care team or visit our website: AUSTRALIA phone: 1300 363 640 fax: 1800 350 067 email: customercare@electrolux.com.au web: westinghouse.com.au NEW ZEALAND phone: 0800 436 245 fax: 0800 225 088 email: customercare@electrolux.co.nz web: westinghouse.co.