
Use and Care Guide


7
ENGLISH INSTRUCTIONS
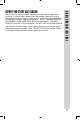
To reduce the risk of electrical shock, this plug must t
fully into the outlet. If the blades do not t into the outlet,
try turning the plug around. If the plug still does not t into
the outlet, contact a qualied electrician. DO NOT attempt
to modify the plug in any way.
OUTLET INSTRUCTIONS
CLEANING INSTRUCTIONS
WARNING! Before cleaning, assembling or disassembling the
Vacuum Sealer, make sure the Vacuum Sealer is OFF and the PLUG IS
REMOVED FROM THE OUTLET/POWER SOURCE!
1. NEVER IMMERSE the Vacuum Sealer in water or other liquid.
2. Make sure the Vacuum Sealer has completely cooled before cleaning it.
3. Wipe clean all outside surfaces including the Plastic Vacuum Chamber and
Vacuum Lid with a damp cloth or paper towel. Most household spray cleaners
are safe to use. Avoid spraying cleaner or water directly into the vent on the
left side of the unit. DO NOT use abrasive cleansers!
4. Be careful while cleaning not to peel or damage the strip of Seal Bar Tape
covering the Seal Bar Heating Element.
5. Dry all surfaces and close the Vacuum Lid before storing the Vacuum
Sealer.
THERMAL OVERLOAD PROTECTOR
The Vacuum Sealer will automatically shut down if it overheats. If this occurs,
turn the unit off and open the Vacuum Lid. Resume normal operation after the
unit cools or about 20 minutes.
To help prevent overheating, wait at least 20 seconds between cycles with the
Vacuum Lid open. Avoid touching the Seal Bar Tape. The Seal Bar Tape will
remain hot for a brief period of time after each sealing cycle.