GRAIN AUGERS UTILITY ASSEMBLY & OPERATION MANUAL Read this manual before using product. Failure to follow instructions and safety precautions can result in serious injury, death, or property damage. Keep manual for future reference.
This product has been designed and constructed according to general engineering standardsa. Other local regulations may apply and must be followed by the operator. We strongly recommend that all personnel associated with this equipment be trained in the correct operational and safety procedures required for this product. Periodic reviews of this manual with all employees should be standard practice. For your convenience, we include this sign-off sheet so you can record your periodic reviews.
WHEATHEART - GRAIN AUGERS UTILITY TABLE OF CONTENTS 1. Introduction .......................................................................................................................... 5 2. Safety First............................................................................................................................ 7 2.1. General Safety ......................................................................................................... 8 2.2. Assembly Safety............................
WHEATHEART - GRAIN AUGERS UTILITY 4 30644 R1
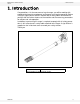
WHEATHEART - GRAIN AUGERS UTILITY 1. INTRODUCTION 1. Introduction Congratulations. As the new owner of a grain auger, you will be working with equipment designed to complement and improve your farming operation. Before using this auger, please read this manual and all safety labels and familiarize yourself with the various features of the machine and the necessary precautions for efficient and safe operation.
1.
WHEATHEART - GRAIN AUGERS UTILITY 2. SAFETY FIRST 2. Safety First The Safety Alert symbol to the left identifies important safety messages on the product and in the manual. When you see this symbol, be alert to the possibility of personal injury or death. Follow the instructions in the safety messages. Why is SAFETY important to you? Three big reasons: • Accidents disable and kill. • Accidents cost. • Accidents can be avoided.
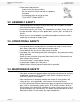
2. SAFETY FIRST 2.1. GENERAL SAFETY WHEATHEART - GRAIN AUGERS UTILITY 2.1. GENERAL SAFETY Important: The general safety section includes instructions that apply to all safety practices. Any instructions specific to a certain safety practice (e.g., assembly safety), can be found in the appropriate section. Always read the complete instructional sections and not just these safety summaries before doing anything with the equipment. YOU are responsible for the SAFE use and maintenance of your equipment.
WHEATHEART - GRAIN AUGERS UTILITY 2. SAFETY FIRST 2.2. ASSEMBLY SAFETY • Follow good shop practices: • keep service area clean and dry • be sure electrical outlets and tools are properly grounded • use adequate light for the job at hand • Think SAFETY! Work SAFELY! 2.2. ASSEMBLY SAFETY • Read through the instructions to get to know the sub-assemblies and hardware that make up the equipment. • Do not take chances with safety. The components are large, heavy, and can be hard to handle.
2. SAFETY FIRST 2.5. ELECTRIC MOTOR SAFETY WHEATHEART - GRAIN AUGERS UTILITY 2.5. ELECTRIC MOTOR SAFETY • Inspect the drive belts before using auger. Replace if frayed or damaged. • Do not grab or touch drive belts during operation for any reason. • Remember to ground electric motor before using auger. 2.6. SAFETY DECAL LOCATIONS • Keep safety decals clean and legible at all times. • Replace safety decals that are missing or have become illegible. See decal location figures below.
WHEATHEART - GRAIN AUGERS UTILITY 2. SAFETY FIRST 2.6. SAFETY DECAL LOCATIONS PLACED ON MACHINE BEHIND GUARD Figure 2.1 * Wheatheart reserves the right to update safety decals without notice. Safety decals may not be exactly as shown.
2. SAFETY FIRST 2.6.
WHEATHEART - GRAIN AUGERS UTILITY 3. ASSEMBLY 3.1. TUBE / FLIGHT EXTENSIONS 3. Assembly Warning: Before continuing, please reread the safety information relevant to this section at the beginning of this manual. Failure to follow the safety instructions can result in serious injury, death, or property damage. Before beginning assembly, familiarize yourself with all the sub-assemblies and hardware making up the auger. Have all parts on hand and arrange them for easy access.
3. ASSEMBLY 3.2. CLAMP-ON ANGLE RING WHEATHEART - GRAIN AUGERS UTILITY 5. For additional tube/flight sections, repeat steps. Figure 3.2 3.2. CLAMP-ON ANGLE RING 1. Slide clamp-on angle ring onto the end of the galvanized tube (Figure 3.3). 2. Slide ring on until the end of the angle ring is flush with the end of the tube. Secure angle ring to the tube using six 7/16” x 1" bolts and whiznuts; tighten bolts and nuts securely. 3.
WHEATHEART - GRAIN AUGERS UTILITY 3. ASSEMBLY 3.4. INTAKE Figure 3.4 3.4. INTAKE See Figure 3.5. Note: To replace intake assembly with hopper assembly or to install hopper assembly, see Section 3.8. 1. Attach intake flighting to the flighting of galvanized tube. Ensure that the 2 flightings overlap. Use two 7/16” x 2-1/4” (for 8") or two 1/2” x 2-3/4” (for 10") bolts and locknuts and tighten securely. 2.
3. ASSEMBLY 3.5. MOTOR MOUNT WHEATHEART - GRAIN AUGERS UTILITY 3.5. MOTOR MOUNT See Figure 3.6 and 3.7. 1. Install front mount plate onto head plate of powerhead using two 1/2” x 1-1/2” bolts, locknuts, and 1/2” flat washers (Figure 3.6). Tighten securely. 2. Place 5/8” adjust bolt through available hole in front mount plate and secure in place using two 5/8” hex nuts (one top, one bottom). Leave adjust bolt loose to allow for later adjustment. Figure 3.
WHEATHEART - GRAIN AUGERS UTILITY 3. ASSEMBLY 3.7. ELECTRIC MOTOR INSTALLATION / ALIGNMENT Table 3.1 Pulley Sizes / Combinationsa Galvanized Utility Auger 8" Utility 10" Utility Auger Pulley 12.7” 12.7” 15” 15” Recommended Sizes Motor Pulley *Flight Speed (rpm) 3 -1/4” 440 3 -1/2” 475 3 -1/4” 375 3 -1/2” 402 To determine flight speed (rpm):b Divide the speed (rpm) of the motor by the outside diameter of the large auger pulley, then multiply by the outside diameter of the small motor pulley.
3. ASSEMBLY 3.8. HOPPER (OPTIONAL) Note: WHEATHEART - GRAIN AUGERS UTILITY The correct operating tension is the lowest tension at which the belts will not slip under peak load conditions. 4. Align the two pulleys using a straight edge. Once belts are aligned and under tension, lock the 5/8” hex nuts and tighten pulley set screws. Note: Once all bolts and set screws are tightened, re-check alignment. Proper alignment will prolong belt life. 5.
WHEATHEART - GRAIN AUGERS UTILITY 3. ASSEMBLY 3.9. SITE INSTALLATION PROCEDURES 3.9. SITE INSTALLATION PROCEDURES Site installation procedures will vary depending on auger length, location, and intended use. Because of these variables, the following instructions are meant to be used as a guide only. It is the installer’s responsibility to ensure that the auger is properly braced and/or supported before operating, with the primary concern being on safety. As a general rule, we suggest the following: 1.
3. ASSEMBLY 3.10. TRUSSING (OPTIONAL) Note: WHEATHEART - GRAIN AUGERS UTILITY 3. Rotate strut assembly to a 45° angle and tighten half ring bolts. 4. Mount the truss attach angles to the truss anchor half rings with two 7/16” x 1" bolts and locknuts each. 5. Locate and mount the half ring assemblies above and below the strut assembly with 7/16” x 1" bolts and locknuts. Do not tighten at this time. The distance for mounting the half ring assemblies is limited by the length of cable in your kit.
WHEATHEART - GRAIN AUGERS UTILITY 4. OPERATION & MAINTENANCE 4.1. PRE-OPERATIONAL CHECKLIST 4. Operation & Maintenance Warning: Before continuing, please reread the safety information relevant to this section at the beginning of this manual. Failure to follow the safety instructions can result in serious injury, death, or property damage. Operators must observe safety procedures at all times and follow the pre-operational checklist before each start-up. 4.1.
4. OPERATION & MAINTENANCE 4.3. OPERATION PROCEDURE WHEATHEART - GRAIN AUGERS UTILITY CAUTION Maintain a hazard zone of 20’ around the work site. Do not start auger until area is clear of all untrained personnel. Note: Important: For safety, clear the 20’ hazard zone around the work site. 3. Start electric motor and feed grain immediately. When starting auger for the first time, be prepared for an emergency shutdown in case of excessive vibration or noise.
WHEATHEART - GRAIN AUGERS UTILITY 4. OPERATION & MAINTENANCE 4.4. MAINTENANCE USE OF GRAIN SPREADERS: Many grain spreaders cannot handle the large capacity of some augers. Some augers plug, causing damage to the flighting and other drive components. This type of damage is not covered by warranty. Hints on how to avoid this... • • • • Get a larger spreader, if available. Remove the spreader. Make sure spreader is turned on and operating.
4. OPERATION & MAINTENANCE 4.4. MAINTENANCE WHEATHEART - GRAIN AUGERS UTILITY GENERAL MAINTENANCE PROCEDURES Area Truss Cables Maintenance While auger is in use, observe the operation checklist on 4.1. If for any reason a part becomes damaged, replace it immediately. If possible, lower auger to replace parts. Check and replace if frayed or damaged. Ensure tension is correct under load (correct tension is the lowest at which the belts will not slip under peak load conditions) Inspect. Lubricate.
WHEATHEART - GRAIN AUGERS UTILITY 5. TROUBLESHOOTING 5. Troubleshooting . Problem Excessive noise or vibration. *Remember to follow proper break-in procedures—auger may run rough until tube is polished. If noise is extreme from outset or continuous after several loads of grade are fed, continue with troubleshooting below Possible Cause Truss cables incorrectly adjusted. Flighting peeled back due to plugging. Bent flighting sections. Obstruction in tube. Motor misaligned.
5.
LIMITED WARRANTY Wheatheart warrants to the buyer that the new machinery is free from defects in material and workmanship. This warranty is only effective for any new machinery that has not been altered, changed, repaired, or treated since its delivery to the buyer, other than by Wheatheart or its authorized dealers or employees, and does not apply to accessories, attachments, tools, or parts sold or operated with the new machinery if they have not been manufactured by Wheatheart.
Wheatheart Part of the Ag Growth International Inc. Group P.O. Box 39 Rosenort, Manitoba, Canada R0G 1W0 Phone: (866) 467-7207 (Canada & USA) Fax: (866) 768-4852 website: www.wheatheart.com email: sales@wheatheart.ca © Ag Growth International Inc.