ProPress SP Furnace Operator's Manual Whip Mix Corporation • 361 Farmington Ave. • P.O. Box 17183 • Louisville, KY 40217-0183 USA 502-637-1451 • 800-626-5651 • Fax 502-634-4512 • www.whipmix.
ProPress SP Furnace Operations Manual Warnings DO NOT OPERATE THIS FURNACE WITH ANY OTHER POWER CORD. THE TRIANGULAR BLACK AND YELLOW STICKER ON THE FRONT CENTER OF THE MUFFLE HOOD IS A WARNING THAT THE METALLIC SURFACE CAN BECOME HOT TO THE TOUCH. NEVER PLACE YOUR HAND ON THIS SURFACE OR LEAN ON THE TOP OF THE HOOD WHEN THE UNIT IS IN OPERATION. DO NOT OPERATE WITH AN EXTENSION CORD.
ProPress SP Furnace Operations Manual Table of Contents External Component Locator.................................................4 Chapter Three — Change Program Menu Chapter One — Getting Started Look at a Program................................................................17 Add/Edit a Program..............................................................18 Introduction to Sense Pressing............................................20 Add/Edit a Sense Press Program...................................
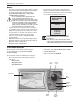
ProPress SP Furnace Operations Manual External Component Locator Top Muffle Cover Lift Table Pressure Regulator Attachment Selector Knob Calibration Port Keypad Back Cover Quick Cool Jet Hose Barb Pressure Regulator Power Switch Vacuum Pump Power Outlet Power Inlet Plug USB Port Fuses Vacuum Pump Hose Barb 4
ProPress SP Furnace Operations Manual Chapter One — Getting Started You are undoubtedly eager to unpack, set up, and begin using your new furnace. Getting started will be much easier if you carefully review the information in this chapter and follow the steps as outlined. Before Unpacking • Save the carton and packing materials. These will be used again if there is ever a need to ship or return equipment.
ProPress SP Furnace Operations Manual Quick-Cool Jet Installation This side goes to the Quick Cool Jet Preparation: 1. Remove the vacuum pump from its box. 2. Remove the brass hose barb from the Furnace accessory box. 3. Remove the muffler from the output end of the vacuum pump. (The input and output valves are identified by arrow indicators on the vacuum pump near inlet or outlet.) 4. Install the brass barb to output end of the vacuum pump. (Where the muffler used to be.) 5.
ProPress SP Furnace Operations Manual Power • The furnace requires 115 Vac and 12 Amps of current in the United States and 220–240 Vac and 7.0 Amps of current in Europe and some parts of Asia. A special heavy-duty power cord has been supplied with your furnace. • Turn the furnace on using the power switch. The display should light up and the unit will perform an internal self test for about 30 seconds. The following screens will be displayed in this process. *USB Driver Ver* MAIN XX.XXXXXXX XXXX X.
ProPress SP Furnace Operations Manual Menu Selection Special Functions — press the Selector Knob and turn the Selector Knob to one of the following actions: The three menu selection items (Run Program, Change Program and Special Functions) will display different options. The menu options can be seen by turning the Selector Knob.
ProPress SP Furnace Operations Manual Information Display and Entry DISPLAY — All information and user prompts will be shown on the display (four lines, twenty characters each). TABLE UP — Press the up arrow button to manually raise the table. Press the up arrow button a second time and the table will stop. SELECTOR KNOB — Turn the Selector Knob left or right to select menu options or to adjust parameters. TABLE DOWN — Press the down arrow button to manually lower the table.
ProPress SP Furnace Operations Manual Chapter Two — Special Functions Most Special Functions can be performed while a program is running, however this is not recommended because changing the operating features could affect how the current program runs. To look at or change a function, press the Special Functions item from the Main Menu. Turn the Selector Knob clockwise or counterclockwise until the desired function is displayed.
ProPress SP Furnace Operations Manual Set Vacuum Level To set the vacuum level for all programs do the following: The factory setting for vacuum is 71 cm of mercury. The acceptable range is from 28 cm to 74–75 cm of mercury or 11.0 inches to 30.0 inches of mercury. 1. Press the Menu button. 2. Select Special Functions, push Selector Knob OR press Next button.
ProPress SP Furnace Operations Manual Set Program Start Delay 6. Push the Selector Knob OR press the Next button to save your selection. You will be returned to the Main Menu automatically. The furnace has a unique feature that allows the operator to program a delay to occur before the start of all programs. This delay occurs before the entry time set into each program begins. This feature may be changed without affecting the programs or calibrations stored in the furnace.
ProPress SP Furnace Operations Manual Saving Programs to a Flash Drive (Exporting) 1. Place the Flash Drive in the USB slot on the left side of the furnace. 2. Select the Special Functions item from the Main Menu. 3. Turn the Selector Knob until the display reads EXPORT PROGRAM, then press the Next button. 4. The display will show Check USB Driver, then Exporting >>>>>>> 5. The furnace will signal the end of the transfer with an audible tone.
ProPress SP Furnace Operations Manual Low Fusing Adjust Calibration (800° C/1470° F or below) Example: If your porcelain appears to be overfired by 25°, you would enter a negative (-25) twenty-five degree value to lower the effective firing temperature of ALL the Low Fusing program. 1. Select the Special Functions item from the Main Menu. 2. Turn the Selector Knob until display reads CAL LOW FUSING. 4. Turn the Selector Knob to enter the number of degrees you would like to adjust the temperature.
ProPress SP Furnace Operations Manual Press Fusing Adjust Conventional and SP Pressing Programs 3. Press the Next button. 1. Select the Special Functions item from the Main Menu. 4. Turn the Selector Knob to enter the number of degrees you would like to adjust the temperature. 2. Turn the Selector Knob until display reads CAL LOW FUSING. Press Temp Adjust 0C (-50C - +50C) * Special Functions > Cal Press Fusing Export Program Import Program 5. Press the Next button.
ProPress SP Furnace Operations Manual Testing Your Furnace To Begin Test: The Pro Series Furnaces are capable of performing several tests to aid in diagnosing the furnace should a problem occur. A TOPS technician or Technical Support technician may ask you to run one or more of these tests to aid in diagnosing the problem. The tests include: 1. Select the Special Functions item from the Main Menu. 2. Turn the Selector Knob until the display reads TEST FURNACE. 3.
ProPress SP Furnace Operations Manual Chapter Three — Change Program Menu The following is an example of a program descriptor. The Program Number is displayed first, then a “-” character. The next fourteen characters contain the name entered to describe this program. The Master Suite DVD provided with the furnace is an alternate means of adding or editing programs using a PC application. A memory stick is then used to transfer the programs from the PC to the furnace.
ProPress SP Furnace Operations Manual Porcelain Firing (See page 22 for adding a Sense Press Program) Add/Edit a Program Normal Porcelain Add/Edit a Program is used to enter a new program or Edit a pre-existing program. This selection will describe how to enter either a 1-Stage or a 2-Stage program. The ^ symbol under the line identifies the current character position being entered.
ProPress SP Furnace Operations Manual Adjustment features are useful for matching the firing characteristics of two furnaces so that they fire identically. 11. Hold Temperature Hold Temperature or the top temperature is the final, highest temperature in a 1-Stage Program, and an intermediate stopover temperature in a 2-Stage Program. At the initial Program Addition, you will want to use the original suggested Program parameters, until your experience suggests a Program specific adjustment is indicated.
ProPress SP Furnace Operations Manual 18. Release Vacuum 17. Start Vacuum Add/Edit Program Use Vacuum >Yes This parameter controls when the vacuum is released, and either air is allowed to enter the muffle. The selections are made by rotating the Selector Knob as in the example below. The range will be different depending on the values already put into the program. This parameter controls when the vacuum pump comes on. The selections are made by rotating the Selector Knob as in the example below.
ProPress SP Furnace Operations Manual loaded suddenly. Once the press rod is in contact with the mold plunger the other 40% is applied, bringing the initial pressure up to the ceramic manufacturers rated pressure. There is also a unique feature to salvage molds which have hairline cracks in the top or side coming out of the burnout oven. At the time the mold is inserted into the SP Press, the furnace will ask the question, “Split Mold, reduced pressure? No.
ProPress SP Furnace Operations Manual Add/Edit a Sense Press Program Hold Temperature *Add/Edit Program* Hold Temp 935C Program Entry The following steps will take you through the entry of SP Press Program entry. As you can see below, it’s really just like entering a conventional pressing program, the main difference being the “%” character being the first letter in the Program Name. (700C – 1200C) Enter the Hold Temperature value.
ProPress SP Furnace Operations Manual Conventional Press Firing Cycle Program 9. Entry Temperature The following procedures describe how to enter a Pressing program: 1. Press the Main Menu button: Entry Temperature is the temperature at which the table will close completely. 2. Select the CHANGE PROGRAM Item and push the Selector Knob OR press the Next button. The range of values is 25° C (77° F) to a maximum of 980°C (1796°F). 3. Turn the Selector Knob until ADD/EDIT PROGRAM is displayed.
ProPress SP Furnace Operations Manual Why do you need fusing adjustments? The Program Level Fusing Adjust is useful for making minor adjustments to a single, specific Program without altering the original Program design. 15. Cool Time The Cool Time parameter specifies the length of time the table takes to go from the full up position to the full down position, with several intermediate pauses along the way.
ProPress SP Furnace Operations Manual Copy/Change a Program 5. COPY TO: is displayed. Turn the Selector Knob to select a location for the copied program. If a program that is already entered is selected, you will write over the existing program. Push the Selector Knob OR press the Next button. The Copy/Change a program feature allows a program to be copied from one program number to another and then changed. This feature is very useful when there are only minor differences between programs.
ProPress SP Furnace Operations Manual Chapter Four — Run Program Menu Turn the Selector Knob until the desired program is displayed. If the table has not been lowered, do so now. The Run Program mode allows you to run programs and to view programs as they are running. Note: You must burn the moisture out of the muffle before firing the first time. See the notation under “Change Idle Temperature” on page 10. Press the Start Program button to begin this program.
ProPress SP Furnace Operations Manual The LED Graph The illustrations below demonstrate the progression of LEDs on a 2-Stage Program: The LED graph follows the running Program’s progress and provides a quick visual reference on how far the program has progressed.
ProPress SP Furnace Operations Manual Running a Pressing Program The ProPress SP can press into a 100, 200, or 300 gram investment mold. Configure the firing tray and press insert as show below for each size mold. Running a SP Pressing Program Make sure the air regulator is set to 70 psi/4.8 bar. Do NOT exceed 72 psi/5.0 bar as this can damage the SmartPress pressure sensor. as it wipes the cylinder walls down to insure smooth action during the actual pressing.
ProPress SP Furnace Operations Manual Running a Re-Press Program 2. If the table is up, press the Next button, the table will lower. With the table in the down position, place the ring onto the firing table and press the Next button. (For Conventional Pressing only) To run a Re-Press Program, Calibration Password number 315 must be set to “Timed Press = No” 3. The Pressing program will begin running. 4. The temperature will now rise to the final temperature selected in the program.
ProPress SP Furnace Operations Manual Chapter Five — Maintenance Cleaning the Furnace Trouble Shooting Guide Your new furnace may be cleaned by using a soft cloth and kitchen cleaners such as Fantastic® or Formula 409®. The front panel should be cleaned with a window cleaner such as Windex®. The ProPress SP furnace offers a number of self checks and warning messages that are designed to identify problems.
ProPress SP Furnace Operations Manual Fuses Vacuum Test The furnace contains two fuses: 1. Press the Up arrow button to raise the table fully up. You cannot start a vacuum test until the table is fully up. • On the rear, just below the power cord, there are two 12 Amp (115 Vac) Slo-Blo or two 7 Amp (220 Vac) Slo-Blo, .25 x 1.25 inch ceramic fuses. 2. Select the Special Functions item. 3. Turn the Selector Knob to Test Furnace. Press the Next button.
ProPress SP Furnace Operations Manual Technical Specifications Replacement Parts Description Power Supply 120 VAC ± 10% 50/60Hz 96004 Power Cord 115V Power Consumption 96008 Power Cord 230V 1200W - Furnace Alone 1400W - With Pump 96001 Ceramic Plunger Rods Pkg. of 2 Shipping Weight 77 lbs. 96020 Investment Ringliner Pkg.
ProPress SP Furnace Operations Manual Pro Series Accessories High-Efficiency Vacuum Pump ProCal 33
ProPress SP Furnace Operations Manual Fahrenheit to Centigrade Centigrade to Fahrenheit °F °C °F °C °F °C °F °C °C °F °C °F °C °F °C °F °C °F 100 110 120 130 140 150 160 170 180 190 200 210 220 230 240 250 260 270 280 290 300 310 320 330 340 350 360 370 380 390 400 410 420 430 440 450 460 470 480 490 500 510 520 530 540 550 560 570 580 590 600 610 620 38 43 49 54 60 66 71 77 82 88 93 99 104 110 116 121 127 132 138 143 149 154 160 166 171 177 182 188 193 199 204 210 216 221 227 232 238