TOP-MOUNT REFRIGERATOR Table of Contents ............................................ www.crosley.
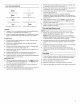
TABLEOF CONTENTS REFRIGERATOR SAFETY ............................................................. Proper Disposal of Your Old Refrigerator .................................... REFRIGERATOR INSTALLATION ................................................. Unpacking .................................................................................... Location Requirements ................................................................ Electrical Requirements .....................................................
REFRIGERATOR SAFETY Your safety and the safety of others are very important. We have provided many important safety messages in this manual and on your appliance, Always read and obey all safety messages, This symbol alerts you to potential hazards that can kill or hurt you and others. All follow the safety alert symbol and either the word "DANGER" or Thissafety is themessages safety alertwillsymbol. "WARNING.
REFRIGERATOR INSTALLATION Excessive Weight Hazard Use two or more people to move and install refrigerator. Failure to do so can result in back or other injury. Removing packaging Remove tape and glue residue from surfaces before turning on the refrigerator. Rub a small amount of liquid dish soap over the adhesive with your fingers, Wipe with warm water and dry. • Do not use sharp instruments, rubbing alcohol, flammable fluids, or abrasive cleaners to remove tape or glue.
_ _ _ 9! _ _ %_ _i ._:,_, __ _ .@_ Read all directions carefully before you begin. IMPORTANT." EJectrical Plug into a grounded Do not remove Shock Hazard 3 prong outlet. ground Failure death, to follow these fire, or eJectricaJ • All installations • Use copper tubing and check for leaks. Install copper tubing only in areas where temperatures will remain above freezing. must meet local plumbing code requirements. NOTE: Your refrigerator dealer has a kit available with a V4in. (6.
. 7. 8. Fasten the shutoff valve to the cold water pipe with the pipe clamp. Be sure the outlet end is solidly in the 1/4in. drilled hole in the water pipe and that the washer is under the pipe clamp. Tighten the packing nut. Tighten the pipe clamp screws carefully and evenly so washer makes a watertight seal. Do not overtighten or you may crush the copper tubing. Slip the compression sleeve and compression nut on the copper tubing as shown.
4. Remove door handle sealing screws. Move to opposite side of refrigerator door as shown (see Graphic 4). 5. Remove door handle seal screw front. Move to opposite side of refrigerator door as shown (see Graphic 7). 6. Remove door stop. Move to opposite side of refrigerator door as shown (see Graphic 5). 7. Position refrigerator handle on opposite side of the refrigerator door as shown (see Graphic 6-3). Drive top two screws in handle first. Align lower portion of handle and drive bottom screw. 8.
1. Cabinet Hinge Hole Plugs .......... 2 I Y¢, 1 1. _" Hex_Head Hinge Screws 2 : 3 : l. Top Hinge Cover 2. 5/_,,Hex.Head Hinge Screws 3. Top Hinge Center i1 PI.g 1. Flat-Head Handle Screws 2. Freezer Handle Hinge !. Door Handle Sealing Screws Side View Front View _1 t. Center" Hinge 2. 5/_,,Hex-Head Hinge Screws i Bottom Hinge 1. Door Stop Screw 2. Door Stop 1 2 1. Door Handle Seal Screw Front ! 2 1. Bottom Hinge 2. 5A_"Hex-Head Hinge Screws 1. Door" Handle Screw Cover l.
Your refrigerator is designed to run more efficiently to keep your food items at the desired temperatures and to minimize energy usage. The high efficiency compressor and fans may cause your refrigerator to run longer than your old one. You may also hear a pulsating or high-pitched sound from the compressor or fans adjusting to optimize performance. Door Closing Your refrigerator and one on the want the doors the instructions has two front adjustable rollers - one on the right left.
Foryourconvenience, yourrefrigerator control(s) arepreset atthe factory. Whenyoufirstinstallyourrefrigerator, makesurethatthe control(s) arestillpreset tothemid-settings asshown. NOTE: Toturnyourrefrigerator off,turntherefrigerator control to thewordOFForuntilthewordOFFappears.
REMEMBER: • 2. Allow 24 hours to produce the first batch of ice. Discard the first three batches of ice produced. Replace the shelf/frame by guiding the rear shelf hooks into the shelf supports. Tilt the front of the shelf up until rear shelf hooks drop into the shelf supports. Check to make sure that the shelf is securely in position. The quality of your ice will be only as good as the quality of the water supplied to your ice maker. Avoid connecting the ice maker to a softened water supply.
2. Replacethe meat drawer cover by fitting the notches and rear edge of the cover over rear and center crossbars on the shelf. Lower cover into place and replace the meat drawer. Drawers To remove and replace a drawer: 1. Slide drawer straight out to the stop. Lift the front of the drawer and slide it out the rest of the way. 2. Replace a drawer by sliding it back in fully past the stop. Crisper Cover To remove the crisper(s) cover: 1. Remove crisper(s).
Meat Storage NOTE: The shelf should lower slightly and lock into place. If the shelf does not appear stable, make sure both ends of the shelf are inserted into the shelf supports. Guide Store most meat in original wrapping as long as it is airtight and moisture-proof. Rewrap if necessary. See the following chart for storage times. When storing meat longer than the times given, freeze the meat. Fresh fish or shellfish ........................
DOOR FEATURES Your model may have some or all of these features. Features that can be purchased separately as product accessories are labeled with the word "Accessory." Not all accessories will fit all models. If you are interested in purchasing one of the accessories, please call the toll-free number on the cover or in the "Assistance or Service" section. Ad ustc b e u ty The utility compartment and tray slide from one side to the other for more flexible storage.
5= REFRIGERATOR CARE There is no need for routine condenser cleaning in normal home operating environments. If the environment is particularly greasy or dusty, or there is significant pet traffic in the home, the condenser should be cleaned every two to three months to ensure maximum efficiency. If you need to clean the condenser: 6= Explosion Use nonflammable Hazard Remove the base grille (see "Base Grille" or "Door Removal" section).
TROUBLESHOOTING Vacations If you choose to leave the refrigerator on while you're away: 1. Use up any perishables and freeze other items. 2. If your refrigerator has an automatic 3. ice maker: • Raise wire shutoff arm to OFF (up) position or move the switch to the OFF (right) setting. • Shut off water supply to the ice maker. Empty the ice bin. If you choose to turn the refrigerator off before you leave: 1. Remove all food from the refrigerator. 2. If your refrigerator has an automatic 3.
The refrigerator • The water dispenser will not operate properly seems to make too much noise The sounds may be normal for your refrigerator. See the "Normal Sounds" section. Has the water system not filled? The water system needs to be filled the first time it is used. Use a sturdy container to depress the water dispenser until water begins to flow. Dispense and discard 2 to 3 gal. (8 to 12 L) of water. This will take approximately 6 to 7 minutes and will help clear air from the line.
Temperature is too warm ASSISTANCEOR SERVICE Are the air vents blocked in either compartment? This prevents cold air movement between the compartments, Move objects away from the air vents. See the "Ensuring Proper Air Circulation" section for air vent locations. • Are the door(s) opened often? The refrigerator will warm when this occurs. Keep the refrigerator cool by getting all items out at one time, keeping food organized, and closing the door as soon as possible.
CROSLEYREFRIGERATOR WARRANTY ONE-YEAR FULL WARRANTY ON REFRIGERATOR For one year from the date of purchase, when this refrigerator (excluding the water filter) is operated and maintained according to instructions attached to or furnished with the product, Whirlpool Corporation will pay for factory specified replacement parts and repair labor costs to correct defects in materials or workmanship. Service must be provided by a Whirlpool designated service company.