SIDE BY SIDE REFRIGERATOR Use & Care Guide 2308045
TABLE OF CONTENTS REFRIGERATOR SAFETY .............................................................3 Proper Disposal of Your Old Refrigerator....................................3 INSTALLATION INSTRUCTIONS ..................................................4 Unpack the Refrigerator...............................................................4 Location Requirements ................................................................4 Electrical Requirements .......................................................
REFRIGERATOR SAFETY Your safety and the safety of others are very important. We have provided many important safety messages in this manual and on your appliance. Always read and obey all safety messages. This is the safety alert symbol. This symbol alerts you to potential hazards that can kill or hurt you and others. All safety messages will follow the safety alert symbol and either the word “DANGER” or “WARNING.
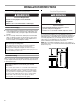
INSTALLATION INSTRUCTIONS Unpack the Refrigerator Location Requirements WARNING WARNING Excessive Weight Hazard Use two or more people to move and install refrigerator. Failure to do so can result in back or other injury. Explosion Hazard Remove the Packaging ■ ■ Remove tape and glue residue from surfaces before turning on the refrigerator. Rub a small amount of liquid dish soap over the adhesive with your fingers. Wipe with warm water and dry.
Electrical Requirements Base Grille WARNING Electrical Shock Hazard Remove the Base Grille: Plug into a grounded (earthed) outlet. 1. Open both doors. 2. Place hands along the ends of the grille. Push in on the top of the base grille and pull up on the bottom. NOTE: Be sure to refasten the Tech Sheet behind the base grille after cleaning. Do not remove ground prong. Do not use an adapter. Do not use an extension cord.
Refrigerator Doors TOOLS NEEDED: ¹⁄₄" hex-head socket wrench, ⁵⁄₁₆" hex-head socket wrench and a flat-head screwdriver. IMPORTANT: Before you begin, turn the refrigerator control OFF. Unplug refrigerator or disconnect power. Remove food and any adjustable door or utility bins from doors. NOTE: It may only be necessary to remove either the door handle or the doors to get your refrigerator through the doorway of your home.
Handle Removal (optional) 1. Apply firm pressure with your hand on the face of trim. Slide top trim up and bottom trim down away from handle. Lift trim pieces off shoulder screws. See Graphic 1. NOTE: Some models include accent pieces between the handle and the handle trim. If your model includes the accents, you will need to carefully remove them with a flat-head screwdriver before removing the handle screws. The accent pieces are optional and can be reinstalled or left off of the handle assembly. 2.
Connect the Water Supply Normal Sounds (on some models) Your new refrigerator may make sounds that your old one didn’t make. Because the sounds are new to you, you might be concerned about them. Most of the new sounds are normal. Hard surfaces, such as the floor, walls, and cabinets, can make the sounds seem louder. The following describes the kinds of sounds and what may be making them.
IMPORTANT: Because air circulates between both sections, any odors formed in one section will transfer to the other. You must thoroughly clean both sections to eliminate odors. To prevent odor transfer from food, wrap or cover foods tightly. Using the Controls For your convenience, your refrigerator controls are preset at the factory. When you first install your refrigerator, make sure that the controls are still preset.
To Dispense Ice: Water and Ice Dispensers (on some models) WARNING Cut Hazard Use a sturdy glass when dispensing ice or water. Failure to do so can result in cuts. Depending on your model, you may have one or more of the following options: the ability to select either crushed or cubed ice, a special light that turns on when you use the dispenser, or a lock option to avoid accidental dispensing. The Ice Dispenser Ice dispenses from the ice maker storage bin in the freezer.
The Dispenser Light Non-indicator Water Filter (on some models) The dispenser area has a light. It can be turned on manually by pressing the ON button at the right hand side of the control panel. The red indicator above the ON button will appear. On some models: Whenever you use the dispenser the lever will automatically turn the light on. If your refrigerator does not have the water filter status light, you should change the water filter cartridge every 6 to 9 months depending upon your usage.
3. Take the new cartridge out of its packaging and remove protective cover from O-rings. Ice Maker and Storage Bin (on some models - Accessory) Style 1 4. Slide the cartridge cap onto the new cartridge. See illustration in Step 2. 5. With cartridge cap in the vertical position, push the new filter cartridge into the base grille until it stops. Rotate the cartridge cap clockwise to a horizontal position. Flush the water system. See “Flushing the Water System After Replacing Filter” later in this section.
■ It is normal for the ice cubes to be attached at the corners. They will break apart easily. ■ For Style 1 ice maker, do not force the wire shutoff arm up or down. ■ Do not store anything on top of the ice maker or in the ice storage bin. Style 2 To Turn the Ice Maker ON/OFF: The ON/OFF switch is located on the top right side of the freezer compartment. 1. To turn the ice maker on, slide the control to the ON (left) position. NOTE: Your ice maker has an automatic shutoff.
Flip-up Shelf (on some models) To Raise or Lower the Shelf: 1. Raise the shelf by pulling forward on the lever located at the bottom front of the shelf and lift until the shelf locks into the vertical position. 2. Lower the shelf until it is latched securely in place. Convertible Vegetable/Meat Drawer, Crisper and Covers (on some models) Crisper and Convertible Vegetable Meat Drawers To Remove and Replace Drawers: 1. Slide crisper or meat drawer straight out to the stop.
Meat Storage Guide Store most meat in original wrapping as long as it is airtight and moisture-proof. Rewrap if necessary. See the following chart for storage times. When storing meat longer than the times given, freeze the meat. Fresh fish or shellfish ........................ use same day as purchased Chicken, ground beef, variety meat (liver, etc.)................ 1-2 days Cold cuts, steaks/roasts .................................................. 3-5 days Cured meats ....................................
DOOR FEATURES REFRIGERATOR CARE Your model may have some or all of these features. Features that can be purchased separately as accessories are labeled with the word “Accessory.” Not all accessories will fit all models. If you are interested in purchasing one of the accessories, please call the toll-free number on the cover or in the “Accessories” section. Cleaning WARNING Door Rails The door rails may be removed for easier cleaning. Snap-on Door Rails To Remove and Replace the Rails: 1.
Do not allow the Stainless Steel Cleaner & Polish to come into contact with any plastic parts such as the trim pieces, dispenser covers or door gaskets. If accidental contact does occur, clean plastic part with a sponge and mild detergent in warm water. Dry thoroughly with a soft cloth. To order the cleaner, see the “Accessories” section. 5. There is no need for routine condenser cleaning in normal home operating environments.
Style 2 – Behind Freezer Basket ■ Depending on your model, remove the top freezer basket or top freezer basket shelf. Remove light shield by removing the Phillips screw on the top of the shield. Carefully rotate the shield until the left tab can be gently pulled from the freezer wall. ■ Replace the light shield by inserting the left tab into the freezer wall. Align top tab with screw hole and replace screw. If you choose to turn the refrigerator off before you leave, follow these steps. 1.
TROUBLESHOOTING Try the solutions suggested here first in order to avoid the cost of an unnecessary service call. ■ Are the controls not set correctly for the surrounding conditions? Refer to the “Using the Controls” section. ■ Are the doors not closed completely? Close the doors firmly. If they do not close completely, see “The doors will not close completely” later in this section. ■ Are the condenser coils dirty? This prevents air transfer and makes the motor work harder. Clean the condenser coils.
■ Has a large amount of ice just been removed? Allow 24 hours for ice maker to produce more ice. ■ Are the controls set correctly? See the “Using the Controls” section. ■ Is there a water filter installed on the refrigerator? The filter may be clogged or installed incorrectly. Check the filter installation instructions to ensure that the filter was installed correctly and is not clogged. If installation or clogging is not a problem, call a technician or other qualified person.
Water or ice is leaking from the dispenser ■ Is the glass not being held under the ice dispenser long enough, causing the ice to spill? Hold the container under the ice chute for two to three seconds after releasing the dispenser lever. Water or ice may continue to dispense during this time. ■ Is an ice cube stuck in the chute and holding the trap door open? Remove the cube.
ASSISTANCE OR SERVICE Before calling for assistance or service, please check “Troubleshooting.” It may save you the cost of a service call. If you still need help, follow the instructions below. When calling, please know the purchase date and the complete model and serial number of your appliance. This information will help us to better respond to your request.
Notes 23
WHIRLPOOL® REFRIGERATOR WARRANTY ONE-YEAR FULL WARRANTY ON REFRIGERATOR For one year from the date of purchase, when this refrigerator (excluding the water filter) is operated and maintained according to instructions attached to or furnished with the product, Whirlpool Corporation will pay for Factory Specified Parts replacement parts and repair labor costs to correct defects in materials or workmanship. Service must be provided by a Whirlpool designated service company.