® SIDE BY SIDE REFRIGERATOR Use & Care Guide Table of Contents .......... 2 FRIGORÍFICO CON CONGELADOR VERTICAL Manual de uso y cuidado Índice .......... 23 .......... 46 ..........
TABLE OF CONTENTS REFRIGERATOR SAFETY .............................................................3 Proper Disposal of Your Old Refrigerator....................................3 REFRIGERATOR INSTALLATION.................................................4 Unpacking ....................................................................................4 Location Requirements ................................................................4 Electrical Requirements .................................................
REFRIGERATOR SAFETY Your safety and the safety of others are very important. We have provided many important safety messages in this manual and on your appliance. Always read and obey all safety messages. This is the safety alert symbol. This symbol alerts you to potential hazards that can kill or hurt you and others. All safety messages will follow the safety alert symbol and either the word “DANGER” or “WARNING.
REFRIGERATOR INSTALLATION Location Requirements WARNING Unpacking WARNING Excessive Weight Hazard Use two or more people to move and install refrigerator. Explosion Hazard Keep flammable materials and vapors, such as gasoline, away from refrigerator. Failure to do so can result in back or other injury. Failure to do so can result in death, explosion, or fire. Removing packaging materials ■ Remove tape and glue residue from surfaces before turning on the refrigerator.
Electrical Requirements Base Grille WARNING To remove the base grille: 1. Open both refrigerator doors. 2. Place hands along the ends of the grille, with your thumbs along the top. Push in with your thumbs and pull up on the bottom. NOTE: Be sure to refasten the Tech Sheet behind the base grille after cleaning. Electrical Shock Hazard Plug into a grounded (earthed) outlet. Do not remove ground prong. Do not use an adapter. Do not use an extension cord.
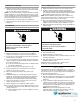
Door Removal TOOLS NEEDED: ¹⁄₄ in. hex-head socket wrench, ⁵⁄₁₆ in. hex-head socket wrench and a flat-head screwdriver. IMPORTANT: Before you begin, turn the refrigerator control OFF, unplug refrigerator or disconnect power. Remove food and any adjustable door or utility bins from doors. NOTE: It may only be necessary to remove either the door handle or the doors to get your product through the doorway of your home. Measure the door opening to see if you need to remove the refrigerator handles or the doors.
Handle Removal (optional) 1. Apply firm pressure with your hand on the face of trim. Slide top trim up and bottom trim down away from handle. Lift trim pieces off shoulder screws (see Graphic 1). NOTE: Some models include accent pieces between the handle and the handle trim. If your model includes the accents, you will need to carefully remove them with a flat-head screwdriver before removing the handle screws. The accent pieces are optional and can be reinstalled or left off of the handle assembly. 2.
4. Open both doors again and check to make sure that they close as easily as you like. If not, tilt the refrigerator slightly more to the rear by turning both leveling screws to the right. It may take several more turns, and you should turn both leveling screws the same amount. 5. Replace the base grille. NOTE: Be sure to refasten the Tech Sheet behind the base grille. 2. Use a sturdy container to depress the water dispenser bar until the water begins to flow.
REFRIGERATOR USE Ensuring Proper Air Circulation In order to ensure proper temperatures, you need to permit air to flow between the two sections. Cold air enters the bottom of the freezer section and moves up. It then enters the refrigerator section through the top vent. Air then returns to the freezer as shown. Setting the dial controls (on some models): The Refrigerator Control adjusts the refrigerator compartment temperature, and the Freezer Control adjusts the freezer compartment temperature.
The ice dispenser Adjusting Control Settings Give the refrigerator time to cool down completely before adding food. It is best to wait 24 hours before you put food into the refrigerator. The settings indicated in the previous section should be correct for normal household refrigerator usage. The controls are set correctly when milk or juice is as cold as you like and when ice cream is firm.
The water dispenser If you did not flush the water system when the refrigerator was first installed, please do so before using the water dispenser. To flush the water system, please see the section “Water System Preparation.” IMPORTANT: Depending on your model, the small removable tray at the bottom of the dispenser is designed to catch small spills and allow for easy cleaning. There is no drain in the tray. The tray can be removed from the dispenser and carried to the sink to be emptied or cleaned.
Water Filtration System (on some models) The base grille water filter status light (on some models) The water filter status light will help you know when to change your water filter cartridge. The light is located at the top of the refrigerator compartment. The light will change from green to yellow. This tells you that it is almost time to change the water filter cartridge (90% of the filter life has been used).
2. For Style 2, slide the cartridge cap off the end of the filter cartridge. DO NOT DISCARD THE CAP. With the cartridge cap in the vertical position, insert the cap into the base grille until it stops. 3. Rotate the cartridge cap to a horizontal position. The cartridge cap might not be even with the base grille. Ice Maker and Storage Bin/Bucket 4. Replace the bin by pushing it in all the way or the dispenser will not work. Push the wire shutoff arm down to the ON position to restart ice production.
■ For Style 1 ice maker, do not force the wire shutoff arm up or down. ■ Do not store anything on top of or in the ice maker or ice bin or bucket. Flip-up Shelf (on some models) To raise or lower the shelf: REFRIGERATOR FEATURES 1. Raise the shelf by pulling forward on the lever located at the bottom front of the shelf and lift until the shelf locks into the vertical position. 2. Lower the shelf until it is latched securely in place. Your model may have some or all of these features.
Convertible Vegetable/Meat Drawer, Crisper and Covers (on some models) Crisper and Convertible Vegetable Meat Drawers To remove and replace drawers: 1. Slide crisper or meat drawer straight out to the stop. Lift the front of drawer with one hand while supporting the bottom of drawer with other hand and slide the drawer out the rest of the way. 2. Replace the crisper or meat drawer by sliding it back in fully past the drawer stop.
FREEZER FEATURES DOOR FEATURES Your model may have some or all of these features. Features that can be purchased separately as product accessories are labeled with the word “Accessory.” Not all accessories will fit all models. If you are interested in purchasing one of the accessories, please call the toll-free number on the cover or in the “Accessories” section. Your model may have some or all of these features.
If you need to clean the condenser: REFRIGERATOR CARE ■ Remove the base grille (see “Base Grille” or “Door Removal” section). ■ Use a vacuum with a soft brush to clean the grille, the open areas behind the grille and the front surface area of the condenser. ■ Replace the base grille when finished. Cleaning 6. Plug in refrigerator or reconnect power. Changing the Light Bulbs Explosion Hazard Use nonflammable cleaner. Failure to do so can result in death, explosion, or fire.
Upper Freezer Light (on some models) ■ Remove the light shield by grasping the sides and squeezing in toward the center and while pulling forward the shield. ■ Replace the light shield by fitting the tabs into the slotted holes in the freezer liner. Push in the shield until it snaps into place. Holiday and Moving Care Holidays If you choose to leave the refrigerator on while you’re away, use these steps to prepare your refrigerator before you leave. 1. Use up any perishables and freeze other items. 2.
■ TROUBLESHOOTING NOTE: Your new refrigerator will run longer than your old one due to its high-efficiency motor. Try the solutions suggested here first in order to avoid the cost of an unnecessary service call. Your refrigerator will not operate Are the door gaskets not sealed all the way around? Contact a technician or other qualified person. The refrigerator seems to make too much noise ■ The sounds may be normal for your refrigerator. See the “Normal Sounds” section.
Has food in the freezer or refrigerator been wrapped properly? Use airtight, moisture-proof packaging to help prevent odor transfer to stored food. ■ ■ Does the water contain minerals (such as sulfur)? A filter may need to be installed to remove the minerals. ■ Is there a water filter installed on the refrigerator? Gray or dark discoloration in ice indicates that the water filtration system needs additional flushing.
■ Does the refrigerator wobble or seem unstable? Level the refrigerator. See the “Door Closing” or “Leveling Refrigerator” section, depending on your model. ■ Were the doors removed during product installation and not properly replaced? Remove and replace the doors according to the “Door Removal” section on some models, or call a qualified service technician.
WHIRLPOOL® REFRIGERATOR WARRANTY ONE-YEAR FULL WARRANTY ON REFRIGERATOR For one year from the date of purchase, when this refrigerator (excluding the water filter) is operated and maintained according to instructions attached to or furnished with the product, Whirlpool Corporation will pay for Factory Specified Parts replacement parts and repair labor costs to correct defects in materials or workmanship. Service must be provided by a Whirlpool designated service company.
ÍNDICE SEGURIDAD DEL FRIGORÍFICO ................................................24 Cómo deshacerse correctamente de su viejo frigorífico ..........24 INSTALACIÓN DEL FRIGORÍFICO .............................................25 Cómo desembalarlo...................................................................25 Requisitos de colocación...........................................................25 Requisitos eléctricos..................................................................26 Rejilla de la base ...
SEGURIDAD DEL FRIGORÍFICO Su seguridad y la de los demás es muy importante. Tanto en este manual como en su electrodoméstico, hemos incluido muchas advertencias de seguridad que resultan de la mayor importancia. Consulte y siga dichas advertencias de seguridad en todo momento. Este símbolo le advierte que tenga cuidado. Este símbolo le advierte de peligros que pueden ocasionar la muerte o daños a usted o a los demás.
INSTALACIÓN DEL FRIGORÍFICO Requisitos de colocación Cómo desembalarlo Peligro de peso excesivo Use dos o más personas para mover e instalar el frigorífico. El no hacerlo pudiera ocasionarle daño a la espalda u otras partes del cuerpo. Cómo quitar los materiales de embalado ■ Quite las cintas adhesivas y goma de su frigorífico antes de usarlo. Frote una pequeña cantidad de jabón líquido para vajilla sobre el adhesivo con los dedos. Enjuague con agua tibia y seque.
Requisitos eléctricos Rejilla de la base Para quitar la rejilla de la base: Peligro de Choque Eléctrico Conecte a una salida de puesta a tierra. No quite el terminal de puesta a tierra. No use un adaptador. No use un cable eléctrico de extensión. No seguir estas instrucciones puede ocasionar la muerte, incendio o choque eléctrico.
Desmontaje de la puerta HERRAMIENTAS NECESARIAS: Llave de cubo de cabeza hexagonal de ¹⁄₄ de pulgada, llave de cubo de cabeza hexagonal de ⁵⁄₁₆ de pulgada y destornillador de cabeza plana. IMPORTANTE: Antes de empezar, gire el control del frigorífico a la posición OFF (apagado), desenchufe el refrigerador o desconecte el suministro eléctrico. Retire los alimentos que se encuentran en cualquier puerta ajustable o recipiente de las puertas.
Desmontaje de los tiradores de la puerta (opcional) 1. Presione firmemente con la mano la parte frontal del borde. Deslice la parte superior del borde hacia arriba y el borde inferior hacia abajo en dirección opuesta al tirador, levántelo, desprendiéndolo de los tornillos de resalto (vea la ilustración 1). NOTA: Algunos modelos incluyen piezas de adorno entre el tirador y el borde del tirador.
3. Utilice un destornillador para ajustar los tornillos niveladores. Gire el tornillo nivelador hacia la derecha para levantar ese lado del frigorífico o gírelo hacia la izquierda para bajar ese mismo lado. Quizás tenga que girar los dos tornillos niveladores varias veces hasta lograr la nivelación adecuada del frigorífico (vea la ilustración 8).
UTILIZACIÓN DEL FRIGORÍFICO Cómo asegurar una adecuada circulación de aire Ajuste de los controles con cuadrante (en algunos modelos): El control de la nevera ajusta la temperatura de la nevera, y el control del congelador ajusta la temperatura del congelador. Los ajustes que están a la izquierda de la posición intermedia ponen la temperatura menos fría. Los ajustes que están a la derecha de la posición intermedia ponen la temperatura más fría.
Si necesita ajustar las temperaturas en la nevera o en el congelador, use como guía los ajustes enumerados en la tabla a continuación. Espere por lo menos 24 horas entre ajustes.
El distribuidor de agua Si cuando instaló el frigorífico por primera vez no efectuó la descarga de agua del sistema, hágalo antes de usar el distribuidor de agua. Para efectuar la descarga del sistema de agua, consulte la sección “Preparación del sistema de agua”. IMPORTANTE: Dependiendo de su modelo, la bandeja pequeña desmontable que se encuentra en el fondo del distribuidor está diseñada para recoger derrames pequeños y permitir una limpieza fácil. La bandeja no tiene drenaje.
Sistema de filtración del agua (en algunos modelos) Luz indicadora del filtro de agua de la rejilla de la base (en algunos modelos) La luz indicadora del filtro de agua le ayudará a saber cuándo debe cambiar el cartucho del filtro de agua. La luz está situada en la parte superior del compartimiento de su nevera. La luz cambiará de verde a amarilla. Esto le indica que se acerca el tiempo de cambiar el cartucho del filtro de agua (90% de la duración del filtro ha sido utilizada).
2. Para el estilo 2, deslice la tapa del cartucho fuera del extremo del cartucho del filtro. CONSERVE LA TAPA. Con la tapa del cartucho en posición vertical, introduzca la tapa en la rejilla de la base hasta que se detenga. 3. Gire la tapa del cartucho hasta una posición horizontal. Es posible que la tapa del cartucho no quede nivelada con la rejilla de la base.
■ Deshágase de los tres primeros lotes de hielo producidos para evitar impurezas que se hayan enjuagado del sistema. ■ La calidad del hielo dependerá de la calidad del agua que suministre a su máquina de hacer hielo. ■ Evite la conexión de su máquina de hacer hielo a un suministro de agua blanda. Los químicos para ablandar el agua (como la sal) pueden dañar ciertos componentes de la máquina de hacer hielo y producir un hielo de muy baja calidad.
Para quitar y volver a colocar el compartimiento para embutidos: 1. Quite el compartimiento para embutidos, deslizándolo hacia fuera hasta el tope. Levante la parte frontal y deslice el compartimiento por completo hacia fuera. 2. Vuelva a colocar el compartimiento para embutidos, deslizándolo nuevamente hacia adentro hasta después del tope.
■ Verduras de hoja: Lávelas con agua fría, escúrralas y corte o elimine los bordes en mal estado o descoloridos. Colóquelas en bolsas o contenedores de plástico y guárdelas en la fresquera.
Rieles encajables de la puerta MANTENIMIENTO DEL FRIGORÍFICO Cómo quitar y volver a poner los rieles: 1. Quite los rieles empujando con suavidad en el frente del soporte mientras tira hacia afuera la lengüeta de adentro. Repita estos pasos en el lado contrario del riel. 2. Vuelva a colocar los rieles alineando los extremos de los soportes con los botones en los lados del revestimiento de la puerta.
juntas de la puerta. Si ocurre un contacto accidental, limpie la parte de plástico con una esponja y un detergente suave en agua tibia. Seque meticulosamente con un paño suave. Para pedir el limpiador, vea la sección “Accesorios”. ■ 5. No hay necesidad de limpiar periódicamente el condensador bajo condiciones normales de funcionamiento en el hogar.
■ Cortes de corriente Si no va a haber electricidad durante 24 horas o menos, mantenga ambas puertas del frigorífico cerradas para que los alimentos se mantengan fríos y congelados. Si no va a haber electricidad durante 24 horas o menos, haga algo de lo siguiente: ■ Saque todos los alimentos congelados y guárdelos en un arcón para congelados. ■ Coloque 2 libras (907 gr.) de hielo seco en el congelador por cada pie cúbico (28 litros) de espacio. Esto mantendrá los alimentos congelados de dos a cuatro días.
Hay agua en la bandeja de descongelación ■ ¿ Está descongelando el frigorífico? El agua se evaporará. Es normal que el agua gotee en la bandeja de descongelación. ■ ¿Hay más humedad de lo habitual? El agua en la bandeja de descongelación tardará más en evaporarse cuando hay mucha humedad en el ambiente. Parece que el motor funciona en exceso ■ ¿Está la temperatura ambiental más alta de lo habitual? Cuando hace calor, lo normal es que el motor funcione por más tiempo.
El distribuidor de hielo no funciona adecuadamente ■ ¿Está bien cerrada la puerta del congelador? Cierre bien la puerta. Si no queda completamente cerrada, consulte “Las puertas no cierran bien”, que se detalla más adelante en esta sección. ■ ¿Está bien instalado el recipiente del hielo o cubitera? Para modelos dotados de un recipiente interior del hielo, empuje el recipiente del hielo por completo. Si el recipiente del hielo no entra completamente, es posible que no esté derecho.
El agua del distribuidor no está bien fría ■ ¿Se acaba de instalar el frigorífico? Deje transcurrir 24 horas para que el frigorífico se enfríe por completo. ■ ¿Se ha servido recientemente una gran cantidad de agua? Deje transcurrir 24 horas para que el agua se enfríe por completo. ■ ¿No se ha servido agua recientemente? El primer vaso de agua quizás no esté bien fría. Tire el primer vaso de agua.
ASISTENCIA O SERVICIO Antes de llamar a su servicio de asistencia técnica, consulte “Identificación y reparación de averías”. Esto le podría ahorrar el coste de la llamada al servicio técnico. Si aún así sigue necesitando ayuda, siga las instrucciones que figuran a continuación. Cuando llame para solicitar asistencia o servicio, tenga a mano una descripción detallada del problema, el número completo de su modelo y número de serie y la fecha de compra.
GARANTÍA DEL FRIGORÍFICO WHIRLPOOL® GARANTÍA TOTAL DE UN AÑO DEL FRIGORÍFICO Durante un año entero a partir del día de la compra, y siempre y cuando se dé al frigorífico (excluyendo el filtro de agua) un uso y mantenimiento de acuerdo con las instrucciones adjuntas o provistas con el producto, Whirlpool Corporation se hará cargo de los costos de las piezas de recambio Factory Specified Parts (Piezas especificadas de fábrica) y correrá con los gastos de reparación para corregir defectos en los materiales o e
.................................................................................47 ..............................................................47 .................................................................................48 ..........................................................................48 .....................................................................................48 .....................................................................................49 ..........................
■ ■ 47
■ ■ 12 / " (1.25 cm) 2" (5.
1 1 1 1 1 50
■ ■ ■ 51
■ ■ ■ ■ ■ ■ ■ ■ ■ ■ ■ ■ ■ ■ ■ ■ ■ ■ 52
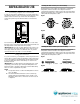
Freezer Off 1 3 2 Refrigerator 4 Colder Cold Freezer cold 1 2 3 1 2 3 4 Colder Refrigerator 4 colder off 1 2 3 4 colder ■ ■ 53
■ ■ ■ ■ ■ ■ 54
■ ■ 55
1 56 2
MAX NORMAL ■ ■ ■ ■ ■ ■ ■ 57
■ ■ 58
■ ■ ■ ■ ■ 59
■ ■ ■ ■ ■ ■ ■ 61
■ ■ ■ ■ ■ ■ ■ ■ ■ ■ ■ ■ ■ ■ ■ ■ 62
■ ■ ■ ■ ■ ■ ■ ■ ■ ■ ■ ■ ■ ■ ■ ■ ■ ■ ■ ■ ■ ■ ■ ■ ■ ■ ■ ■ ■ ■ 63
■ ■ ■ ■ ■ ■ ■ ■ ■ ■ ■ ■ ■ ■ ■ ■ ■ ■ ■ ■ ■ ■ ■ ■ ■ 64
■ ■ ■ ■ ■ ■ ■ ■ ■ ■ ■ ■ ■ ■ ■ ■ ■ ■ 65
® 66
...........................................................................68 ...........................................................................68 ....................................................................................69 ....................................................................................69 ....................................................................................69 .........................................................................70 ...................
■ ■ 68
■ ■ 12 / " (1.25 cm) 2" (5.
1 1 1 1 1 71
■ ■ ■ 72
■ ■ ■ ■ ■ ■ ■ ■ ■ ■ ■ ■ ■ ■ ■ ■ ■ ■ 73
Freezer Off 1 3 2 Refrigerator 4 Colder Cold Freezer cold ■ ■ 74 1 2 3 1 2 3 4 Colder Refrigerator 4 colder off 1 2 3 4 colder
■ ■ ■ ■ ■ ■ ) 75
■ ■ 76
1 2 77
MAX NORMAL ■ ■ ■ ■ ■ ■ ■ 78
■ ■ 79
■ ■ ■ ■ ■ 80
■ ■ ■ ■ ■ ■ ■ 82
■ ■ ■ ■ ■ ■ ■ ■ ■ ■ ■ ■ ■ ■ ■ ■ 83
■ ■ ■ ■ ■ ■ ■ ■ ■ ■ ■ ■ ■ ■ ■ ■ ■ ■ ■ ■ ■ ■ ■ ■ ■ ■ ■ ■ ■ ■ 84
■ ■ ■ ■ ■ ■ ■ ■ ■ ■ ■ ■ ■ ■ ■ ■ ■ ■ ■ ■ ■ ■ ■ ■ ■ 85
■ ■ ■ ■ ■ ■ ■ ■ ■ ■ ■ ■ ■ ■ ■ ■ ■ ■ 86
2308181 © 2004 Whirlpool Corporation. All rights reserved. ® Registered Trademark/TM Trademark of Whirlpool, U.S.A. © 2004 Whirlpool Corporation. Todos los derechos reservados. ® Marca registrada/TM Marca de comercio de Whirlpool, EE.UU. © ® © ® . 10/04 Printed in U.S.A. Impreso en EE.UU.