
Installation


10
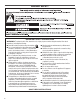
Complete Installation
Checklist
q
Check electrical requirements. Be sure you have correct
electrical supply and recommended earthing method.
q
Check that all parts are now installed. If there is an extra
part, go back through steps to see what was skipped.
q
Check that you have all of your tools.
q
Check that shipping materials were completely
removed from washer.
q
Check that water faucets are on.
q
Check for leaks around faucets and inlet hoses.
q
Remove lm from console and any tape remaining on washer.
q
Check that washer is plugged into an earthed outlet.
q
Dispose of/recycle all packaging materials.
q
Read “Washer Care” in your Use and Care Guide.
q
To test and clean your washer, measure 1/2 of normal
recommended amount of powdered or liquid detergent
and pour it into washer basket or detergent dispenser
(on some models). Close lid. Select any cycle. Start washer
and allow to complete full cycle.
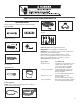
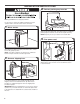
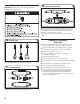
Select the plug that ts with the electric receptacle.
16. Select plug
Power Cord Installation
IMPORTANT: Installation must be performed by Whirlpool
qualied service personnel only.
Assemble the plug into the end of the power cord.
17. Assemble plug
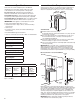
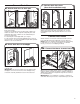
Secure the power cord by seating the connection on the cord
lock. Place the cord lock cover and push until it snaps. Make
sure the power cord connection is seated on the cord lock
and that the cord lock clamps correctly.
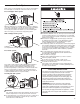
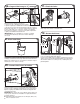
Plug power supply cord into an earthed outlet. Turn power
supply on.
18. Secure power cord