
Use and Care Manual


Dispensing Cold Water
Note: After setup, it will take up to 6 hours to get the water to its maximum cold temperature.
During this time, the compressor will run continuously. Compressor works to build up ice bank,
this is normal.
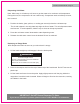
1. Position the bottle, glass, pitcher, or cooking pot securely below the cold water tap.
- The circular shapes in the drip plate help align the flow of water. This unit dispenses water
at a fast rate. To avoid splashes, hold the cup as close to the tap as possible.
2. Press the cold water control downward to start dispensing water.
3. Release the cold water control once the desired fill level is achieved.
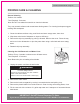
Replacing an Empty Bottle
Note: Replace the bottle as soon as you notice that it is empty.
1. Lift the bottle straight up to disengage it from the bottle probe.
2. Remove the tamper seal from the top of bottle cap of the fresh bottle. Do NOT remove the
plastic cap.
3. Lift the bottle and insert it onto the probe. Apply slight pressure until the plug inside the
cap pushes in and the bottle is seated. Water will begin to flow into the reservoirs, causing
air bubbles in the bottle.
Model # 7LIECK-W-WL: Page 11
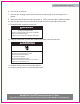
IMPORTANT: Do NOT Return Dispenser To Store.
If you have a question or problem, please contact 1-855-5-WHIRL-5 for assistance.
Excessive Weight Hazard
Use two or more people to move and install the
water cooler and the bottles.
Failure to do so can result in back or other injury.
WARNING