AIR CONDITIONER Use & Care Guide For questions about features, operation/performance, parts, accessories or service, call: 1-800-253-1301 in the U.S.A. ACONDICIONADOR DE AIRE Manual de Uso y Cuidado Si tiene preguntas respecto a las características, funcionamiento, rendimiento, partes, accesorios o servicio técnico, llame al: 1-800-253-1301 en los EE. UU. Table of Contents/Índice .....................................
TABLE OF CONTENTS AIR CONDITIONER SAFETY .........................................................2 INSTALLATION REQUIREMENTS ................................................3 Tools and Parts ............................................................................3 Location Requirements ................................................................3 Electrical Requirements ...............................................................4 INSTALLATION INSTRUCTIONS .......................................
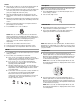
IMPORTANT SAFETY INSTRUCTIONS WARNING: To reduce the risk of fire, electrical shock or injury when using your air conditioner, follow these basic precautions: Plug into a grounded 3 prong outlet. Do not use an extension cord. Do not remove ground prong. Unplug air conditioner before servicing. Do not use an adapter. Use two or more people to move and install air conditioner.
Specific electrical requirements are listed in the chart below. Follow the requirements for the type of plug on the power supply cord. Through-the-wall installation The wall opening measurements should be: ■ Height: 16" (40.6 cm) plus twice the thickness of wood used to build frame. ■ ■ Power supply cord Width: 22⁵⁄₈" (57.5 cm) plus twice the thickness of wood used to build frame. Depth: 2¹⁄₂" (6.4 cm) minimum to 8" (20.3 cm) maximum. C ¹⁄₄" (0.6 cm) A B D C A. 16" (40.6 cm) B. 22⁵⁄₈" (57.5 cm) C.
To test your power supply cord: WARNING Plug into a grounded 3 prong outlet. 1. Plug power supply cord into a grounded 3 prong outlet. 2. Press RESET. 3. Press TEST (listen for click; Reset button will trip and pop out). 4. Press and release RESET (listen for click; Reset button will latch and remain in). The power supply cord is ready for operation. NOTES: ■ The Reset button must be pushed in for proper operation. Do not remove ground prong.
Installing Air Conditioner NOTE: Handle air conditioner gently. Window installation (on some models) NOTE: Attach top channel and side curtains to air conditioner cabinet before placing cabinet in window. 1. Locate supplied bag of screws. 2. Place top channel on top of air conditioner cabinet, lining up the 3 holes in top channel with the 3 holes on top of air conditioner cabinet. 3. Using 3 - #10 - 12 x ³⁄₈" pan-head Phillips screws, attach top channel to air conditioner cabinet. B A 5.
Option 2—Plastered wall with no molding If the plastered wall is to be flush with the cabinet and no molding is used, the wood frame must be set ¹⁄₂" (13 mm) into the inside wall. AB C 3. Cut opening through the wall. Remove and save insulation. NOTES: ■ Dimension for depth depends on wall thickness and type of molding. ■ Do not block louvers in air conditioner cabinet. ■ Use 1" (2.5 cm) or thicker lumber for wood frame. D A B C A. Plastered wall B. Inside wall C. Wood frame D. Louvers 1.
6. Insert one of the #8 x ³⁄₄" round-head screws through hole and into lower window sash. Insert one of the #6 - 32 x ¹⁄₄" pan-head screws through threaded hole in top of curtain. A B 2. Use a level to check that cabinet is level side to side. C A A. Level A. Hole for #8 x ³⁄₄" round-head screw B. Threaded hole C. #6 - 32 x ¹⁄₄" pan-head screw 7. Repeat for right-hand curtain. 8. Insert foam seal behind the top of the lower window sash and against the glass of the upper window. 9.
4. Install foam seal in the gap between air conditioner base and cabinet. Push foam seal in at the sides and trim any excess material. WARNING Electrical Shock Hazard A Plug into a grounded 3 prong outlet. Do not remove ground prong. Do not use an adapter. A. Foam seal Do not use an extension cord. 5. Remove the 2 front panel screws from air conditioner base. 6. Insert front tabs of front panel into top of cabinet and swing front into place. 7. Attach bottom front of panel with front panel screws.
NOTES: ■ When the air conditioner is off, the Room indicator light is lit and the display shows the current room temperature. ■ If the room temperature is below 55ºF (13ºC), the display will show 55ºF (13ºC). If the room temperature is above 99ºF (37ºC), the display will show 99ºF (37ºC). ■ When the Set indicator light is lit, the display shows the temperature control setting. See “Temperature” later in this section.
To change the temperature display from °F to °C: To see or change the remaining time (in hours): 1. Turn off the air conditioner. 2. While the air conditioner is off, press and hold down the MODE and FAN SPEED buttons while pressing POWER to turn on the air conditioner. NOTE: Follow these same steps to change the temperature display from °C to °F. 1. Press TIMER once after it has been programmed. Hour indicator light will turn on, and display will show remaining time. 2.
To select the fan speed (in Cool, Fan Only or Power Saver mode only): Press TURBO, HIGH or LOW. 3. Press the plus or minus button to change delay time (1 to 24 hours). 4. Press TIMER again or wait 10 seconds. Timer indicator light on air conditioner will remain on. Hour indicator light on air conditioner will turn off, and Room indicator light on air conditioner will turn on. Display on air conditioner will show the current room temperature.
AIR CONDITIONER CARE Your new air conditioner is designed to give you many years of dependable service. This section tells you how to clean and care for your air conditioner properly. Call your local authorized dealer for an annual checkup. Remember… the cost of this service call is your responsibility. 4. Use a vacuum cleaner to clean air filter. If air filter is very dirty, wash it in warm water with a mild detergent. Do not wash air filter in the dishwasher or use any chemical cleaners.
Air conditioner power supply cord trips (Reset button pops out) ■ The filter is dirty or obstructed by debris. Clean the filter. ■ The inside evaporator and outside condenser coils are dirty or obstructed by debris. See “Annual Maintenance.” ■ Disturbances in your electrical current can trip (Reset button will pop out) the power supply cord. Press and release RESET (listen for click; Reset button will latch and remain in) to resume operation.
ASSISTANCE OR SERVICE To avoid unnecessary service calls, please check the “Troubleshooting” section. It may save you the cost of a service call. If you still need help, follow the instructions below. If you need assistance or service Call the Customer eXperience Center telephone number. Dial tollfree 1-800-253-1301 in the U.S.A. Our consultants are available to assist you. When calling: Please know the purchase date, and the complete model and serial number of your appliance.
Notes 16
SEGURIDAD DEL ACONDICIONADOR DE AIRE Su seguridad y la seguridad de los demás es muy importante. Hemos incluido muchos mensajes importantes de seguridad en este manual y en su electrodoméstico. Lea y obedezca siempre todos los mensajes de seguridad. Este es el símbolo de advertencia de seguridad. Este símbolo le llama la atención sobre peligros potenciales que pueden ocasionar la muerte o una lesión a usted y a los demás.
Piezas suministradas (en algunos modelos) Instalación en la ventana (en algunos modelos) Verifique que estén todas las piezas en el paquete de piezas. Medidas de la abertura de la ventana: ■ Ancho: 27" (68,6 cm) mínimo a 40" (101,6 cm) máximo B ■ Altura: 16¹⁄₄" (41,3 cm) mínimo A H C D E F G A. Obturadores de espuma (2) B. Soporte de seguridad para la ventana C. Tornillos de cabeza de cono achatado #6 - 32 x ¹⁄₄" (2) D. Tornillos de cabeza redonda #8 x ³⁄₄" (3) A E.
Requisitos eléctricos Método recomendado para la puesta a tierra ADVERTENCIA Peligro de Choque Eléctrico Conecte a un contacto de pared de conexión a tierra de 3 terminales. No quite la terminal de conexión a tierra. No use un adaptador. Este acondicionador de aire debe ser puesto a tierra. Este acondicionador de aire está equipado con un cable de suministro de energía provisto de un enchufe con tres terminales.
3. Presione TEST (Prueba) (escuche el chasquido, el botón de reposición se atrapa y salta). 4. Presione y suelte RESET (escuche el chasquido, el botón de reposición queda asegurado y se mantiene asegurado). El cable de suministro de energía está listo para su funcionamiento. NOTAS: ■ El botón de reposición debe presionarse para el funcionamiento adecuado. ADVERTENCIA Peligro de Choque Eléctrico Conecte a un contacto de pared de conexión a tierra de 3 terminales. No quite la terminal de conexión a tierra.
6. Tire de la manija para deslizar el acondicionador de aire fuera del gabinete. Coloque el acondicionador de aire sobre el cartón. Vista posterior A A B A. Alojamiento de la cortina B. Guías para las cortinas Vista inferior A. Manija NOTA: No levante, empuje, jale ni remueva ningún poliestireno expandido (espuma) del interior del acondicionador de aire. No es un material de empaque. Instalación del acondicionador de aire NOTA: Trate el acondicionador de aire con cuidado.
■ Instalación a través de la pared NOTAS: ■ Es responsabilidad y obligación del cliente hacer que este producto sea instalado por un técnico calificado familiarizado con instalaciones a través de la pared de acondicionadores de aire de habitaciones. ■ La parte de donde sale el cable eléctrico del acondicionador de aire debe colocarse a no más de 4 pies (122 cm) de un tomacorriente de conexión a tierra de 3 terminales. ■ No bloquee las rejillas. A B C A. Ancho exterior B. Altura exterior C.
5. Tire de la cortina izquierda hacia afuera hasta que encaje en el canal de la ventana. Utilice una broca de barrena de ³⁄₃₂" para taladrar un primer orificio en el alojamiento de la cortina y dentro del marco inferior de la ventana. 11. Fije el soporte de seguridad de la ventana al marco de la ventana con un tornillo de cabeza redonda #8 x ³⁄₄" para asegurar la ventana en su lugar. Vista frontal B C A A B A. Cortina izquierda B. Canal de la ventana Vista superior A.
Complete la instalación NOTA: Trate el acondicionador de aire con cuidado. 1. Asegúrese de que el extremo libre del alambre a tierra esté fuera del gabinete. ADVERTENCIA Peligro de Peso Excesivo Use dos o más personas para mover e instalar el acondicionador de aire. 5. Quite los dos tornillos del panel delantero de la base del acondicionador de aire. 6. Inserte las lengüetas frontales del panel delantero en la parte superior del gabinete y oscile el frente para colocarlo en su lugar. 7.
CÓMO USAR SU ACONDICIONADOR DE AIRE Operar debidamente su acondicionador de aire le permite obtener los mejores resultados posibles. Esta sección le explica cómo operar su acondicionador de aire debidamente. IMPORTANTE: ■ Si usted apaga el acondicionador de aire, espere por lo menos 3 minutos antes de volver a ponerlo en marcha. Esto evitará que se queme un fusible del hogar o se dispare un disyuntor de circuito a causa del acondicionador de aire.
Monitor del filtro 1. Cuando la luz indicadora Filter (filtro) se encienda o destelle, saque, limpie y reemplace el filtro de aire. Vea “Limpieza del filtro de aire”. 2. Presione y sostenga FILTER (filtro) por 3 segundos después de limpiar y reemplazar el filtro de aire. Esto vuelve a fijar el monitor del filtro. NOTA: Después de que el ventilador funcione por 360 horas, la luz indicadora del filtro se encenderá. Permanecerá encendida por 180 horas o hasta que usted presione FILTER (filtro).
Para borrar la programación del tiempo de retardo del temporizador: NOTA: El acondicionador de aire puede estar encendido o apagado. Presione y sostenga TIMER por 3 segundos. La luz indicadora Timer se apagará. Para ver o cambiar el tiempo restante (en horas): 1. Oprima TIMER una vez después de que haya sido programado. La luz indicadora Hour (Hora) se encenderá y la pantalla mostrará las horas restantes. 2.
Para programar el temporizador para un retardo de 1 a 24 horas hasta que el acondicionador de aire se apague (el acondicionador de aire tiene que estar Encendido): 1. Oprima TIMER. La luz indicadora Timer en el acondicionador de aire destellará. La luz indicadora Hour (Hora) en el acondicionador se encenderá y la pantalla en el acondicionador mostrará las horas restantes antes de que se apague el acondicionador de aire. 2. Oprima el botón de más o menos para cambiar el tiempo de retardo (de 1 a 24 horas).
CUIDADO DE SU ACONDICIONADOR DE AIRE Su nuevo acondicionador de aire está diseñado para darle muchos años de servicio confiable. Esta sección le ofrece la información acerca de la limpieza adecuada y el cuidado de su acondicionador de aire. Llame al vendedor autorizado de su localidad para un chequeo anual. Acuérdese…el precio de este servicio es su responsabilidad. 4. Limpie el filtro de aire usando una aspiradora. Si está muy sucio, lave el filtro con agua tibia y un detergente suave.
■ El acondicionador de aire no tiene el tamaño adecuado para su habitación. Verifique la capacidad de enfriamiento de su acondicionador de aire para habitacion. Los acondicionadores de aire para habitaciones no están diseñados para enfriar varias habitaciones. ■ El filtro está sucio u obstruido por escombros. Limpie el filtro. ■ El evaporador interno y los serpentines del condensador externo están sucios u obstruidos por escombros. Vea “Mantenimiento anual”.
AYUDA O SERVICIO TÉCNICO Para evitar llamadas solicitando servicio innecesarias, revise la sección de “Solución de problemas”. Podría ahorrarle el costo de una llamada solicitando servicio. Si aún necesita ayuda, siga las instrucciones a continuación. Si necesita ayuda o servicio técnico Llame al número telefónico del Centro para la eXperiencia del cliente. Llame gratis al 1-800-253-1301 en los EE. UU. Nuestros consultores están disponibles para ayudarlo.
1188081A © 2005. All rights reserved. Todos los derechos reservados. 5/05 Printed in U.S.A. Impreso en EE. UU.