ACMT 6332/IX/3
English GB Operating Instructions COOKER AND OVEN Contents Operating Instructions,2 SAFETY INSTRUCTIONS ,3 Description of the appliance-Overall view,21 Description of the appliance-Control Panel,21 Installation,22 Start-up and use,27 Clock/Minute Minder Operation,30 Care and maintenance,32 NL Nederland FR Français Mode d’emploi CUISINIERE ET FOUR Sommaire Mode d’emploi,2 Consignes de s'ecurit'e ,7 Description de l’appareil-Vue d’ensemble, 34 Description de l’appareil-Tableau de bord, 34 Installation
SAFETY INSTRUCTIONS IMPORTANT TO BE RED AND OBSERVED GB Before using the appliance carefully read Health and Safety and Use and Care guides. Keep these instructions close at hand for future reference. These instructions shall also be available on website: www.whirlpool.eu YOUR SAFETY AND SAFETY OF OTHERS IS VERY IMPORTANT This manual and the appliance itself provide important safety warnings, to be read and observed at all times. This is the safety alert symbol.
INTENDED USE OF THE PRODUCT GB - This appliance is designed solely for domestic usage. No other use is permitted (e.g. heating rooms). To aim the appliance as professional use is forbidden. The manufacturer declines all responsibility for innapropriate use or incorrect setting of the controls. .
- GB GB The power cable must be long enough for connecting the appliance, once fitted in its housing, to the main power supply. Do not pull the power supply cable. If the power cable is damaged it must be replaced with an identical one. The power cable must only be replaced by a qualified technician in compliance with the manufacturer instruction and current safety regulations. Contact an authorized service center.
- - GB - - For further information on the treatment, recovery and recycling of household electrical appliances, contact your competent local authority, the collection service for household waste or the store where you purchase the appliance. This appliance is marked in compliance with European Directive 2012/19/EU, Waste Electrical and Electronic Equipment (WEEE).
CONSIGNES DE SÉCURITÉ FR INSTRUCTIONS IMPORTANTES À LIRE ET À RESPECTER Avant d'utiliser l'appareil, lisez attentivement les guides de sécurité, d'utilisation et d'entretien. Gardez ces documents à portée de main pour toute référence future. Ces instructions sont également disponibles sur le site Web : www.whirlpool.eu VOTRE SÉCURITÉ ET CELLE D'AUTRUI EST TRÈS IMPORTANTE Ce manuel et l'appareil lui-même fournissent des avertissements de sécurité importants, à lire et à respecter en tout temps.
USAGE PRÉVU DE L'APPAREIL FR - Le présent appareil a été conçu à des fins domestiques uniquement. Toute utilisation à des fins autres que celles prévues est interdite (chauffage de pièces par exemple) Tout usage à des fins professionnelles est interdit. Le fabricant décline toute responsabilité pour un usage inapproprié ou un réglage incorrect des commandes.
AVERTISSEMENTS RELATIFS À L'ÉLECTRICITÉ - Assurez-vous que la tension indiquée sur la plaque signalétique correspond à celle de votre maison. - Le règlement exige que l'appareil soit relié à la terre. - Pour les appareils avec prise intégrée, si la fiche ne convient pas à votre prise de courant, contactez un technicien qualifié. - N'utilisez pas de rallonges, de multiprises ou d'adaptateurs. Ne branchez pas l'appareil à une prise qui peut être actionnée par télécommande.
NETTOYAGE ET ENTRETIEN FR FR - Avant d'effectuer toute opération de nettoyage ou d'entretien, assurez-vous de débrancher l'appareil du secteur. - Assurez-vous de débrancher l'appareil avant de remplacer l'ampoule pour éviter tout risque de choc électrique. N'utilisez jamais un équipement de nettoyage à vapeur. N'utilisez jamais de produits abrasifs ou les grattoirs métalliques pour nettoyer la porte de l'appareil, ils pourraient enrayer la vitre et elle pourrait se briser.
DÉCLARATION DE CONFIRMITÉ - Cet appareil a été conçu, fabriqué et distribué en conformité avec les exigences des directives européennes en matière de sécurité : FR ° 2006/95/CE (Directive Basse Tension) ° 2004/108/CE (Directive sur la compatibilité électromagnétique) - Cet appareil, qui est destiné à entrer en contact avec des denrées alimentaires, est conforme au règlement européen (LOGO CE) no 1935/2004.
oü VEILIGHEIDSINSTRUCTIES NL Voor u het apparaat in gebruik neemt, moet u de gezondheids- en veiligheidsrichtlijnen en de onderhouds- en gebruikshandleiding zorgvuldig te lezen. Houd deze instructies bij de hand voor een eventuele raadpleging in de toekomst. Deze instructies zijn ook beschikbaar op de website: www.whirlpool.
oü - OPGELET: De branders mogen niet worden gebruikt met een externe timer of afzonderlijk afstandsbediening systeem. U mag geen explosieve of ontvlambare stoffen zoals aerosol flessen opslaan in het apparaat en u mag geen benzine of andere ontvlambaar materiaal in of in de buurt van het apparaat opslaan: dit kan brand veroorzaken als het apparaat per ongeluk wordt ingeschakeld.
NL oü CORRECT GEBRUIK OPGELET: De bereiding moet onder toezicht gebeuren. Een korte bereiding moet voortdurend onder toezicht gebeuren. WAARSCHUWING: Etenswaren bereiden zonder toezicht op een brander met vet of olie kan gevaarlijk zijn en resulteren in brand. Probeer een dergelijke brand nooit te blussen met water maar schakel het apparaat uit en dek de vlam af met een deksel of een branddeken.
oü CONFORMITEITSVERKLARING - - NL Dit apparaat werd ontworpen, vervaardigd en verdeeld in conformiteit met de veiligheidsvereisten van Europese Richtlijnen: ° 2006/95/EC Laagspanningsrichtlijn ° 2004/108/EC Elektromagnetische compatibiliteit richtlijn Dit apparaat dat bedoeld is in contact te komen met etenswaren is conform de Europese regelgeving (LOGO CE) n. 1935/2004. Dit apparaat voldoet aan de Eco Ontwerp vereisten van Europese regelgeving n. 65/2014 en n.
DE WICHTIGE SICHERHEITSHINWEISE BITTE UNBEDINGT LESEN UND BEACHTEN Lesen Sie sich vor der Verwendung des Geräts die Gesundheit- und Sicherheitshinweise sowie Bedienungs- und Pflegeanleitung durch. Bitte bewahren Sie diese Bedienungsanleitung für den zukünftigen Gebrauch auf. Diese Bedienungsanleitung kann zudem auf der folgenden Website abgerufen werden:www.whirlpool.
DE - Wenn dass Gerät für die Nutzung eines Thermometer geeignet ist, verwenden Sie ausschließlich für diesen Herd empfohlene Modelle. - BRANDGEFAHR: Legen Sie keine Gegenstände auf die Garflächen, da sich diese entzünden könnten. - VORSICHT: Sollte das Glas einer Heizplatte brechen: schalten Sie sofort alle Brenner und sämtliche elektrische Heizelemente aus. Ziehen Sie den Gerätenetzstecker.
VORGESEHENE VERWENDUNG DES GERÄTS DE Dieses Gerät ist nur für den Einsatz im Haushalt bestimmt. Eine Nutzung für andere als den vorgesehenen Zwecke ist nicht zulässig (beispielsweise zur Heizung von Räumen). Die gewerbliche Nutzung des Geräts ist untersagt. Der Hersteller übernimmt keinerlei Haftung für alle aus unsachgemäßer Nutzung bzw. falscher Einstellung der Steuerung entstehenden Schäden.
Das Stromkabel muss lang genug sein, um die Entfernung von die Anschlussbuchse bis zur Anschlussstelle an die Stromleitung überbrücken zu können. Ziehen Sie niemals am Stromversorgungkabel. Ein beschädigtes Stromkabel ist unverzüglich auszutauschen. Das Stromkabel darf nur durch qualifizierte Installateure und unter Einhaltung der Anweisungen des Herstellers sowie der geltenden Vorschriften erfolgen. Kontaktieren Sie den zuständigen Kundendienst.
- DE - - Weitere Informationen zur Entsorgung, Erfassung und Wiederverwertung von Elektrohaushaltsgeräten erhalten Sie bei den zuständigen Behörden, den Recyclingunternehmen bzw. in dem Geschäft, in dem Sie das Gerät gekauft haben. Dieses Gerät verfügt über eine Kennzeichnung gemäß der EU-Direktive 2012/19/EU zur Entsorgung von Elektro- und Elektronik-Altgeräten (WEEE).
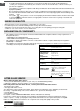
Description of the appliance Overall view GB Glass cover* Gas burner Hob grid Containment surface for spills GUIDE RAILS for the sliding racks position 5 position 4 position 3 position 2 position 1 Control panel RACK shelf DRIPPING PAN shelf Adjustable foot Adjustable foot Control panel 4 3 M 1 2 5 GB Description of the appliance Control panel 1.SELECTOR knob 2.THERMOSTAT knob 3.THERMOSTAT indicator light 4.Electronic cooking programmer 5.
Installation Room ventilation GB The appliance may only be installed in permanentlyventilated rooms, according to current national legislation and any subsequent amendments in force. The room in which the appliance is installed must be ventilated adequately in order to provide as much air as is needed by the normal gas combustion process (the flow of air must not be lower than 2 m3/h per kW of installed power).
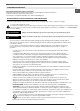
• If the cooker is installed underneath a wall cabinet, there must Min. 600 mm. be a minimum distance of 420 mm between this cabinet and the top of the hob. This distance should be increased to 700 mm if the wall cabinets are flammable (see figure). • Do not position blinds behind the cooker or less than 200 mm away from its sides. • Any hoods must be installed in accordance with the instructions listed in the relevant operating manual. Levelling 420 mm. Min. min. 650 mm. with hood min. 700 mm.
GB Once the connection has been performed, make sure that the hose: • Does not come into contact with any parts which reach temperatures of over 50°C. • Is not subject to any pulling or twisting forces and that it is not kinked or bent. • Does not come into contact with blades, sharp corners or moving parts and is not compressed. • Is easy to inspect along its whole length so that its condition may be checked. • Is shorter than 1500 mm.
GB Adapting to different types of gas Replacing the Triple ring burner nozzles It is possible to adapt the appliance to a type of gas other than the default type (this is indicated on the rating label on the cover). 1. Remove the pan supports and lift the burners out of their housing. The burner consists of two separate parts (see pictures). 2. Unscrew the nozzles using a 7 mm socket spanner. Replace the nozzles with models that are configured for use with the new type of gas (see Table 1).
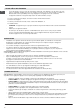
GB Safety Chain In order to prevent accidental tipping of the appliance, for example by a child climbing onto the oven door, the supplied safety chain MUST be installed! The cooker is fitted with a safety chain to be fixed by means of a screw (not supplied with the cooker) to the wall behind the appliance, at the same height as the chain is attached to the appliance. S R TC A ACMT 6332/IX/3 Choose the screw and the screw anchor according to the type of material of the wall behind the appliance.
Start-up and use Using the hob Lighting the burners For each BURNER knob there is a complete ring showing the strength of the flame for the relevant burner. To light one of the burners on the hob: 1. Bring a flame or gas lighter close to the burner. 2. Press the BURNER knob and turn it in an anticlockwise direction so that it is pointing to the maximum flame setting E. 3. Adjust the intensity of the flame to the desired level by turning the BURNER knob in an anticlockwise direction.
Cooking modes GB All cooking modes have a default cooking temperature which may be adjusted manually to a value between 40°C and 250°C as desired. THERMOSTAT indicator light When this is illuminated, the oven is generating heat.It switches off when the inside of the oven reaches the selected temperature. At this point the light illuminates and switches off alternately, indicating that the thermostat is working and is maintaining the temperature at a constant level.
GB Practical cooking advice In the GRILL cooking mode, place the dripping pan in position 1 to collect cooking residues (fat and/or grease). GRILL • Insert the rack in position 3 or 4. Place the food in the centre of the rack. • We recommend that the power level is set to maximum. The top heating element is regulated by a thermostat and may not always operate constantly. PIZZA • Use a light aluminium pizza pan. Place it on the rack provided.
Clock/Minute Minder Operation GB Programming cooking COOKING PROCESS icon DISPLAY A AUTO icon U T O •• •• A cooking mode must be selected before programming can take place. Programming the cooking duration 1. Press the button several times until icon OT and the DUR digits on the DISPLAY begin to flash. 2. Use the “+” and “-” buttons to set the desired duration; if you press and hold either button, the display will scroll through the values more quickly, making it quicker and easier to set the value.
GB Oven cooking advice table Cooking modes Foods Duck Roast veal or beef Traditional Pork roast Oven Biscuits (short pastry) Tarts Tarts Fruit cakes Plum cake Sponge cake Baking Stuffed pancakes (on 2 racks) Small cakes (on 2 racks) Mode Cheese puffs (on 2 racks) Cream puffs (on 3 racks) Biscuits (on 3 racks) Meringues (on 3 racks) Frozen food Pizza Courgette and prawn pie Country style spinach pie Turnovers Lasagne Golden Rolls Fast Chicken morsels cooking Pre-cooked food Golden chicken wings Fresh Foo
Care and maintenance GB Switching the appliance off Disconnect your appliance from the electricity supply before carrying out any work on it. Cleaning the appliance Never use steam cleaners or pressure cleaners on the appliance. • The stainless steel or enamel-coated external parts and the rubber seals may be cleaned using a sponge which has been soaked in lukewarm water and neutral soap. Use specialised products for the removal of stubborn stains. After cleaning, rinse well and dry thoroughly.
Removing and fitting the oven door: 1.Open the door 7.Replace the profile, a click will indicate that the part is positioned correctly. 8.Open the door completely. 9.Close the supports (see photo). GB 2.Make the hinge clamps of the oven door rotate backwards completely (see photo) 40° 10.Now the door can be completely closed and the oven can be started for normal use. 3.Close the door until the clamps stop (the door will remain open for 40° approx.
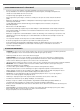
FR 7 1 2 3 8 9 10 11 12 13 4 5 6 Description de l’appareil Vue d’ensemble 1.Brûleur à gaz 2.Grille du plan de cuisson 3.Tableau de bord 4. Support GRILLE 5. Support LECHEFRITE 6.Pied de réglage 7.Plateau du plan de cuisson 8. GLISSIERES de coulissement 9. niveau 5 10.niveau 4 11.niveau 3 12.niveau 2 13.niveau 1 6 4 3 M 1 2 5 FR Description de l’appareil Tableau de bord 1.Manette PROGRAMMES 2.Manette du THERMOSTAT 3.Voyant lumineux THERMOSTAT 4.Electronic programmateur de cuisson 5.
Installation Aération des locaux L’appareil doit être installé dans des locaux qui sont aérés en permanence, selon les prescriptions des Normes en vigueur dans le pays d’installation. Il est indispensable que la pièce où l’appareil est installé dispose d’une quantité d’air égale à la quantité d’air comburant nécessaire à une bonne combustion du gaz (le flux d’air doit être d’au moins 3 m3/h par kW de puissance installée).
si les éléments suspendus sont inflammables (voir figure); Min. 600 mm. • ne placez pas de rideaux derrière la cuisinière ou sur ses côtés à moins de 200 mm de distance; • pour l’installation de hottes, conformez-vous aux instructions de leur notice d’emploi. FR 420 mm. Min. min. 650 mm. with hood min. 700 mm. without hood Min. 420 mm. HOOD Nivellement Pour mettre l’appareil bien à plat, vissez les pieds de réglage fournis aux emplacements prévus aux coins à la base de la cuisinière (voir figure).
Raccordement gaz par tuyau flexible en acier inox, à paroi continue avec raccords filetés Assurez-vous que le tuyau et les joints sont bien conformes aux normes applicables dans le pays d’installation. Pour installer le tuyau, enlevez l’about annelé équipant l’appareil (le raccord d’entrée du gaz à l’appareil est fileté 1/2 gaz mâle cylindrique). Procédez au raccordement de manière à ce que la longueur du tuyau ne dépasse pas 2 mètres d’extension maximale.
Tableau Caractéristiques des brûleurs et des injecteurs FR G25 /G25.3 G20 G25 /G25.3 3.00 129 128 332 1.90 104 104 210 51 1.10 79 79 111 105 130 3.10 3.25 1.50 2x99 2x99 343 309 G25 /G25.
Mise en marche et utilisation FR Utilisation du plan de cuisson Allumage des brûleurs Un petit cercle plein près de chaque bouton BRULEUR indique le brûleur associé à ce dernier. Pour allumer un brûleur du plan de cuisson : 1. approchez une flamme ou un allume-gaz ; 2. poussez sur le bouton du BRULEUR tout en le tournant dans le sens inverse des aiguilles d’une montre jusqu’au symbole grande flamme E. 3.
FR Programmes de cuisson Pour tous les programmes, il est possible de sélectionner une température comprise entre 50°C et MAX., sauf pour : • GRIL (il est conseillé dans ce cas de sélectionner MAX.); • GRATIN (il est conseillé de ne pas dépasser 200°C). Function Function FOUR TRADITION FOUR PATISSERIE FAST COOKING Mise en marche des résistances de voûte et de sole.
FR Conseils de cuisson Pour les cuissons ventilées ne pas utiliser les gradins 1et 5 : ils sont directement frappés par l’air chaud qui pourrait brûler les préparations délicates. MULTICUISSON • Utiliser les gradins 2 et 4 et placer au 2 les plats qui exigent davantage de chaleur. • Placer la lèchefrite en bas et la grille en haut. GRIL • En cas de cuisson en mode GRIL, placer la grille au gradin 5 et la lèchefrite au gradin 1 pour récupérer les jus de cuisson.
FR Tableau de cuisson Pour perfectionnement de cuisson 42
Fonctionnement de l’horloge/Bip minute Programmation de la cuisson ! Icône PROCÉDURE DE CUISSON ! Sélectionnez un mode de cuisson avant la programmation. FR AFFICHAGE Icône AUTO A U T O Programmation de la durée de cuisson •• •• Icône MINUTERIE M Bouton RÉDUCTION DE LA DURÉE Bouton AUGMENTATION DE LA DURÉE Bouton MODE Réglage de l’horloge ! ! L’horloge peut être réglée lorsque le four est éteint ou quand il est allumé, à condition que le délai d’un cycle de cuisson n’ait pas déjà été programmé.
Nettoyage et entretien FR Mise hors tension Entretien robinets gaz Avant toute opération de nettoyage ou d’entretien coupez l’alimentation électrique de l’appareil. Il peut arriver qu’au bout d’un certain temps, un robinet se bloque ou tourne difficilement. Il faut alors le remplacer. Cette opération doit être effectuée par un technicien agréé par le fabricant. Nettoyage de l’appareil Ne nettojez jamais l’appareil avec des nettoyeurs vapeur ou haute pression.
FR Démontage et remontage de la porte du four : ATTENTION! Four ne doit pas être utilisé avec intérieure verre de portière enlevé! 1. Ouvrir la porte 2. Faire pivoter à l'arrière les crochets des charnières de la porte du four (voir photo) ATTENTION! Lors du remontage de la porte intérieure verre insérer le panneau de verre correctement, de sorte que le texte écrit sur le panneau n’est pas inversée et peuvent être facilement lisibles. 7.
FR Cette méthode de nettoyage est recommandée surtout après la cuisson de la viande très grasse (rôtie). En effet, elle facilite le retrait de la saleté des parois du four. Durant ce processus, la vapeur est produite à l’intérieur de la cavité du four, ce qui facilite le nettoyage. ! Important ! Avant de commencer le nettoyage à la vapeur : - Retirez les résidus alimentaires et la graisse accumulés dans la partie inférieure du four. - Retirez les accessoires du four (grilles et lèchefrites).
14 NL UA 7 1 2 3 8 9 10 11 12 13 4 5 6 6 Aanzichttekening Aanzichttekening 1. Gasbrander 2. Rooster van het fornuis 3. Bedieningspaneel 4. Ovenrek 5. Lekplaat of bakplaat 6. Stelschroeven 7.Plaat voor opvangen van overkooksel 8.Geleidersvan de roosters 9.stand 5 10.stand 4 11. stand 3 12. stand 2 13. stand 1 14.Glazen deksal (Slechts op enkele modellen aanwezig) 4 3 M 1 2 5 NL Aanzichttekening Bedieningspaneel 2 3.
Installatie Ventilatie van de vertrekken Afvoer van de verbrandingsgassen Dit apparaat mag uitsluitend worden geïnstalleerd in permanent geventileerde ruimten, overeenkomstig de geldende nationale voorschriften. In het vertrek waar het apparaat wordt geïnstalleerd moet zoveel lucht kunnen toestromen als nodig is voor de normale gasverbranding (de luchtcapaciteit mag niet minder zijn dan 2 m3/h per kW geïnstalleerd vermogen).
Plaatsen en waterpas zetten Het apparaat kan naast meubels worden geplaatst die niet hoger zijn dan het werkvlak. Controleer dat de wand die in contact komt met de achterkant van het apparaat van niet ontvlambaar materiaal is en bestand tegen hitte (T 90°C). 420 mm. Min. min. 650 mm. with hood min. 700 mm. without hood 420 mm. Min.
NL HEET OPPERVLAK Verbindingspunt Isolatiekraan Verbindingspunt Complete slang Isolatiekraan Complete slang Als u aan één of meer van deze voorwaarden niet kunt voldoen of als het fornuis wordt geïnstalleerd volgens de voorwaarden van klasse 2 - onderklasse 1 (apparaat gemonteerd tussen twee meubels), dient u een flexibele, stalen buis gebruiken (zie onder). Aansluiting met een flexibele roestvrije stalen buis aan een onafgebroken wand voorzien van aanhechtingen met schroefdraad.
Vervanging van de sproeiers op de brander met Drievoudige vlammenkroon 1. verwijder de roosters en branders van hun plaats. De brander bestaat uit twee afzonderlijke delen (zie afbeeldingen.); NL S R TC A ACMT 6332/IX/3 2. schroef de sproeiers los met een steeksleutel van 7 mm. Vervang de sproeiers met degene die geschikt zijn voor het nieuwe type gas (zie tabel 1). De twee sproeiers hebben dezelfde gaten. 3. zet de onderdelen weer op hun plaats door de handelingen omgekeerd uit te voeren t.o.v.
Starten en gebruik Gebruik van de kookplaat NL Aansteken van de branders Naast elke BRANDER knop wordt met een vol rondje aangegeven bij welke brander deze knop hoort. Om een brander van de kookplaat aan te steken: 1. houd een vlam of aansteker bij de brander; 2. druk en draai tegelijkertijd de BRANDER knop linksom tot aan het symbool van de grootste vlam . 3. regel de sterkte van de gewenste vlam, door de BRANDER knop linksom te draaien: op het minimum , op het maximum of op een tussenliggende stand.
Functie Functie Functie TRADITIONELE OVEN Zowel het bovenste als het onderste verwarmingselement schakelt in. Als u deze traditionele bereidingsmodus gebruikt, is het best slechts een rek te gebruiken. Indien meer dan een rek wordt gebruikt, wordt de warmte ongelijkmatig verdeeld. BAKKEN Het achterste verwarmingselement en de ventilator worden ingeschakeld en dit garandeert de distributie van de warmte op een delicate en gelijkmatige wijze in de hele oven.
NL WAARSCHUWING! De oven is voorzien van een stopsysteem om de rekken te verwijderen en te voorkomen dat ze uit de oven komen.(1) Zoals weergegeven in de tekening, om ze volledig te verwijderen, tilt u de rekken op, waarbij u ze vooraan vasthoudt en trek (2). Gelijktijdig koken op meerdere laden Als het nodig is twee rekken te gebruiken, kunt u de VENTILATOR ONDERSTEUNDE modus gebruiken aangezien dit is de enige bereidingsmodus geschikt voor dit type bereidingen.
Klok/Minuut timer bediening Bereidingen programmeren NL Een kookmodus moet geselecteerd worden voor de programmering kan worden uitgevoerd. KOOKPROCES pictogram - De bereidingstijd programmeren AUTO pictogram Timer pictogram TIJD VERMINDEREN knop MODUS toets TIJD VERHOGEN knop De klok instellen De klok kan ingesteld worden wanneer de oven uitgeschakeld is of wanneer ze ingeschakeld is, op voorwaarde dat de eindtijd van een kookcyclus niet vooraf geprogrammeerd is.
Over bereidingsadvies tabel NL Bereidingsmod i Traditioneel Bakken Modus Snelle bereiding Meervoudig koken PIZZAMODUS Grill Gratin Onderzijde Geventileerd Onderzijde Etenswaren Gewicht (in kg) Rekstand Voorverwarming duur (minuten) Aanbevolen temperatuur Bereidingstijd (minuten) 1 1 1 1 3 3 3 3 3 15 15 15 15 15 200 200 200 180 180 65-75 70-75 70-80 15-20 30-35 Taartjes Fruittaarten Pruimentaart Biscuit Gevulde pannenkoeken (op 2 rekken) Kleine cakes (op 2 rekken) Kaassoesjes (op 2 rekk
Onderhoud en verzorging • Bereid uw etenswaren in afgesloten potten of pannen met goed passende deksels en gebruik zo weinig mogelijk water. Koken zonder deksel zal het energieverbruik enorm verhogen • Gebruik enkel vlakke potten en pannen • Als u iets bereidt dat lang duurt, kunt u eventueel een snelkookpan gebruiken die twee maal sneller werkt en een derde van de energie bespaart. De elektrische stroom afsluiten Sluit altijd eerst de stroom af voordat u tot enige handeling overgaat.
NL Demonteren en weer monteren van de ovendeur 1. Open de deur 2. Laat de haken van de scharnieren van de ovendeur helemaal naar achter draaien (zie foto) WAARSCHUWING! De oven mag niet worden gebruikt als de glazen plaat aan de binnenzijde is verwijderd! WAARSCHUWING! Als u de glazen plaat aan de binnenzijde weer in elkaar zet, dient u het paneel goed op zijn plaats te schuiven zodat de waarschuwingstekst niet achterstevoren staat en goed te lezen is. 7.
14 1 2 7 3 8 9 10 11 12 13 6 4 5 6 DE Geräteansicht 1. Gasbrenner 2. Kochmuldenrost 3. Bedienfeld 4. Einschub BACKOFENROST 5. Einschub FETTPFANNE 6. Höhenverstellbarer Stellfuß 7. Kochfeld-Überlaufschutz 8. GLEITFÜHRUNGEN für die Einschübe 9 Einschubhöhe 5 10. Einschubhöhe 4 11. Einschubhöhe 3 12. Einschubhöhe 2 13. Einschubhöhe 1 14. Glasabdeckung * 4 3 M 1 2 5 DE Gerätebeschreibung Bedienfeld 1. AUSWAHLDREHSCHALTER 2. THERMOSTATSCHALTER 3.THERMOSTAT Anzeigelampe 4.
Installation DE Belüftung der Räume Abluftsystem Das Gerät darf nur in ständig belüfteten Räumen und in Übereinstimmung mit den geltenden Normvorschriften installiert werden. Dem Raum, in welchem das Gerät installiert wird, muss ebenso viel Luft zugeführt werden, wie zur ordnungsgemäßen Gasverbrennung erforderlich ist (das Luftvolumen darf 2 m3/h pro kW der installierten Leistung nicht unterschreiten).
HOOD 420 mm. Min. min. 650 mm. with hood min. 700 mm. without hood 420 mm. 600 mm. Min. Min. • Bringen Sie keine Vorhänge hinter dem Herd oder in einem Seitenabstand von weniger als 200 mm an. • Eventuelle Dunstabzugshauben sind gemäß den in den Bedienungsanleitungen der Dunstabzugshaube aufgeführten Anweisungen zu installieren.
Anpassung an verschiedene Gasarten DE HEISSE OBERFLÄCHE Anschlusspunkt Isolierhahn Schlauchbaugruppe Anschlusspunkt Isolierhahn Schlauchbaugruppe Das Gerät kann auf eine andere Gasart als die, für die es vorgesehen wurde, eingestellt werden (ersichtlich aus dem Eichungs-Etikett auf der Abdeckung).
DE Austausch der Dreikreis-Ringbrennerdüsen 1. Nehmen Sie die Topfaufsätze und heben Sie Brenner aus den Gehäusen. Die Brenner bestehen aus zwei separaten Teilen (siehe Abbildung) 2. Schrauben Sie die Düsen mit einem Steckschlüssel (7 mm) ab. Ersetzen Sie die Düsen mit Modellen, die für den Einsatz mit der neuen Gassorte konfiguriert sind (siehe Tabelle 1). Die beiden Düsen haben den gleichen Lochdurchmesser. 3.
Sicherheitskette DE Um ein Kippen des Geräts zu verhindern, beispielsweise durch ein Kind, das auf die geöffnete Ofentür klettert, MUSS die Sicherheitskette installiert werden! Der Herd ist mit einer Sicherheitskette ausgestattet, die mit einer Schraube (nicht mitgeliefert) an der hinter dem Herd liegenden Wand in der gleichen Höhe der Befestigung der Kette am Herd befestigt werden muss. Wählen Sie die für die Wand hinter dem Gerät passende Schraube und Schraubenverankerung aus.
Inbetriebsetzung und Gebrauch Gebrauch des Kochfeldes Zündung der Brenner Neben jedem BRENNER-Reglerknopf ist durch ein ausgefülltes Kreissymbol die zugehörige Gasflamme gekennzeichnet. Zum Zünden eines Kochfeld-Brenners verfahren Sie bitte wie folgt: 1. Führen Sie ein brennendes Streichholz oder einen Gasanzünder an den Brenner. 2. Drücken Sie den BRENNER-Reglerknopf nach innen und drehen Sie ihn gleichzeitig gegen den Uhrzeigersinn bis er auf dem Symbol der maximalen Flamme- steht. 3.
Function DE Function TRADITIONELE OVEN BAK SNELLE BEREIDING MULTI-BEREIDING PIZZA GRILL GRATIN ONTDOOI ONDERSTE Function Zowel het bovenste als het onderste verwarmingselement schakelt in. Als u deze traditionele bereidingsmodus gebruikt, is het best slechts een rek te gebruiken. Indien meer dan een rek wordt gebruikt, wordt de warmte ongelijkmatig verdeeld.
Praktische Back-/Brathinweise DE Verwenden Sie beim Heißluftgaren nicht die Einschubhöhen 1 und 5: Sie sind zu direkt der Heißluft ausgesetzt, wodurch empfindliche Gerichte leicht verbrennen könnten. Setzen Sie beim Garen mit den Programmen GRILL und Überbacken/Bräunen die Fettpfanne zum Auffangen von abtropfendem Fett oder Fleischsaft auf Einschubhöhe 1 ein. Echte Heißluft Verwenden Sie die Einschubhöhen 2 und 4, wobei die 2. Ebene für die Speisen verwendet werden sollte, die mehr Hitze verlangen.
Bedienung der Uhr/Minutenzeitschalter Programmierte Zubereitung GARVORGANG Icon DE ANZEIGE AUTO Icon Zeitschalter-Icon GARZEIT VERRINGERN Taste GARZEIT VERLÄNGERN Taste MODU S Taste Einstellung der Uhr Die Uhr kann bei ausgeschaltetem oder auch eingeschaltetem Backofen eingestellt werden, sofern die Endzeit für einen Garzyklus nicht zuvor programmiert worden ist.
Tipps zur Benutzung des Ofens Kochmodi Speisen Ente Traditioneller Gebratenes Kalb- oder Rindfleisch Gebratenes Schweinefleisch Ofen Plätzchen Böden Böden Obstkuchen Pflaumenkuchen Biskuit Boden Backmodus Gefüllte Pfannkuchen (auf 2 Blechen) Kleine Kuchen (auf 2 Blechen) Kleine Kuchen (auf 2 Blechen) Kleine Kuchen (auf 3 Blechen) Plätzchen (auf 3 Blechen) Baiser (auf 3 Blechen) Schnellkochen Umluft Pizza Modus Grill Gratin Boden Umluft Boden Gefrorene Lebensmittel Pizza Zucchini und Garnelenpaste
Reinigung und Pflege Abschalten des Gerätes vom Stromnetz DE Vor jeder Reinigung und Pflege ist das Gerät vom Stromnetz zu trennen. Reinigung des Gerätes Verwenden Sie zur Reinigung keinen Dampfstrahler. • Die emaillierten oder aus Edelstahl gefertigten Außenteile des Gerätes sowie die Gummidichtungen können mit einem mit lauwarmem Wasser und einem neutralen Reinigungsmittel getränkten Schwamm gereinigt werden. Sollten die Flecken nur schwer zu entfernen sein, verwenden Sie spezielle Reinigungsmittel.
Bitte halten Sie folgende Informationen bereit: • Art des aufgetretenen Problems • Gerätemodell (Mod.). • Die Seriennummer (S/N). Die letzten beiden Angaben finden Sie auf deme auf dem Gerät befindlichen Typenschild. Aus- und Einbau der Ofentür: 1.Öffnen Sie die Tür 2.
Whirlpool EMEA S.p.A. Via Carlo Pisacane n.1 20016 Pero (MI), Italy VAT number: IT00693740425 www.whirlpool.com 02/2016-19514095801 XEROX FABRIANO Diese Reinigungsmethode ist insbesondere nach dem Kochen sehr fettigen (gebratenem) Fleisch empfehlenswert. DE Diese Reinigungsmethode erleichtert die Entfernung von Schmutz von den Ofenwänden, indem Dampf innerhalb der Ofenkammer zur leichteren Reinigung erzeugt wird.