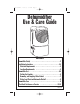
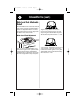
187730ENv10 12/3/03 1:11 PM Page 1 Dehumidifier Use & Care Guide Contents Dehumidifier Safety . . . . . . . . . . . . . . . . . . . . . . . . . . . . . . . . . .2 Installation Instructions . . . . . . . . . . . . . . . . . . . . . . . . . . . . . .3-4 Electrical Requirements . . . . . . . . . . . . . . . . . . . . . . . . . . . . .3 Location Requirements . . . . . . . . . . . . . . . . . . . . . . . . . . . . .4 Dehumidifier Use . . . . . . . . . . . . . . . . . . . . . . . . . . . . . . . . . . .
1187730ENv10 12/3/03 1:11 PM Page 2 2 Dehumidifier Safety Your safety and the safety of others are very important. We have provided many important safety messages in this manual and on your appliance. Always read and obey all safety messages. This is the safety alert symbol. This symbol alerts you to potential hazards that can kill or hurt you and others. All safety messages will follow the safety alert symbol and either the word “DANGER” or ‘“WARNING.
1187730ENv10 12/3/03 1:11 PM Page 3 Installation Instructions Electrical Requirements WARNING 3 Grounding instructions 3 prong ground-type outlet 3 prong ground plug Electrical Shock Hazard Plug into a grounded 3 prong outlet. Do not remove ground prong. Do not use an adapter. Do not use an extension cord. Failure to follow these instructions can result in death, fire, or electrical shock. A 115-volt (103.5 min., 126.5 max.
1187730ENv10 12/3/03 1:11 PM Page 4 4 Installation Dehumidifier Instructions Safety(cont.) Location Requirements Good air circulation is needed for best performance - allow at least 12-18 in. (30.5 45.7 cm) of air space on all sides of the dehumidifier. Keep all outside doors, windows and other openings closed when operating dehumidifier. Humid outdoor air will increase dehumidifier workload. 12-18" (30.5 - 45.7 cm) 12-18" (30.5 - 45.
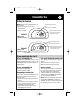
1187730ENv10 12/3/03 1:11 PM Page 5 Dehumidifier DehumidifierSafety Use 5 Setting the Controls NOTE: Before turning dehumidifier on, be sure that: • Bucket is properly inserted into dehumidifier • Bucket is empty indicates the bucket is full OR the bucket is not in position NO R M A L HIGH DRYE ST Control A EMPTY/ADJUST BUCKET adjusts humidity removal set point (amount of moisture removed from room) LOW OFF Minimum operating temperature is 65°F (18°C) CONTINUOUS DRYNESS CONTROL FAN SPEED ind
1187730ENv10 12/3/03 1:11 PM Page 6 Dehumidifier Use (cont.) 6 Setting the Controls indicates the bucket is full OR the bucket is not in position DRY AUTO DRY CONTINUOUS HIGH Control C Minimum operating temperature is 44°F (7°C) MOIST LOW ON / OFF EMPTY /ADJUST BUCKET MODE selects mode adjusts humidity removal set point (amount of moisture removed from room) If your control looks like C: To turn dehumidifier on Press the ON/OFF button.
1187730ENv10 12/3/03 1:12 PM Page 7 6 Dehumidifier Dehumidifier UseSafety (cont.) Removing & Emptying Water Bucket WARNING Sickness Hazard Do not drink water collected in water bucket. Doing so can result in sickness. 7 Drain hose connection method: (to drain water from bucket continuously) drain hose connector cover (not on all models) 1. If your dehumidifier does not have a drain hose connector cover, go to Step 2.
1187730ENv10 12/3/03 1:12 PM Page 8 8 Dehumidifier UseSafety (cont.) Dehumidifier Water Level Float & Automatic Shutoff All dehumidifiers have automatic shutoff and a water level float. All dehumidifiers feature an adjustable Water Level Float. The bucket must be properly aligned for the Water Level Float to work. Water Level Float Adjustment: You can set the adjustable Water Level Float at the “high” or “low” position. Both settings will turn off the dehumidifier automatically.
1187730ENv10 12/3/03 1:12 PM Page 9 Dehumidifier DehumidifierSafety Care 9 You may clean the exterior of your product: General cleaning and maintenance 1. Dust the front grille and side panels with a soft brush or the dusting attachment of your vacuum. 2. If cabinet paint chips, you can touch up the paint with a good grade enamel paint to prevent rust. 3. Have an authorized servicer clean and service the interior coils of your product annually.
1187730ENv10 12/3/03 1:12 PM Page 10 10 If You Need AssistanceSafety or Service… Dehumidifier If you need service or call with a question, have this information ready: Model number Serial number Purchase date Phone number Store Model and serial numbers are located on the wall behind the water bucket. 1. Before calling for assistance… 2. If you need assistance in the U.S.A.… Performance problems often result from little things you can find and repair yourself without tools of any kind.
87730ENv10 12/3/03 1:12 PM Page 11 If You NeedDehumidifier Assistance orSafety Service (cont.) 3. If you need assistance or service in Canada… Contact the dealer from whom you purchased your appliance, or call the Customer Interaction Center toll free, 8:00 a.m. - 6:00 p.m. (EST), at 1-800-461-5681. OR Contact your nearest direct service branch or authorized servicing outlet to service your appliance. (See list below.
1187730ENv10 12/3/03 1:12 PM Page 12 1187730 ©2003. All rights reserved. 11/03 Printed in U.S.A.
1187730SPv08 12/3/03 1:23 PM Page 1 Manual de uso y cuidado del deshumidificador Contenido Seguridad del deshumidificador . . . . . . . . . . . . . . . . . . . . . . . . . 2 Instrucciones de instalación . . . . . . . . . . . . . . . . . . . . . . . . . . 3-4 Requisitos eléctricos . . . . . . . . . . . . . . . . . . . . . . . . . . . . . . 3 Requisitos de ubicación . . . . . . . . . . . . . . . . . . . . . . . . . . . . 4 Cómo usar el deshumidificador . . . . . . . . . . . . . . . . . . . . . . . .
1187730SPv08 12/3/03 1:23 PM Page 2 2 Seguridad del deshumidificador Su seguridad y la seguridad de los demás es muy importante. Hemos incluido muchos mensajes importantes de seguridad en este manual y en su electrodoméstico. Lea y obedezca siempre todos los mensajes de seguridad. Este es el símbolo de advertencia de seguridad. Este símbolo le llama la atención sobre peligros potenciales que pueden ocasionar la muerte o una lesión a usted y a los demás.
1187730SPv08 12/3/03 1:23 PM Page 3 Instrucciones de instalación Requisitos eléctricos 3 Instrucciones de conexión a tierra: ADVERTENCIA Contacto de pared de conexión a tierra con tres terminales Enchufe tripolar con conexión a tierra Peligro de Choque Eléctrico Conecte a un contacto de pared de conexión a tierra de 3 terminales. No quite el terminal de conexión a tierra. No use un adaptador. No use un cable eléctrico de extensión.
1187730SPv08 12/3/03 1:23 PM Page 4 4 Instrucciones de instalación (cont.) Requisitos de ubicación Cuando esté usando el deshumidificador, mantenga cerradas todas las puertas y ventanas que dan al exterior, y otras aberturas. El aire húmedo del exterior aumentará la carga de trabajo del deshumidificador. Para mejor rendimiento, se necesita una buena circulación de aire - deje por lo menos de 12 a 18 pulg. (de 30,5 a 45,7 cm) de espacio para el aire alrededor del deshumidificador.
1187730SPv08 12/3/03 1:23 PM Page 5 Cómo usar el deshumidificador (cont.
1187730SPv08 12/3/03 1:23 PM Page 6 6 Cómo usar el deshumidificador (cont.
1187730SPv08 12/3/03 1:23 PM Page 7 Cómo usar el deshumidificador (cont.) Si usted ha seleccionado CONTINUOUS: Usted no puede seleccionar el nivel de humedad que desea quitar. En el modo continuo, el deshumidificador funcionará continuamente sin considerar el nivel de humedad. El deshumidificador se apagará solamente si el balde está lleno o se quitó. NOTA: El deshelador apagará el compresor si existe un estado de baja temperatura.
1187730SPv08 12/3/03 1:23 PM Page 8 8 Cómo usar el deshumidificador (cont.) Método de conexión de la manguera de desagüe: (para sacar agua del balde continuamente) tapa del conector de la manguera de desagüe (no en todos los modelos) 1. Si su deshumidificador no tiene una tapa del conector de la manguera de desagüe, vaya al paso 2. Si su deshumidificador tiene una tapa del conector de la manguera de desagüe, use un destornillador de hoja plana para quitar la tapa del conector de desagüe.
1187730SPv08 12/3/03 1:24 PM Page 9 Cómo usar el deshumidificador (cont.) La posición “Alta”: el Flotador de Nivel del Agua está preseleccionado en la posición de “alta”, al lado izquierdo de la abertura. El deshumidificador se apagará automáticamente cuando el balde esté 3 ⁄4 lleno. 9 La posición “Baja”: deslice el Flotador de Nivel del Agua a la posición de “baja”, al lado derecho de la abertura, para que el balde esté más liviano para transportarlo.
1187730SPv08 12/3/03 1:24 PM Page 10 10 Si necesita ayuda o servicio técnico… Si necesita servicio técnico o llamar para hacer alguna pregunta, tenga lista esta información: Número del modelo Número de serie Fecha de compra Número de teléfono Tienda El número del modelo y el número de serie están ubicados en la pared detrás del balde de agua. 1.
1187730SPv08 12/3/03 1:24 PM Page 11 Si necesita ayuda o servicio técnico (cont.) 3. Si necesita ayuda o servicio técnico en Canadá… Contacte al distribuidor que le vendió su aparato, o llame gratis al Centro de Interacción del cliente, de 8:00 a.m. a 6:00 p.m. (hora del este), al 1-800-461-5681. O Contacte a la sucursal de servicio directo o al centro de servicio autorizado más cercano para darle servicio técnico a su aparato. (Vea la lista abajo.
1187730SPv08 12/3/03 1:24 PM Page 12 1187730 ©2003. Todos los derechos reservados. 11/03 Impreso en los EE.UU.