INSTRUCTIONS FOR USE INSTALLATION ELECTRICAL CONNECTION CONNECTING TO THE GAS SUPPLY REFERENCE TO ITALIAN NATIONAL REGULATIONS BEFORE USING THE OVEN SAFEGUARDING THE ENVIRONMENT PRECAUTIONS AND GENERAL RECOMMENDATIONS OVEN ACCESSORIES COOKING TABLE CLEANING THE OVEN AND ACCESSORIES TROUBLESHOOTING GUIDE AFTER SALES SERVICE DECLARATION OF CONFORMITY CE 26
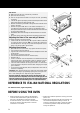
INSTALLATION Technical information for the installer • It is important that all installation procedures be performed by a qualified technician. • After unpacking the oven to connect it, rest it on its base without damaging it. • Do not attempt to lift the oven by the handle. Lift at the sides. • Handling the oven must be done by 2 people. • Check that the appliance has not been damaged in transit. • Oven dimensions and kitchen unit dimensions are shown in the figure below.
INSTALLATION Installation location In order for the gas unit to function properly it is essential that the air necessary for burning the gas flow into the area naturally (see Product Description Sheet). The installer must follow the safety rules for the country of installation. The flow of air into the area must come directly through openings made in the exterior walls. These openings must have a free passage section of at least 100 cm2 (one or more openings may be made).
CONNECTING TO THE GAS SUPPLY • The gas supply system must conform to current local law (see chapter, “References to National Regulations”). • The type of gas for which the oven has been adjusted is shown on the rating plate and on the packing. • Before making the connection, adjust the oven to the type of gas in the home. • The connection between the tapered gas connection and the pipe must be made in one of the following ways: 1.
Grill burner 1. Make sure that the oven is electrically connected. 2. Open the oven door fully. 3. Pull out the grill burner located in the top of the oven, proceeding as follows: • Unhook the ignition spark plug and the thermocouple bulb from the grill burner drawing off their securing clips. • Remove the fastening screw “B” on the grill burner and draw off the latter to the right.
SAFEGUARDING THE ENVIRONMENT 1. Packaging • The packaging material can be 100% recycled, as confirmed by the recycling symbol . 2. Electrical appliances • The appliances are built from recyclable or reusable materials. Disposal must be carried out in accordance with local environmental regulations for waste disposal. Before disposing of them make them unusable by cutting off the supply cable. PRECAUTIONS AND GENERAL RECOMMENDATIONS • This oven is designed solely for domestic use, for cooking food.
OVEN ACCESSORIES • Accessories supplied depend on the model (see. the “Product Description Sheet” supplied separately). Drip tray The drip tray is designed to collect fat and food particles when it is positioned under the grid or as a plate, such as when cooking meat, chicken and fish with or without vegetables. Pour water in the drip tray to cover the bottom to reduce smoke and fat spatters. Wire shelf It can be used to cook food or as a support for baking trays, cake tins and other cooking receptacles.
COOKING TABLE Oven functions depend on the model: refer to the separate Product Description Sheet. Type of Food Temp. °C Runners (starting from the bottom) Desserts Approximate cooking time Recommended Raising cakes (sponges) 175 3 35-45 Cheese-cake 190 3 35-45 Fruit pie 190 3 35-45 Pies 190 3 40-45 Pie crust (shortcrust) 190 3 8-10 Bread (1 kg.
Fish Trout 200 3 40-50 Grey mullet 200 3 40-50 Pizza 230 3 10-20 Porkchops 4 8-10 Sausages 4 10-12 Spicy chicken 3 35-45 Grill Veal roast on the spit 50-60 Chicken on the spit 60-70 N.B.: - Preheat the oven at the maximum temperature setting for 15 minutes. When it is time to put the food inside, turn the thermostat to the desired temperature. - When using the “Grill” function, we recommend turning meat several times during the cooking.
CLEANING THE OVEN AND ACCESSORIES • After every use, let the oven cool down sufficiently then clean it to prevent the build-up of baked-on food residues. • If the dirt is tough, use a specific oven cleaning product following the instructions on the packaging. • Clean the exterior of the oven with a damp sponge and warm water. • Do not use abrasive cleaners, pan scourers, electric steam cleaners or inflammable products. • Clean the glass of the oven door with a suitable liquid detergent.
TROUBLESHOOTING GUIDE The burner does not light • Is the gas supply tap open? • Is there an interruption in the supply of gas? • Is the cylinder empty? • Are the burner openings obstructed? The burner does not remain lit: • Light it again with the knob turned to the symbol representing the maximum temperature. Electric ignition is not working: • Is there a power failure? AFTER SALES SERVICE Before contacting After Sales Service: 1. Try to solve the problem yourself (see “Troubleshooting Guide”). 2.